Stone Veneer on Concrete Wall Detail: Troubleshooting Failures
Diagnose and repair common stone veneer on concrete wall detail failures, including efflorescence, moisture intrusion, and flashing defects.

Why Concrete Substrates Sabotage Stone Veneer Details
Applying adhered manufactured or natural stone veneer over poured concrete or concrete masonry units (CMU) presents unique hygrothermal challenges. Unlike wood-framed walls with built-in drainage cavities, concrete is a highly alkaline (pH 12-13), capillary-active mass that stores and transmits significant moisture. When the stone veneer on concrete wall detail is executed without a continuous drainage plane, proper weep mechanisms, and alkali-resistant barriers, the system inevitably fails. Hydrostatic pressure pushes moisture through the concrete, dissolving calcium hydroxide and depositing it in the mortar joints, while freeze-thaw cycles cause the veneer to spall and delaminate.
Symptom-to-Cause Diagnostic Matrix
Before initiating repairs, accurately map the visible symptom to the underlying detailing failure. Use this diagnostic framework to isolate the exact point of compromise in the wall assembly.
| Visible Symptom | Root Cause in Concrete Detail | Required Repair Action |
|---|---|---|
| White, powdery crust on mortar joints (Efflorescence) | Missing WRB; concrete leaching calcium hydroxide into the setting bed. | Acid wash, apply penetrating silane sealer, repoint with Type S mortar. |
| Bottom course of stone detaching or rotting | Weep screed buried in soil or missing; capillary draw from grade. | Remove bottom 12 inches, install weep vent, flash with fluid-applied membrane. |
| Water staining on interior drywall near windows | Concrete window buck lacks sloped sill pan; water tracks behind veneer. | Remove perimeter stone, install flexible sill pan flashing, integrate with WRB. |
| Vertical cracking through stone faces | Veneer bridging a concrete control joint; substrate movement transfers to stone. | Grind out crack, install soft sealant joint matching the substrate control joint. |
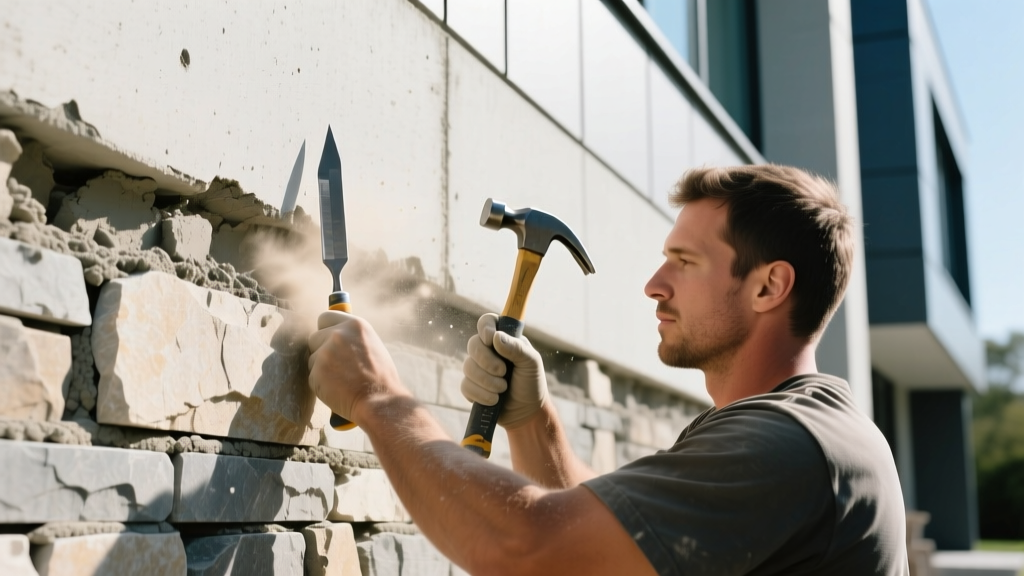
Repairing the Base Flashing and Weep Screed Detail
The most frequent and destructive failure in concrete wall detailing occurs at the base intersection. Concrete foundations act as massive wicks. If the weep screed is omitted, or if the stone veneer is carried all the way to the soil grade, trapped moisture will destroy the lower mortar bed within 2 to 3 years.
Step 1: Demolition and Substrate Prep
Use a masonry chisel and rotary hammer to carefully remove the bottom 12 to 16 inches of the stone veneer and the underlying scratch coat down to the bare concrete. Clean the concrete surface with a wire wheel to remove all mortar residue, efflorescence, and form-release oils. The substrate must be structurally sound and free of dust.
Step 2: Fluid-Applied Air and Water Barrier
Roll or trowel a fluid-applied membrane directly onto the exposed concrete. Products like Prosoco R-Guard FastFlash or Henry Blueskin VP100 are ideal because they bridge micro-cracks in the concrete and resist the high alkalinity of the substrate. Extend the coating at least 6 inches up the wall and overlap it onto the existing WRB above.
Step 3: Weep Screed and Drainage Mat Installation
Install a corrugated weep screed, such as the Mortar Net WeepVent, at the base of the wall. The screed must maintain a minimum 4-inch clearance above the soil grade and 2 inches above any paved surfaces. Fasten the weep screed directly into the concrete using Tapcon masonry screws spaced every 12 inches. Over the fluid-applied barrier, install a dimpled drainage mat (e.g., MortarNet lath) to create a 1/4-inch air gap, allowing incidental water to drain freely out of the weep holes.
Step 4: Lath, Scratch Coat, and Stone Replacement
Install 2.5 lb self-furring galvanized metal lath over the drainage mat. Apply a 1/2-inch scratch coat of Type S masonry mortar, scoring it horizontally with a rake to provide a mechanical key. Allow the scratch coat to cure for 48 hours before reinstalling the stone veneer, ensuring the new stones do not rest directly on the weep screed flange.
Fixing Efflorescence and Alkali Burn on Mortar Joints
When water migrates through unsealed concrete, it carries soluble salts to the surface of the stone veneer mortar joints. This results in severe efflorescence that eventually causes the mortar to lose cohesion and crumble. According to Building Science Corporation, managing the bulk water and providing a drainage plane is the only permanent cure; surface treatments alone will fail if the hydrostatic drive remains.
The Chemical Cleaning and Repointing Protocol
- Dry Brush: Remove loose, powdery efflorescence with a stiff, non-metallic bristle brush. Do not use water at this stage, as it will drive salts back into the pores.
- Acid Wash: Apply a diluted solution of muriatic acid (1 part acid to 10 parts water) or a proprietary masonry cleaner like Prosoco Sure Klean VanaTrol. Agitate lightly and rinse thoroughly with low-pressure water. Allow the wall to dry completely for 72 hours.
- Repointing: Rake out any crumbling mortar joints to a depth of 3/4 inch. Repoint using a high-quality, polymer-modified Type S veneer mortar (e.g., SPEC MIX Veneer Stone Mortar). Type S provides the necessary compressive strength (1,800 psi) to resist the expansive forces of minor salt crystallization.
- Sealing: Once the new mortar has cured for 28 days, apply a breathable, silane-based penetrating sealer to the mortar joints only. Avoid sealing the stone faces, as this can trap moisture inside the assembly and cause spalling during freeze-thaw cycles.
Addressing Concrete Control Joint Bridging
Poured concrete and CMU walls require control joints to accommodate thermal expansion and shrinkage. A critical error in the stone veneer on concrete wall detail occurs when masons lay stone and mortar continuously across these joints. When the concrete substrate shifts, the rigid stone veneer cracks vertically.
The Repair: You must recreate the control joint in the veneer. Use a diamond-tipped angle grinder to cut a straight, 3/8-inch wide vertical joint through the stone and mortar, perfectly aligned with the substrate's control joint below. Clean the kerf with compressed air, insert a closed-cell backer rod, and fill the joint with a high-movement, color-matched polyurethane sealant (such as Tremco Dymonic 100). This decouples the veneer from the substrate's movement.
Repair Cost and Time Estimates
Budgeting for veneer repairs requires understanding the linear and square-foot costs associated with concrete substrate preparation. The following estimates reflect current market rates for professional masonry restoration.
- Base Flashing & Weep Screed Replacement: $45 to $85 per linear foot. This includes demolition of the bottom course, concrete prep, fluid-applied WRB, and new stone installation.
- Efflorescence Cleaning & Repointing: $12 to $18 per square foot. Acid washing and hand-tooling mortar joints is highly labor-intensive.
- Control Joint Retrofitting: $25 to $40 per linear foot for saw-cutting, backer rod installation, and sealant application.
- Window Buck Sill Pan Flashing Repair: $300 to $600 per window opening, depending on the size of the buck and the complexity of the surrounding stone removal.
Written by
Priya KapoorPriya Kapoor is a real estate market analyst and construction economics researcher with expertise in housing affordability, development feasibility, and infrastructure investment. She holds a Master of Regional Planning from Cornell University and previously worked as a senior analyst at CBRE's Investment Properties group, where she modeled returns for $4B in mixed-use development pipelines. Priya now runs an independent research practice advising developers, municipalities, and REITs on construction cost forecasting and market timing. She publishes the quarterly "BuildMat Market Pulse" report tracking material price indices across 12 commodity categories. Based in Austin, TX, Priya serves on the board of Habitat for Humanity Austin and is a marathon runner.
More from Priya Kapoor
View all
Construction Cost
Cost to Build a 1600 Sq Ft Home in 2026: Full Breakdown
Accurate 2026 cost to build a 1600 sq ft home—material, labor, and regional pricing breakdowns included. Plan your budget with real-time estimates.
Aug 11, 2026

Wood & Lumber
Name the Types of Wood for Pressure Treatment and Preservation
Learn how to name the types of wood best suited for pressure treatment. Compare species treatability, chemical retention levels, and 2026 preservation costs.
Aug 4, 2026

Stone & Masonry
Stone Veneer Suppliers Lindenhurst: 2026 Cost Analysis
Analyze 2026 stone veneer costs in Lindenhurst, NY. Compare local supplier pricing, delivery fees, and Suffolk County installation labor rates.
Aug 4, 2026