Site Setup and Assembly Guide for Different Types of Concrete Mixer
Learn how to assemble, calibrate, and deploy different types of concrete mixer on-site. Includes pan clearance specs, power requirements, and test batching.

Deploying the correct mixing equipment and calibrating it to precise tolerances is the foundational step in ensuring structural concrete integrity. Selecting from the various types of concrete mixer requires more than matching drum volume to yardage; it demands rigorous on-site assembly, electrical integration, and mechanical calibration. A poorly set up mixer leads to aggregate segregation, inconsistent slump, and premature equipment failure. This guide details the exact site preparation, assembly protocols, and calibration procedures required for the most common mixer configurations used in modern construction.
Project Scale to Mixer Selection Matrix
Before unloading equipment, verify that the selected mixer aligns with your batch volume, site constraints, and power availability. Use this decision matrix to confirm your deployment strategy.
| Mixer Type | Typical Capacity | Power Requirement | Ideal Application | Avg. Setup Time |
|---|---|---|---|---|
| Portable Tilting Drum | 6 to 9 cu. ft. | 120V/240V Single-Phase (1-2 HP) | Small footings, residential flatwork, masonry mortar | 45 Minutes |
| Stationary Pan Mixer | 1 to 2 cu. yd. | 480V Three-Phase (15-25 HP) | Precast yards, high-strength architectural panels, SCC | 4 to 6 Hours |
| Twin-Shaft Continuous | 2 to 5 cu. yd. per min | Diesel / 480V Three-Phase (50+ HP) | RCC (Roller Compacted Concrete), mass pours, dams | 1 to 2 Days |
| Truck-Mounted Volumetric | 8 to 12 cu. yd. payload | Truck PTO / Hydraulic System | Remote sites, multi-slump daily pours, shotcrete prep | 2 Hours (Calibration) |
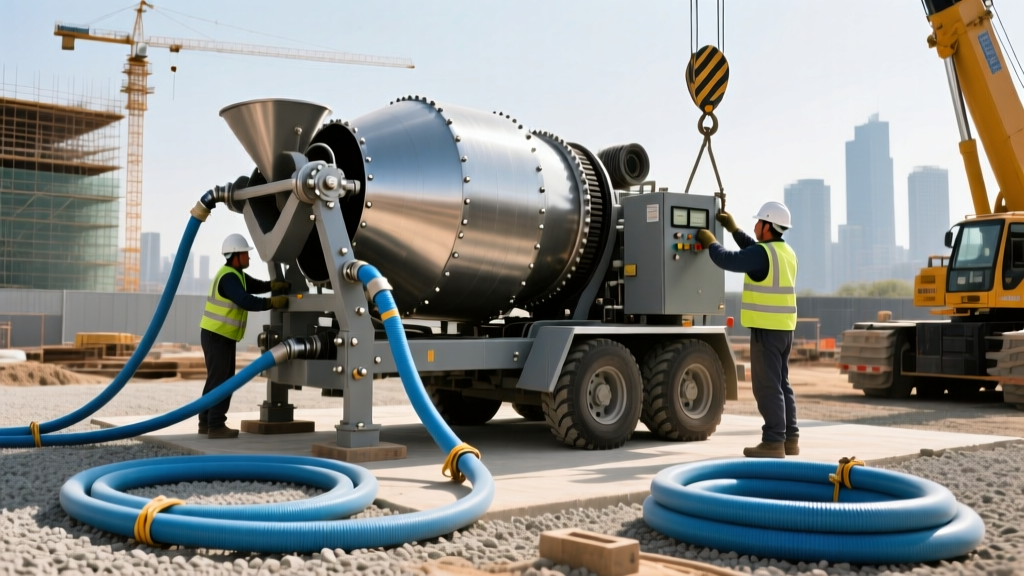
Pre-Installation Site Requirements
Equipment failure frequently originates from inadequate site preparation. Address these three critical infrastructure elements before assembly begins:
- Ground Bearing Capacity: Stationary pan mixers and volumetric trucks exert massive point loads. Ensure the setup pad is compacted aggregate or reinforced concrete with a minimum bearing capacity of 3,000 psf. Use steel crane mats under outriggers for truck-mounted volumetric units operating on soft subgrades.
- Electrical Infrastructure: High-shear pan mixers require dedicated 480V, 3-phase power with a minimum 60-amp service. Install a NEMA 3R rated disconnect switch within 10 feet of the mixer. All 120V portable drum mixers must be connected to a GFCI-protected circuit to prevent electrocution in wet batch environments.
- Water Supply and Metering: Municipal hose pressure fluctuates between 40 and 80 PSI. Install a pressure-reducing valve (PRV) and an inline digital water meter calibrated to 0.1-gallon increments to ensure exact water-to-cement (w/c) ratio compliance.
Type-Specific Assembly and Calibration Protocols
Tilting Drum Mixers (Batch Processing)
Portable drum mixers rely on belt-driven rotation and gravity for material discharge. Improper belt tension is the leading cause of motor burnout.
- Chassis Leveling: Deploy the axle stands and use a torpedo level on the drum trunnion ring. An unlevel chassis causes uneven wear on the polyurethane drum rollers.
- Belt Tensioning: Adjust the motor mount bolts until the V-belt exhibits exactly 1/2 inch of deflection at mid-span under moderate thumb pressure (approx. 10 lbs of force). Overtightening destroys the motor bearings; undertightening causes belt slip and batch stalling.
- Tilt Mechanism: Grease the tilt-pin gears with NLGI #2 lithium-complex grease. Verify that the locking pawl engages fully into the rack gear at both the mixing (horizontal) and discharge (45-degree) angles.
High-Shear Pan Mixers
Pan mixers utilize forced-action mixing blades and are mandatory for low-slump, high-performance, or self-consolidating concrete (SCC). The critical setup parameter is blade-to-pan clearance.
- Scraper Arm Adjustment: The outer scraper arms must be set exactly 3mm to 5mm from the pan wall. If the gap exceeds 5mm, a 'dead zone' of unmixed material forms. If it is less than 3mm, the arms will crush coarse aggregate against the steel liner, altering the mix design.
- Mixing Blade Pitch: Verify the mixing blade pitch angle (typically 45 degrees for standard mixes, adjustable to 30 degrees for highly viscous SCC). Tighten the retaining bolts to the OEM-specified torque, usually 120 ft-lbs, and apply medium-strength threadlocker (e.g., Loctite 243).
- Discharge Gate Seal: Close the hydraulic or manual bottom discharge gate and perform a dry water test. Adjust the rubber gasket compression until zero weeping occurs under 50 PSI of static water pressure.
Before entering a pan mixer to adjust blade clearances, you must disconnect the main power source and apply a physical lockout/tagout (LOTO) device. Pan mixers possess high-torque motors that can engage via automated timers or remote relays, posing a fatal entanglement hazard.
Truck-Mounted Volumetric Mixers
Volumetric mixers proportion materials by volume rather than weight, making gate calibration the most vital installation step.
- PTO and Driveline Alignment: Connect the Power Take-Off (PTO) shaft to the truck transmission. Ensure the operating angle of the universal joints does not exceed 3 degrees to prevent catastrophic driveline vibration at highway speeds.
- Conveyor Tracking: Run the main aggregate conveyor belt empty for 5 minutes. Adjust the tail pulley tensioning bolts in 1/4-turn increments until the belt tracks perfectly centered on the idlers.
- Gate Calibration: Use a 1-cubic-foot calibration box. Open the sand gate to the 'Type 1' setting, run the belt for exactly 10 seconds, and weigh the captured material. Adjust the hydraulic gate cylinder limit switches until the output perfectly matches the batch ticket's volumetric yield requirements.
First-Batch Calibration and ASTM C94 Compliance
According to standards outlined by the Portland Cement Association, mixing efficiency is dictated by the sequence of material introduction and total drum revolutions. For your test batch, adhere to the following protocol to verify equipment readiness:
- Charging Sequence: Introduce 75% of the required water and coarse aggregate first. This coats the aggregate and prevents cement balling. Follow with the sand and cement, then introduce the remaining water and liquid admixtures.
- Revolution Count: ASTM C94 specifies that mixing begins only after all solid materials are in the drum. For standard tilting drum mixers, run the drum at the manufacturer's designated RPM (usually 14-18 RPM) for a minimum of 70 revolutions, but never exceed 300 revolutions, which causes slump loss and aggregate degradation.
- Slump Verification: Discharge the test batch and perform an ASTM C143 slump cone test. If the slump deviates by more than 1 inch from the target, recalibrate the inline water meter and check the aggregate stockpiles for unaccounted surface moisture.
Operational Troubleshooting and Failure Modes
Even with meticulous assembly, operational variables can disrupt the batching process. Use this diagnostic framework to resolve common on-site mixing anomalies.
| Symptom | Root Cause | Corrective Action |
|---|---|---|
| Cement 'balling' or dry clumps in discharge | Water introduced too late; insufficient shear force. | Change charging sequence to introduce 75% of water before cement. Increase pan mixer RPM by 10% if applicable. |
| Motor bogs down or stalls mid-batch | Belt slip (drum) or overloaded pan (high-slump error). | Re-tension V-belt to 1/2' deflection. For pan mixers, reduce batch size by 15% or check for seized scraper arm bearings. |
| Aggregate segregation in volumetric output | Conveyor belt speed too high; improper auger pitch. | Reduce conveyor hydraulic flow rate. Ensure the mixing auger flighting is not worn past the 1/4-inch thickness limit. |
| Discharge gate weeping (Pan Mixer) | Aggregate trapped in seal; worn polyurethane gasket. | Flush gate with high-pressure water. Replace gasket if compression set exceeds 20% of original thickness. |
Proper installation and calibration of your mixing equipment directly dictates the compressive strength and durability of the final cured product. Always cross-reference your specific equipment OEM manual with local OSHA concrete and masonry safety regulations to ensure full compliance regarding machine guarding, electrical clearances, and silica dust mitigation during dry-cement charging.
Written by
James ThorntonJames Thornton is a construction industry veteran with 25 years of hands-on experience in wood framing, lumber grading, and residential building codes. He started as a framing carpenter in rural Oregon, earned his ICC Residential Building Inspector certification, and eventually became a senior plan reviewer for the City of Portland Bureau of Development Services. James holds a B.S. in Wood Science & Technology from Oregon State University and is a certified lumber grader through the West Coast Lumber Inspection Bureau (WCLIB). He has inspected over 3,000 residential construction sites and authored the city's internal guide on advanced framing techniques (2x6 at 24" O.C.). James lives in Bend, OR, where he builds custom timber-frame cabins and competes in lumberjack sports.
More from James Thornton
View all
Insulation
Best Home Insulation Materials: Complete 2026 Guide
Compare top home insulation materials for 2026. Find R-values, installed costs per square foot, and best uses for fiberglass, spray foam, and mineral wool.
Aug 4, 2026

Sustainable Building
Certify Your Green Building Material for LEED and WELL
Step-by-step guide to certifying a green building material for LEED v5 and WELL v2. Master EPDs, HPDs, and VOC limits for 2026 project specifications.
Aug 4, 2026

Stone & Masonry
Veneer Stacked Stone Panels: Interior Design & Style Showcase
Discover how veneer stacked stone panels transform interiors. Explore modern design profiles, material pairings, and technical installation specs.
Aug 4, 2026