Stone Veneer for Concrete Steps: Application & Design Showcase
Discover how to transform plain stairways with stone veneer for concrete steps. Explore design ideas, material costs, and critical installation techniques.

The Golden Rule of Step Veneering: Risers vs. Treads
Applying stone veneer for concrete steps is a high-impact architectural upgrade that transforms utilitarian slabs into premium exterior features. However, the most common failure mode in residential and commercial step veneering stems from a fundamental misunderstanding of load dynamics. Stone veneer—whether manufactured (MSV) or natural thin veneer (NTV)—is strictly a cladding material. It lacks the compressive strength and abrasion resistance required for horizontal foot traffic.
Therefore, the golden rule of step veneering is absolute: veneer is applied only to the vertical risers and the side cheeks. The horizontal treads must be finished with full-thickness dimensional stone (such as 1.25-inch bluestone or granite), stamped concrete, or a broom-finished cast-in-place surface. Attempting to adhere thin veneer to horizontal treads guarantees delamination, edge chipping, and water infiltration within a single freeze-thaw cycle.
⚠️ Critical Warning: Horizontal Application Failures
Never install standard stone veneer on horizontal step treads. Pooling water will migrate behind the veneer face. When temperatures drop, the trapped moisture expands, causing the veneer to spall or pop off entirely. Always utilize structural capstones or dimensional stone slabs for treads, ensuring a minimum 1-inch overhang past the riser veneer face.
Material Selection Matrix for Step Risers
Selecting the appropriate cladding for the vertical risers dictates both the aesthetic outcome and the long-term durability of the staircase. Below is a technical comparison of the three primary veneer categories used in modern exterior stair applications.
| Material Type | Weight (psf) | 2026 Cost (Mat Only) | Freeze-Thaw Rating | Best Application Profile |
|---|---|---|---|---|
| Manufactured Stone (MSV) | 10 - 12 lbs | $8.50 - $13.00 | Excellent (ASTM C1780) | Modern ledgestone, tight-stack profiles |
| Natural Thin Veneer (NTV) | 13 - 15 lbs | $15.00 - $24.00 | Variable (Depends on quarry) | Rustic fieldstone, traditional ashlar |
| Cast Stone Veneer | 14 - 18 lbs | $11.00 - $16.00 | Good (Requires sealer) | Mediterranean, classical estate |
Application Showcase: Three Design Profiles
To illustrate the versatility of stone veneer for concrete steps, we examine three distinct architectural applications, highlighting the specific material pairings and structural detailing required for each.
Profile 1: The Modern Minimalist
The Vision: Clean lines, monochromatic palettes, and seamless integration with contemporary landscaping.
- Riser Veneer: Black or charcoal-colored manufactured ledgestone (e.g., Eldorado Stone's 'Shadow' profile), installed in a dry-stack (mortarless) appearance.
- Tread Material: Poured concrete with a hard-trowel finish and a subtle exposed aggregate border.
- Technical Detail: The riser veneer is brought up precisely 1/4-inch below the tread nosing, creating a shadow line that emphasizes the floating nature of the concrete treads. Stainless steel cable railings are core-drilled directly into the concrete treads, bypassing the veneer entirely to prevent lateral load stress on the cladding.
Profile 2: The Rustic Craftsman
The Vision: Organic textures, warm earth tones, and heavy, tactile materials that blend into wooded environments.
- Riser Veneer: Natural thin veneer (NTV) fieldstone, featuring rounded, mossy, and weathered faces in browns and grays.
- Tread Material: Full-thickness (1.5-inch) bluestone slabs with a thermal (flamed) finish for maximum slip resistance.
- Technical Detail: A 2-inch bullnose bluestone cap overhangs the NTV riser. A 3/8-inch kerf cut (drip groove) is routed into the underside of the bluestone overhang to force water to drop clear of the veneer face, preventing mineral staining and efflorescence on the porous natural stone.
Profile 3: The Mediterranean Estate
The Vision: Grand, sweeping staircases with classical proportions and sun-baked aesthetics.
- Riser Veneer: Cream and tan cast stone ashlar blocks with a tumbled, antiqued edge.
- Tread Material: Limestone slabs with a honed finish, or heavily textured stamped concrete mimicking travertine.
- Technical Detail: Because cast stone is highly porous, the risers are treated with a breathable, silane-siloxane penetrating sealer post-installation. The mortar joints are struck with a convex 'grapevine' tooling profile to shed water efficiently, adhering to historical masonry practices.
Technical Installation Protocol
Executing a flawless application requires strict adherence to masonry and concrete preparation standards. The following protocol assumes a fully cured, structurally sound concrete step substrate.
Step 1: Substrate Profiling and Preparation
Concrete steps are often formed with release agents that leave a slick, impermeable surface. The concrete must be mechanically abraded to achieve a Concrete Surface Profile (CSP) of 3 to 5. According to the Portland Cement Association, proper surface preparation is critical for preventing moisture-related degradation and ensuring mechanical adhesion. Use a walk-behind scarifier or hand-held diamond cup grinder to open the pores of the concrete risers. Follow with a high-pressure wash and allow 24 hours for drying.
Step 2: Scratch Coat Application
While some polymer-modified thin-sets allow direct-to-concrete application, best practice for exterior, freeze-thaw environments dictates a traditional scratch coat. Apply a 3/8-inch layer of Type S masonry mortar to the vertical risers. Score the mortar horizontally with a notched trowel to create mechanical ridges. Allow this scratch coat to cure for a minimum of 48 hours, keeping it lightly misted to prevent rapid drying and shrinkage cracking.
Step 3: Mortar Selection and Veneer Setting
The Brick Industry Association Technical Notes 28 specifies that mortar for stone veneer must balance adhesion with flexibility. Use a Type N mortar mix (1 part Portland cement, 1 part lime, 6 parts sand) or a high-quality pre-blended polymer-modified veneer mortar. Butter the back of each veneer piece with a 1/2-inch layer of mortar, ensuring 100% coverage to eliminate hollow voids where water could pool and freeze. Press firmly into the scratch coat, maintaining consistent joint widths.
Step 4: Joint Tooling and Moisture Management
Proper joint finishing is not merely cosmetic; it is a primary moisture defense mechanism. As detailed by the National Park Service Preservation Brief 2, mortar joints should be tooled when 'thumbprint hard' using a concave or V-shaped jointer. This compresses the mortar against the stone edges, creating a dense, water-shedding seal. Rake out any excess mortar immediately; do not use acid washes on natural thin veneer, as it can etch the stone face and degrade the Portland cement matrix.
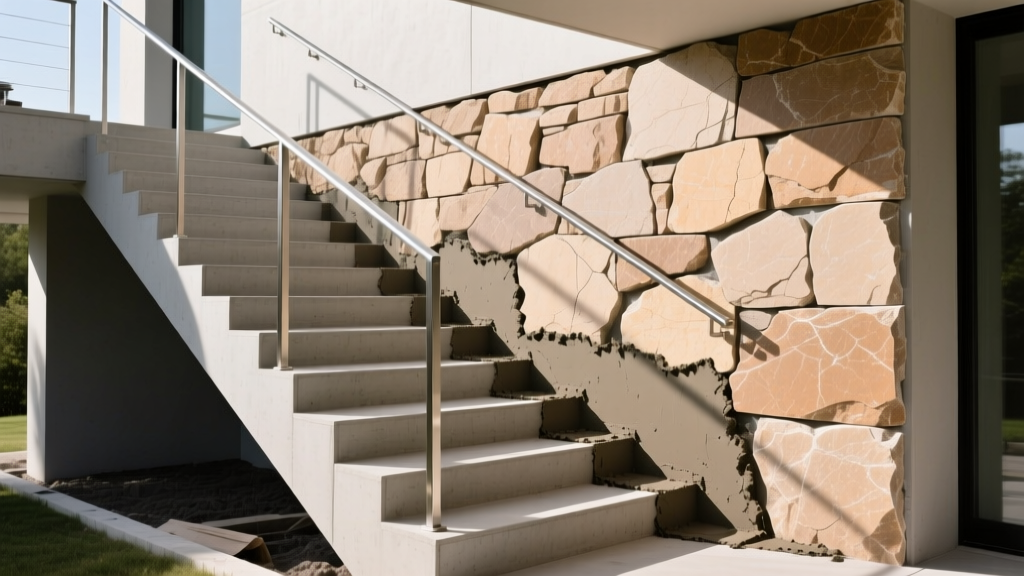
2026 Project Cost Breakdown
Budgeting for stone veneer on concrete steps requires calculating the square footage of the vertical risers and side cheeks, not the horizontal footprint. The following breakdown estimates costs for a standard 4-step staircase, 4 feet wide, featuring 7-inch risers and 11-inch treads (yielding approximately 24 square feet of veneer coverage area, plus waste factor).
| Cost Category | Manufactured Stone (MSV) | Natural Thin Veneer (NTV) |
|---|---|---|
| Veneer Material (incl. 10% waste) | $285 - $375 | $450 - $630 |
| Mortar, Lath, & Prep Supplies | $85 | $85 |
| Professional Masonry Labor | $600 - $850 | $750 - $1,100 |
| Total Estimated Project Cost | $970 - $1,310 | $1,285 - $1,815 |
By restricting the veneer strictly to the vertical planes and investing in high-quality dimensional stone for the treads, homeowners and contractors ensure that the staircase remains structurally resilient, visually striking, and entirely resistant to the destructive forces of pedestrian traffic and seasonal weather cycles.
Written by
Marcus ChenMarcus Chen is a licensed structural engineer (PE) and building materials analyst with over 12 years of experience across residential, commercial, and industrial construction. He holds a Master of Science in Civil Engineering from UC Berkeley and spent six years at Thornton Tomasetti before transitioning to independent consulting and technical writing. Marcus specializes in material selection for seismic-prone regions, concrete reinforcement strategies, and lifecycle cost analysis. His work has been cited by the American Concrete Institute (ACI) and the Structural Engineers Association of California (SEAOC). When he is not on a job site or at his desk, you will find him hiking the Sierra Nevada or restoring a 1920s craftsman bungalow in Oakland, CA.
More from Marcus Chen
View all
Construction Cost
How Much Did the Eiffel Tower Cost to Build?
How much did the Eiffel Tower cost to build in 1889? We adjust for inflation and compare its budget to modern skyscraper construction.
Aug 4, 2026

Fire Resistance
What Is a Fire Resistant Material? Testing & Certification Guide
Discover what is a fire resistant material through ASTM and UL testing. Learn how fire ratings, certifications, and assemblies work in construction.
Aug 4, 2026

Construction Cost
How Much Did the Burj Khalifa Cost to Build?
How much did the Burj Khalifa cost to build? We break down the $1.5B project and extract 5 money-saving strategies for your next build.
Jul 30, 2026