How Much Does It Cost to Build a Backyard Pavilion? Full Breakdown
Discover exactly how much it costs to build a backyard pavilion. Explore pricing for cedar, pine, and aluminum kits, plus hidden foundation costs.

The True Cost of Building a Backyard Pavilion
When homeowners ask, "how much does it cost to build a pavilion," the answer depends heavily on span, material selection, and foundation engineering. A basic 10x10 pressure-treated pine kit starts around $3,500 for materials, but a custom 16x20 rough-sawn Western Red Cedar pavilion with a standing-seam metal roof and engineered concrete piers will realistically cost between $16,000 and $24,000 fully installed. Understanding the cost drivers prevents budget overruns and ensures the structure survives local wind and snow loads.
Average Cost Matrix by Size and Material
The following table outlines estimated total costs (materials plus professional installation) for the three most common pavilion configurations. These figures assume a standard asphalt shingle or exposed-fastener metal roof and basic concrete pier foundations.
| Dimensions | Pressure-Treated Pine | Western Red Cedar | Extruded Aluminum Kit |
|---|---|---|---|
| 10x10 (100 sq ft) | $4,000 - $6,500 | $7,500 - $10,000 | $5,500 - $8,000 |
| 12x16 (192 sq ft) | $7,500 - $11,000 | $13,000 - $18,000 | $9,000 - $13,500 |
| 16x20 (320 sq ft) | $12,000 - $17,000 | $20,000 - $28,000 | $15,000 - $21,000 |
| 20x20 (400 sq ft) | $16,000 - $22,000 | $26,000 - $35,000 | N/A (Requires Steel I-Beams) |
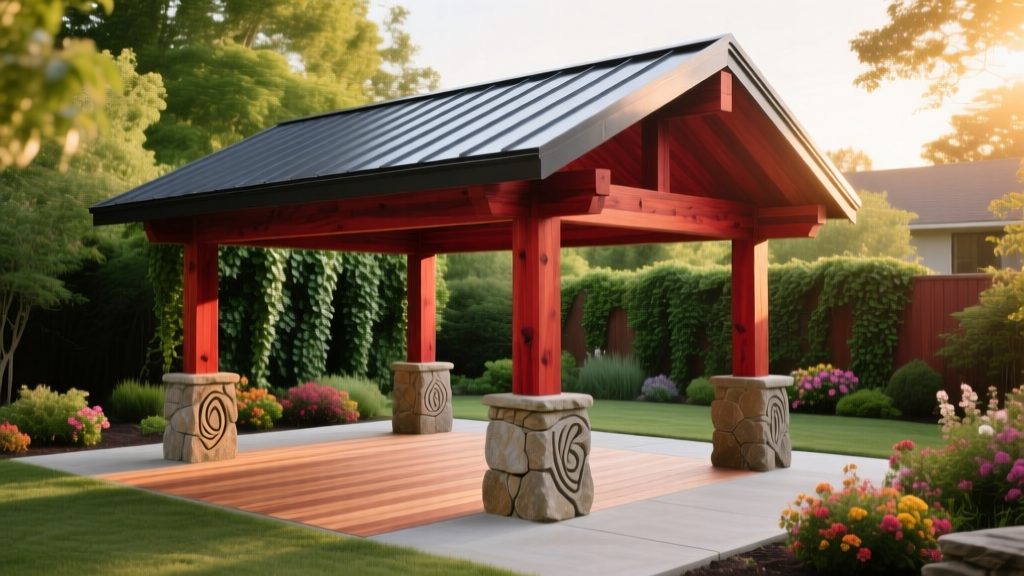
Framing Materials: Pine vs. Cedar vs. Aluminum
The framing material dictates not only the upfront cost but the long-term maintenance schedule and structural longevity. According to the USDA Forest Products Laboratory Wood Handbook, wood species vary drastically in natural decay resistance and dimensional stability.
#2 Southern Yellow Pine (SYP)
Pressure-treated SYP is the most budget-friendly option. However, it is highly susceptible to twisting, checking, and warping as the preservative chemicals and moisture cure over the first 6 to 12 months. You cannot stain SYP immediately; it must dry to a moisture content below 15% before accepting a penetrating oil stain. Budget an additional $1,500 to $2,500 for sanding and staining one year post-installation.
Rough-Sawn Western Red Cedar
Cedar contains natural tannins that resist rot and insect damage without chemical treatment. It is dimensionally stable, meaning heavy beams (like 6x6 or 8x8 posts) will not twist or crack as severely as pine. The premium for cedar is typically 40% to 60% over treated pine, but it eliminates the mandatory waiting period for staining and offers a superior architectural aesthetic.
Glulam Beams for Long Spans
For pavilions wider than 16 feet, solid timber beams are prone to sagging under their own weight and snow loads. The APA - The Engineered Wood Association recommends using Glued Laminated Timber (Glulam) for primary load-bearing beams. Glulam beams are engineered from layered wood laminations, offering superior load-bearing capacity and resisting the checking that plagues solid-sawn timbers.
Foundation Engineering and Frost Heave
A pavilion is only as stable as its footings. The most common failure mode for DIY pavilions is frost heave, where freezing soil pushes shallow footings upward, racking the structure and tearing the roof joinery apart.
Precast concrete deck blocks resting on the surface are only suitable for temporary or extremely lightweight structures. A 12x16 pavilion with a shingled roof can easily weigh over 4,000 lbs. Surface blocks will settle unevenly into the topsoil.
The Correct Approach: Sonotube Piers
- Depth: Excavate below your local frost line (typically 32 to 48 inches in the northern US, 12 to 18 inches in the south).
- Diameter: Use 12-inch or 14-inch Sonotube forms to provide adequate bearing surface on the soil.
- Hardware: Embed a Simpson Strong-Tie ABU44 or CB44 adjustable post base into the wet concrete. This elevates the wood post 1 inch above the concrete surface, preventing wicking and end-grain rot.
Expect to pay $350 to $600 per pier for professional excavation, concrete, and hardware installation.
Wind Uplift and Roofing Systems
Because pavilions lack shear walls, they act like airplane wings in high winds. Wind flowing over the roof creates negative pressure (uplift), which can literally pull the roof off the posts if not properly engineered. The FEMA Wind Retrofit Guide emphasizes the necessity of a continuous load path for open-sided structures.
Fastening the Load Path
Standard toenailing with galvanized nails is entirely insufficient for pavilion joinery. You must use structural screws (like Simpson Strong-Drive SDWS) and hurricane ties (like the Simpson H2.5A) to connect the rafters to the beams, and the beams to the posts. This creates a continuous metal load path that transfers uplift forces directly down into the concrete piers.
Roofing Material Costs
| Roofing Type | Material Cost (per sq ft) | Labor & Sheathing | Total Installed Cost |
|---|---|---|---|
| Architectural Asphalt Shingles | $1.50 - $2.50 | Requires OSB & Felt ($2.00/sq ft) | $5.50 - $8.00 / sq ft |
| 29-Gauge Corrugated Metal | $2.00 - $3.50 | Can attach to purlins ($1.00/sq ft) | $4.50 - $7.00 / sq ft |
| Standing Seam Metal | $6.00 - $9.00 | Requires solid decking ($2.50/sq ft) | $12.00 - $16.00 / sq ft |
While asphalt shingles match the main house, they add significant dead weight to the pavilion framing. Exposed-fastener corrugated metal is lighter, sheds snow efficiently, and can be installed directly over 2x4 purlins, saving the cost of a full OSB sheathing deck.
Hidden Costs: Electrical and Fastener Corrosion
Budgeting for a pavilion often ignores the micro-details that cause premature failure or require expensive change orders mid-build.
The Fastener Corrosion Trap
Modern pressure-treated lumber is preserved with Alkaline Copper Quaternary (ACQ) or Copper Azole (CA-C). These chemicals are highly corrosive to standard metals. If you use standard zinc-plated or electro-galvanized brackets and screws, they will corrode and fail within 3 to 5 years. You must specify G185 hot-dipped galvanized (HDG) or Type 304/316 stainless steel fasteners for all treated lumber connections.
Electrical Integration
Running power to a pavilion for lighting, ceiling fans, or outdoor kitchens requires trenching and conduit.
- Trenching: $8 to $15 per linear foot to dig an 18-inch deep trench for PVC conduit.
- Wiring: UF-B (Underground Feeder) cable or THWN-2 wires pulled through Schedule 40 PVC.
- Fixtures: Low-voltage LED post-cap lights ($50-$100 each) vs. line-voltage recessed soffit cans ($150-$250 each installed).
Allocate $1,200 to $2,500 for a licensed electrician to run a dedicated 20-amp GFCI-protected circuit from your main panel to the pavilion.
Permitting, HOA, and Site Preparation
Before breaking ground, verify local zoning ordinances. Most municipalities classify pavilions over 120 square feet as permanent accessory structures, triggering specific requirements:
- Setbacks: Structures typically must be 10 to 15 feet from rear and side property lines.
- Impermeable Surface Limits: If you are pouring a concrete slab under the pavilion, it counts toward your lot's maximum impermeable surface ratio. A gravel pad or permeable pavers may bypass this restriction.
- Engineering Stamps: In high-wind or heavy-snow regions, the building department will require a structural engineering stamp on your plans, costing $800 to $1,500.
DIY vs. Professional Installation
Building a pavilion is not a standard weekend DIY project. Setting 400-lb Glulam beams 10 feet in the air requires a telehandler or crane ($800 to $1,200 per day rental). While purchasing a pre-cut kit from a specialized timber frame company can save 30% on labor, you are still responsible for the precision site prep, concrete pouring, and heavy lifting. If you lack experience with structural load paths and concrete forming, hiring a specialized post-frame builder ensures the structure will not rack, sag, or lift in severe weather.
Written by
James ThorntonJames Thornton is a construction industry veteran with 25 years of hands-on experience in wood framing, lumber grading, and residential building codes. He started as a framing carpenter in rural Oregon, earned his ICC Residential Building Inspector certification, and eventually became a senior plan reviewer for the City of Portland Bureau of Development Services. James holds a B.S. in Wood Science & Technology from Oregon State University and is a certified lumber grader through the West Coast Lumber Inspection Bureau (WCLIB). He has inspected over 3,000 residential construction sites and authored the city's internal guide on advanced framing techniques (2x6 at 24" O.C.). James lives in Bend, OR, where he builds custom timber-frame cabins and competes in lumberjack sports.
More from James Thornton
View all
Insulation
Best Home Insulation Materials: Complete 2026 Guide
Compare top home insulation materials for 2026. Find R-values, installed costs per square foot, and best uses for fiberglass, spray foam, and mineral wool.
Aug 4, 2026

Sustainable Building
Certify Your Green Building Material for LEED and WELL
Step-by-step guide to certifying a green building material for LEED v5 and WELL v2. Master EPDs, HPDs, and VOC limits for 2026 project specifications.
Aug 4, 2026

Stone & Masonry
Veneer Stacked Stone Panels: Interior Design & Style Showcase
Discover how veneer stacked stone panels transform interiors. Explore modern design profiles, material pairings, and technical installation specs.
Aug 4, 2026