Cost to Build a 30x40 Pole Barn: Material & Labor Comparison
Analyze the cost to build a 30x40 pole barn with our 2026 pricing guide. Compare material packages, labor rates, and foundation options for 1,200 sq ft.

Baseline Pricing: The 1,200 Sq Ft Footprint
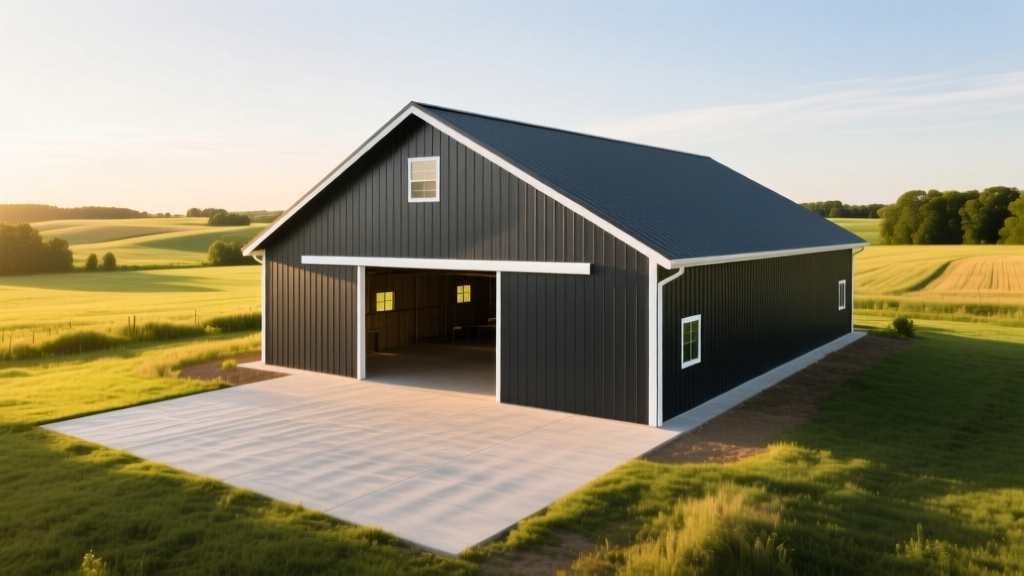
When calculating the total cost to build 30x40 pole barn structures, the 1,200 square foot footprint serves as a highly efficient baseline for agricultural storage, hobby shops, and rural garages. In 2026, the national average for a fully erected, weather-tight 30x40 post-frame building ranges from $28,800 to $48,000 ($24 to $40 per square foot). However, this baseline shifts dramatically based on interior finish levels, foundation engineering, and regional load requirements.
- Basic Shell (Materials Only): $16,800 - $24,000
- Weather-Tight Shell (Erected): $28,800 - $42,000
- Insulated Workshop (Turnkey): $54,000 - $78,000
- Finished Barndominium Shell: $84,000 - $114,000+
Build Level Comparison Matrix
To accurately budget your project, you must define your target build level. The following matrix compares the four primary stages of post-frame construction for a 30x40 layout.
| Build Stage | Cost Range | Included Components | Exclusions |
|---|---|---|---|
| Material Package | $16,800 - $24,000 | Laminated posts, trusses, purlins, steel panels, fasteners | Concrete, labor, site prep, permits |
| Weather-Tight Shell | $28,800 - $42,000 | All materials plus professional erection, basic doors/windows | Slab, insulation, electrical, plumbing |
| Insulated Shop | $54,000 - $78,000 | Shell plus 4-inch slab, R-19 wall insulation, basic lighting | Drywall, HVAC, interior partitions |
| Finished Interior | $84,000 - $114,000+ | Fully framed interior, drywall, HVAC, basic bathroom rough-in | High-end fixtures, custom cabinetry |
Material Specifications & Cost Drivers
The variance in material package pricing stems directly from the structural specifications you select. According to the National Frame Building Association (NFBA), post-frame structures rely on deeply embedded columns to transfer wind and snow loads directly into the ground. Upgrading these materials impacts both longevity and the final invoice.
Columns: Solid vs. Laminated
For a 30-foot clear-span truss, your building requires robust columns spaced at 8-foot or 10-foot intervals. Avoid solid 6x6 treated posts. Solid timber is prone to twisting and checking as it cures, which can warp your steel siding. Instead, specify 3-ply or 4-ply laminated Southern Yellow Pine columns (typically 2x6 or 2x8 layers nailed and glued under pressure). Laminated columns cost approximately 15% to 20% more than solid posts but offer vastly superior load-bearing capacity and dimensional stability. Ensure the lower 5 feet of the column are CCA-treated to a minimum 0.60 pcf retention level for direct ground contact.
Steel Panel Gauge and Profile
The exterior envelope is usually clad in ribbed steel panels. You will generally choose between 29-gauge and 26-gauge steel.
- 29-Gauge ($1.80 - $2.40 per sq ft): Standard for agricultural storage. Adequate for low-wind regions but susceptible to denting from hail or equipment impact.
- 26-Gauge ($2.50 - $3.20 per sq ft): The recommended standard for commercial shops and residential barndominiums. The thicker steel provides higher shear strength and better resistance to oil-canning (visible rippling in direct sunlight).
Truss Engineering and Spacing
Standard pole barn kits utilize pre-engineered wood trusses spaced at 4-foot or 5-foot centers, supported by 2x4 purlins placed flat. To reduce long-term maintenance and increase roof load capacity, upgrade to 2-foot truss spacing with 2x4 purlins placed on edge. This configuration dramatically reduces the risk of roof sagging under heavy snow loads (40+ psf) and provides a much stiffer diaphragm for high-wind zones.
Foundation & Site Prep: The Hidden Variables
Site preparation and concrete work frequently derail post-frame budgets. A 30x40 building requires a perfectly level pad, but the method of anchoring the structure dictates your foundation costs.
Before ordering materials, conduct a basic soil evaluation. Expansive clays or high water tables require deeper post embedment (up to 60 inches) or specialized concrete collars to prevent frost heave and structural uplift.
Embedded Wood Posts vs. Perma-Columns
Traditionally, treated wood posts are embedded 48 to 60 inches into the ground, surrounded by tamped earth or a concrete collar. While cost-effective upfront ($300 - $500 per post installed), embedded wood eventually succumbs to moisture and decay at the concrete-to-air transition line.
The modern alternative is the Perma-Column system—a precast concrete pier that elevates the wood column entirely above grade. Perma-Columns cost between $180 and $250 per pier (plus installation labor), adding roughly $2,500 to $3,500 to a 30x40 build. However, this upgrade effectively eliminates ground-line decay, extending the structural lifespan of the building by decades.
The Concrete Slab
If your 30x40 barn requires a floor, do not pour a standard 3000 PSI residential driveway mix. Specify a 4000 PSI concrete mix with fiber mesh reinforcement, poured to a minimum 4-inch thickness over a 10-mil poly vapor barrier. For heavy equipment storage, upgrade to a 5-inch or 6-inch slab with #4 rebar tied on 24-inch centers. Expect to pay $7.50 to $11.00 per square foot for a commercial-grade slab, totaling $9,000 to $13,200 for the 1,200 sq ft footprint.
Labor Costs: DIY vs. Professional Erection
Labor represents 35% to 50% of the total cost to build 30x40 pole barn structures. According to Angi's post-frame construction data, professional crews charge between $8 and $15 per square foot for shell erection.
- DIY Erection: Saves $9,600 to $18,000. Requires a minimum crew of 4 people, a telehandler or skid steer with boom attachments, and advanced knowledge of squaring a 30x40 footprint (diagonal measurements must be exact within 1/8th of an inch to prevent truss binding).
- Professional Crew: A 3-person specialized post-frame crew will typically frame, sheet, and trim a 30x40 weather-tight shell in 7 to 12 working days. They carry liability insurance and guarantee the structural squareness required for sliding doors to operate correctly.
Engineering, Permitting, and Regional Adjustments
Local building departments dictate structural requirements that directly impact material costs. A 30x40 barn in central Texas requires engineering for 110 mph wind speeds (Exposure C) but minimal snow load. Conversely, the same footprint in upstate New York requires engineering for 60+ psf ground snow loads, necessitating heavier truss chords, closer truss spacing, and larger knee braces.
As noted by Penn State Extension's agricultural engineering guidelines, skipping sealed engineering plans to save $1,500 upfront often results in failed municipal inspections or catastrophic structural failure during extreme weather events. Always budget $1,500 to $3,000 for site-specific, PE-stamped structural plans.
Strategic Cost-Saving Framework
To optimize your budget without compromising structural integrity, apply the following decision framework:
- Standardize Dimensions: Stick to the 30x40 footprint. Lumber and steel are manufactured in 2-foot and 4-foot increments. Designing a 32x42 barn generates massive offcut waste, artificially inflating your material package by 10% to 15%.
- Limit Roof Penetrations: Every skylight, vent pipe, or cupola requires custom flashing, additional framing, and increases the risk of future leaks. Opt for ridge vents and polycarbonate eave light panels instead of mechanical roof penetrations.
- Phased Insulation: If building a shop, install a high-quality radiant barrier under the steel roofing during initial construction, but leave the walls open. You can easily blow-in cellulose or install closed-cell spray foam into the wall cavities years later when your budget allows, avoiding the upfront $8,000+ insulation cost.
Written by
Sarah WhitfieldSarah Whitfield is a chartered quantity surveyor (MRICS) and construction cost analyst with 15 years of experience in material pricing, procurement strategy, and project budgeting. She earned her degree in Construction Management from the University of Reading (UK) and has worked on projects ranging from $2M custom homes to $180M mixed-use developments across North America and Europe. Sarah currently leads cost estimating for BuildMat Insight, maintaining a proprietary database of 4,000+ material price points updated quarterly. She is a frequent contributor to RSMeans cost data panels and has presented at the International Cost Engineering Council (ICEC) congress. Based in Denver, CO, Sarah is an avid trail runner and volunteer mentor for Women in Construction.
More from Sarah Whitfield
View all
Wood & Lumber
What Are the Different Types of Wood? A Builder's Guide
Compare structural softwoods, finish hardwoods, and engineered lumber. Analyze Janka ratings, MOE values, and 2026 pricing for construction.
Aug 4, 2026

Walls & Panels
Steel Framing vs Wood Framing: Corrosion and Moisture Defense
Compare steel framing vs wood framing for moisture resistance. Learn about galvanized coatings, condensation risks, and corrosion protection strategies.
Jul 21, 2026

Stone & Masonry
How to Cut Stone Veneer: Wet Saw vs Grinder Comparison
Compare the best tools for cutting stone veneer. We review wet saws, angle grinders, and chop saws to help you achieve clean, chip-free cuts.
Jul 21, 2026