How to Reduce the Cost to Build MVP: Core-Shell Strategies
Learn how to minimize the cost to build MVP structures using core-shell construction, advanced framing, and phased MEP strategies for maximum savings.

The Construction MVP Concept: Defining the Minimum Viable Property
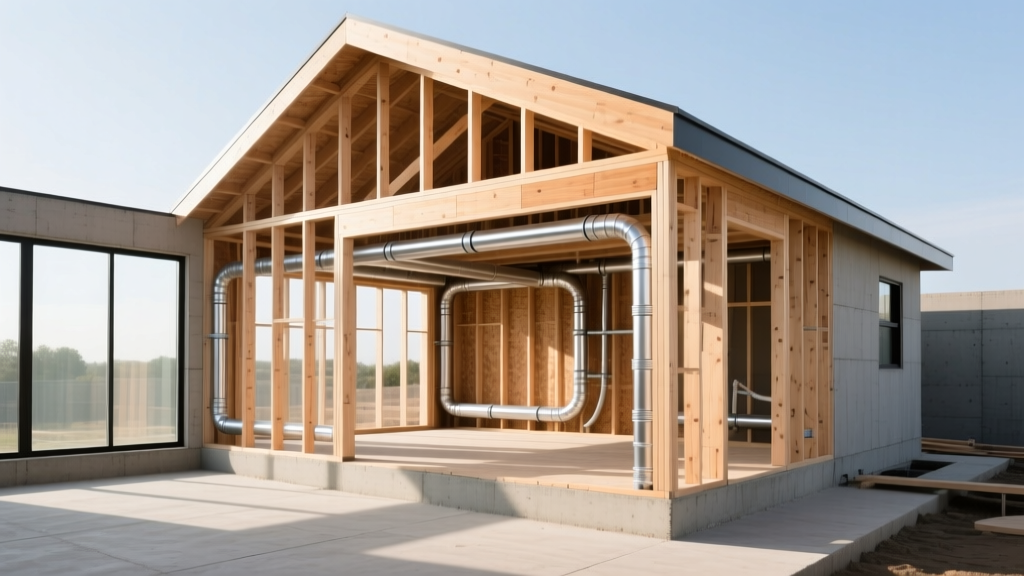
In physical construction, the Minimum Viable Product (MVP) translates to the Minimum Viable Property. Rather than value-engineering cheap materials into a fully finished 2,500-square-foot floor plan, the MVP strategy involves building a hyper-efficient, fully code-compliant, weather-tight core (typically 800 to 1,200 square feet) and deliberately deferring non-essential spatial finishes and secondary zones. This approach drastically reduces the initial cost to build MVP structures while preserving the structural integrity and envelope performance required for future expansion.
Real-World Cost Breakdown: Traditional vs. MVP Build Budgets
To understand the financial impact, we must compare a standard 1,200-square-foot speculative build against an MVP core-shell build of the same footprint. The following data reflects 2026 national average pricing for materials and labor in a moderate-cost region.
| Line Item | Traditional Build | MVP Core-Shell | Savings |
|---|---|---|---|
| Site Prep & Foundation | $18,500 | $11,200 | $7,300 |
| Framing & Sheathing | $32,000 | $24,500 | $7,500 |
| Roofing & Envelope | $16,000 | $12,800 | $3,200 |
| MEP Rough-In & Trim | $41,000 | $19,500 | $21,500 |
| Interior Finishes | $55,000 | $14,000 | $41,000 |
| Total Estimated Cost | $162,500 | $82,000 | $80,500 |
Value Engineering the Core Shell: Where to Save Without Failing
Reducing the cost to build MVP structures requires aggressive optimization of the structural shell and mechanical systems. The goal is to eliminate redundancy while maintaining strict adherence to the International Residential Code (IRC).
Foundation and Framing Tactics
Abandon the traditional stem-wall and crawlspace approach. A monolithic slab-on-grade foundation (thickened edge slab) reduces concrete volume and eliminates the need for separate footing pours and block stem walls. Specify a 4-inch slab with a thickened 12-inch by 12-inch edge beam, reinforced with #4 rebar. Place 2 inches of EPS (Expanded Polystyrene) underslab insulation to achieve an R-10 thermal break, which is critical when the slab serves as the finished floor in deferred zones.
For the superstructure, utilize Optimum Value Engineering (OVE), commonly known as advanced framing. By spacing 2x6 studs at 24 inches on-center rather than 16 inches, you reduce lumber usage by up to 15%. The Department of Energy's advanced framing guidelines confirm that this method also reduces thermal bridging, allowing for deeper cavity insulation. Use single top plates with truss clips, and replace solid wood headers with insulated box headers to further cut material costs and improve the envelope's R-value.
MEP (Mechanical, Electrical, Plumbing) Optimization
Mechanical systems represent one of the largest cost centers. Instead of routing expensive sheet metal ductwork through conditioned attics or dropped soffits, specify a ductless mini-split system. A single 18,000 BTU Daikin Aurora or Mitsubishi M-Series hyper-heat condenser paired with two wall-mounted air handlers can efficiently condition a 1,200-square-foot MVP core for roughly $4,500 installed, compared to $12,000+ for a central forced-air system.
For plumbing, mandate PEX-A (cross-linked polyethylene) using expansion fittings (e.g., Uponor ProPEX). PEX-A can be snaked through wall cavities like electrical wire, drastically reducing the number of fittings and the labor hours required for rough-in. Run a home-run manifold system directly from the water heater to the single MVP wet zone to minimize hot water wait times and eliminate wasted copper.
Material Substitution Matrix for MVP Builds
Selecting the right materials ensures the deferred zones remain protected while keeping initial capital expenditure low.
Phasing the Build-Out: Deferring Costs Safely
The primary risk of an MVP build is creating a structure that fails building inspections or suffers moisture degradation in unfinished areas. To defer costs safely, the thermal and moisture boundary must be 100% complete, even if the interior finishes are not.
In secondary bedrooms or future expansion zones, install the exterior sheathing, windows, and insulation, but stop at the drywall. Instead of paying for a Level 4 smooth finish, specify a Level 2 fire-taped finish. This satisfies the IRC requirement for fire resistance and draft-stopping without paying for the mudding, sanding, and painting labor. Leave the Advantech subfloor exposed; its moisture-resistant resin coating allows it to serve as a durable, temporary walking surface for years until the budget allows for engineered hardwood or polished concrete finishes.
Hidden MVP Pitfalls and How to Avoid Them
- Permitting Phasing: Many municipal building departments do not allow 'temporary' certificates of occupancy for unfinished interior zones. Ensure your architectural plans explicitly label deferred zones as 'unfinished storage' or 'future expansion' on the initial permit application to avoid failing the final framing and drywall inspections.
- Electrical Panel Sizing: A common mistake is installing a 100-amp panel to match the reduced initial MVP load. When you eventually build out the secondary zones and add appliances, you will need to pay for a panel upgrade. Install a 200-amp main breaker panel during the MVP phase; the material upsell is only $150-$200, saving you $2,500 in future retrofit labor.
- Plumbing Stub-Outs: Always rough-in the drain, waste, and vent (DWV) lines for future bathrooms or wet bars during the initial slab pour. Cutting and coring a post-tensioned or thickened-edge concrete slab to add a toilet flange three years later will cost upwards of $1,500 and risk structural compromise.
Actionable Checklist for Your MVP Blueprint
- Design a Simple Geometry: Stick to a rectangular or L-shaped footprint. Complex rooflines with valleys and dormers increase the cost to build MVP structures by 15-20% due to framing labor and flashing materials.
- Centralize the Wet Zones: Back the kitchen plumbing directly against the bathroom plumbing wall. This single design choice reduces PEX routing by up to 40 feet and requires only one main vertical vent stack through the roof.
- Specify Insulated Headers: Use 2x4 header boxes filled with rigid foam or closed-cell spray foam at all window and door openings to eliminate thermal bridging without requiring larger dimensional lumber.
- Seal the Envelope Early: Use fluid-applied flashing at all window rough openings and sill pans. A weather-tight shell allows interior trades to work in deferred phases without risking moisture damage to exposed subfloors or framing.
- Pre-Wire for Future Tech: Pull empty 1-inch Smurf tube (flexible PVC conduit) from the main panel to deferred zones. When you are ready to finish those rooms, you can pull new 12/2 Romex or Cat6a data cables without cutting open your newly finished drywall.
Written by
David NakamuraDavid Nakamura is a licensed architect (AIA) and construction technology writer focused on sustainable building methods, mass timber engineering, and high-performance building envelopes. He holds a Master of Architecture from the University of Washington and is a certified Passive House Consultant (CPHC). David spent eight years at the Seattle firm Mithun, where he led the design of three LEED Platinum projects, before founding his own practice specializing in net-zero residential design. He serves on the editorial advisory board of GreenBuilder Magazine and has authored peer-reviewed papers on cross-laminated timber (CLT) connections for the Journal of Structural Engineering. In his spare time, David teaches woodworking at Pratt Fine Arts Center and kayaks the Puget Sound.
More from David Nakamura
View all
Construction Cost
Labor Cost to Build a Deck Per Sq Ft: 2026 Installation Guide
Discover the exact labor cost to build a deck per sq ft in 2026. This installation guide breaks down contractor rates, complexity factors, and hidden fees.
Aug 4, 2026

Construction Cost
How Much Does It Cost to Build a 3 Bedroom House? Financing Guide
Learn exactly how much it costs to build a 3 bedroom house and explore 2026 financing options, construction loan types, and budget frameworks for your build.
Aug 4, 2026

Construction Cost
Cost to Build a Tennis Court: 2026 Guide
How much does it cost to build a tennis court in 2026? Breakdowns for asphalt, concrete, and synthetic surfaces plus fencing and lighting.
Jul 30, 2026