Master Cable Deck Railing Installation: Tension & Code Guide
Learn how to install cable deck railing with precise tensioning, post spacing, and code compliance. Step-by-step guide for 316 stainless steel systems.
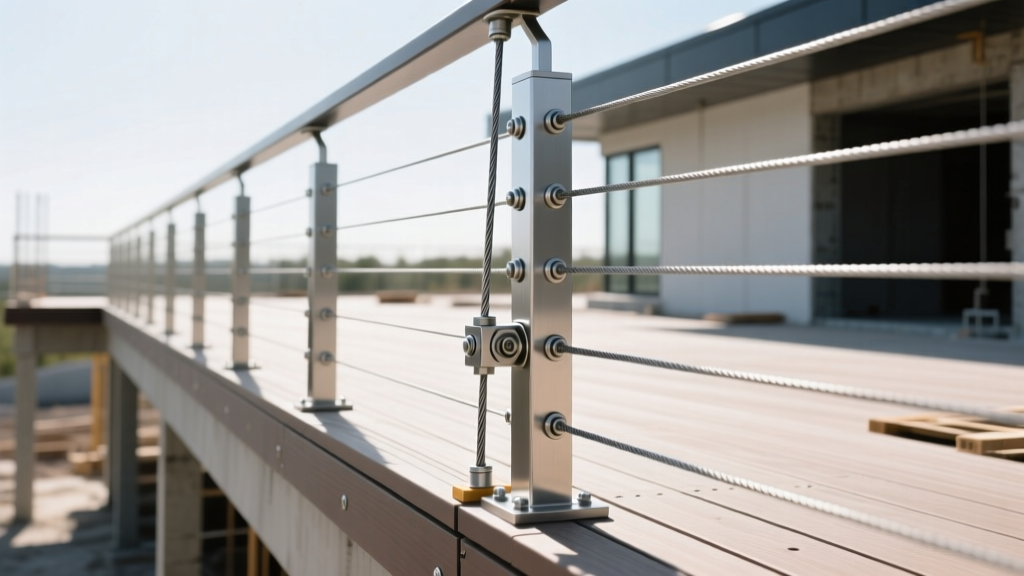
Code Compliance and Material Specifications
Installing cable deck railing requires strict adherence to the International Residential Code (IRC). Under IRC Section R312, guards must not have openings that allow a 4-inch sphere to pass through. Because cables naturally flex under pressure, they must be tensioned sufficiently to prevent a 4-inch sphere from pushing between the lines. According to the International Code Council, local inspectors will physically test this deflection; under-tensioned cables will fail inspection immediately.
Material selection dictates the longevity of your installation. You must use Type 316 marine-grade stainless steel for all outdoor applications. Type 304 stainless steel, while cheaper, is highly susceptible to pitting and 'tea-staining' (surface rust) in coastal, high-humidity, or de-icing salt environments. Furthermore, the cable construction must be 1x19 strand. Never use 7x7 or 7x19 wire rope; these flexible constructions are designed for winches and pulleys, and they will stretch excessively and look rough when tensioned for railing.
Standard Sizing Parameters
- 1/8-inch diameter: The industry standard for residential decks. Requires a 7/32-inch drill bit for swage sleeves or a 5/32-inch bit for threaded terminals.
- 3/16-inch diameter: Reserved for commercial applications, high-wind zones, or straight runs exceeding 20 feet where 1/8-inch cable might exhibit harmonic vibration.
- Post Spacing: Maximum 8 feet on center for straight horizontal runs. For stair applications, maximum spacing drops to 4 feet on center due to the angled vector forces that increase cable deflection.
Essential Hardware and Tooling Matrix
The American Wood Council emphasizes that structural integrity in deck railings relies heavily on the connection hardware. For cable systems, the termination method dictates your tooling requirements and final aesthetic.
| Termination Method | Required Tooling | Pros | Cons | Best Application |
|---|---|---|---|---|
| Hydraulic Swage Sleeves | Hydraulic crimper, 7/32" drill bit, angle grinder | Lowest profile, cleanest look, highest pull-out strength (up to 1,500 lbs) | Requires expensive hydraulic tool rental, permanent once crimped | Professional installs, long uninterrupted runs |
| Hand Crimp Swages | Manual hand swager, 7/32" drill bit | Lower tool cost, portable | High physical effort, inconsistent crimp pressure, higher risk of pull-out | Short runs, budget DIY projects |
| Threaded Terminals | Wrenches, 5/32" drill bit, no crimping required | Forgiving installation, adjustable tension, easy DIY | Bulkier hardware visible on post exterior, requires precise length measurement | DIY homeowners, complex multi-angle stair runs |
Phase 1: Post Layout and Precision Drilling
The most common failure point in cable deck railing installation is misaligned drill holes. If your holes are not perfectly horizontal and parallel, the swage sleeve will bind against the wood or metal post. This creates a shear point that will eventually snap the cable or pull the swage through the wood under tension.
Drilling Protocol
- Use a Drill Guide: Never freehand the holes. Clamp a commercial cable railing drill guide to your 4x4 or 6x6 wooden posts. If using structural steel or aluminum posts, order them pre-drilled from the manufacturer to ensure exact CNC precision.
- Marking the Layout: Standard spacing is 3 inches on center. The bottom cable should be positioned no more than 2 inches above the deck surface to satisfy the 4-inch sphere rule at the base. The top cable should be at least 1 inch below the top rail cap.
- Drilling Technique: Use a sharp 7/32-inch brad-point bit for wood to prevent tear-out. Drill completely through the post. For intermediate posts, the hole must be perfectly straight so the cable passes through without friction. For terminal (end) posts, you will countersink the outside of the hole slightly to allow the swage sleeve to seat flush.
Phase 2: Threading, Anchoring, and Swaging
Once drilling is complete, the physical assembly begins. Always wear heavy leather gloves; cut 1x19 stainless steel cable has razor-sharp ends that will easily puncture skin.
Start by attaching your fixed anchor points on one terminal post. If using swage sleeves, insert the cable through the sleeve, loop it through the anchor eyelet, and feed it back through the sleeve. Before crimping, leave exactly 1/4-inch of slack in the loop. If the loop is pulled tight against the eyelet before crimping, the tensioning process will place all the shear stress on the crimp rather than the mechanical loop, drastically reducing the breaking strength.
Use a hydraulic crimper with the correct die size (usually marked for 1/8-inch cable). Apply two crimps per sleeve. The first crimp should be placed 1/4-inch from the end of the sleeve, and the second crimp placed adjacent to the first. After swaging, use a caliper to measure the crimped sleeve; it should match the manufacturer's specified post-crimp dimension (typically around 0.160 inches for 1/8-inch cable). Test your crimp pressure on a scrap piece of cable and perform a pull-test before committing to the actual deck.
Phase 3: The Tensioning Protocol
Tensioning is where the structural integrity and visual appeal of the system are finalized. The target tension for residential 1/8-inch cable is between 150 and 200 pounds per line. This is roughly equivalent to the tension of a heavily plucked bass guitar string.
Applying 200 lbs of tension across 10 cables generates 2,000 lbs of inward compressive force on your terminal posts. Standard 4x4 wooden posts will bow inward severely under this load, ruining the aesthetic and compromising the structure. You must install temporary 2x4 wooden bracing between the terminal posts, or use a specialized steel tensioning jig, to hold the posts perfectly plumb while you tension the cables. Do not remove the bracing until all cables are fully tensioned and locked.
The Alternating Tension Sequence
Never tension cables sequentially from top to bottom. This will pull the top rail downward and the bottom rail upward, causing severe warping. Instead, use the alternating sequence:
- Tension the exact middle cable first to 150 lbs.
- Tension the top-most and bottom-most cables to 150 lbs.
- Work your way inward from the top and bottom toward the center, tensioning each to 150 lbs.
- Do a final pass on all cables, bringing them up to the final 200 lbs target, checking with a digital cable tension gauge.
Troubleshooting Common Installation Failures
Even with meticulous planning, field conditions can introduce variables that affect the final installation. Consult resources like Fine Homebuilding for advanced framing techniques if your substructure is inadequate.
| Symptom | Root Cause | Corrective Action |
|---|---|---|
| Cables sag in the middle of a long run | Post deflection or tension below 100 lbs | Verify post bracing. Re-tension to 200 lbs. If posts are bowing, install a structural steel tension rod between terminal posts behind the wood facade. |
| Surface rust ('tea-staining') on 316 SS | Carbon steel tool contamination or embedded iron dust | Never use standard steel wire brushes or carbon steel wrenches on stainless hardware. Clean affected areas with a citric acid passivation gel to restore the chromium oxide layer. |
| Cable vibration/humming in high wind | Run length exceeds 20 feet with 1/8-inch cable | Install intermediate cable stabilizers (small plastic or metal spacers) every 4 feet, or upgrade to 3/16-inch cable for longer spans. |
| Swage sleeve pulls through the wood | Undersized drill bit or soft wood species (e.g., cedar) | Insert a stainless steel backing washer or a specialized metal insert tube into the drill hole to distribute the load across a wider surface area of the wood. |
2026 Cost Breakdown: DIY vs. Professional Installation
Understanding the financial commitment is crucial for project planning. Cable railing is a premium product, and the hardware costs significantly more than traditional wood or composite balusters. The pricing below reflects current 2026 market rates for Type 316 marine-grade stainless steel systems.
| Cost Category | DIY Installation (Per Linear Foot) | Professional Installation (Per Linear Foot) |
|---|---|---|
| Hardware & Cable (1/8" 316 SS) | $45 - $65 | $45 - $65 |
| Wooden Posts (6x6 Pressure Treated) | $15 - $25 | $25 - $40 |
| Tool Rental (Hydraulic Crimper) | $8 - $12 (amortized) | $0 (included in labor) |
| Labor & Overhead | $0 | $60 - $110 |
| Total Estimated Cost | $68 - $102 / LF | $130 - $215 / LF |
For a standard 12x12 deck requiring roughly 24 linear feet of railing on the open sides, a DIY installation will cost between $1,632 and $2,448 in materials. Hiring a professional contractor will range from $3,120 to $5,160. While the upfront cost is high, the near-zero maintenance requirements and unobstructed sightlines make cable deck railing a high-ROI addition to modern outdoor living spaces.