Deck Lighting Maintenance: Cleaning and Troubleshooting Guide
Keep your deck lighting bright and functional. Learn exact cleaning methods, troubleshooting steps, and seasonal care for low-voltage and solar fixtures.
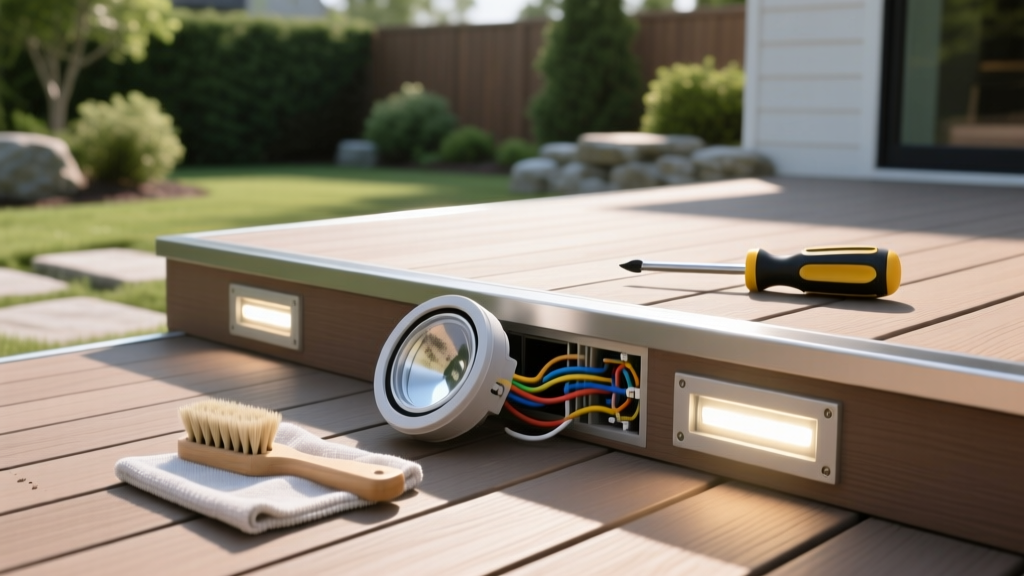
The Hidden Enemies of Deck Lighting Longevity
Modern LED deck lighting systems rarely fail because the diodes burn out. According to the U.S. Department of Energy, high-quality outdoor LEDs can maintain 70% of their initial lumen output for 50,000 hours or more. Instead, deck lighting failures are almost entirely driven by environmental degradation: polycarbonate lens crazing, moisture intrusion in low-voltage connections, and solar panel micro-debris buildup. A proactive maintenance playbook is the difference between a system that lasts 15 years and one that requires a total teardown in three.
Step-by-Step Lens Cleaning Playbook
The cleaning agent you choose must match the lens material. Using the wrong chemical will cause irreversible micro-fractures (crazing) that trap dirt and scatter light, creating a permanent foggy appearance.
Polycarbonate and Acrylic Lenses (Post Caps & Recessed Pucks)
Most composite-compatible deck lights, such as the Trex DeckLight or TimberTech XLM series, use UV-stabilized polycarbonate or acrylic lenses. These plastics are highly susceptible to ammonia and harsh solvents.
- Mix the Solution: Combine 1 teaspoon of pH-neutral dish soap (like Dawn) with 1 quart of distilled water. Distilled water prevents hard water mineral deposits from baking onto the lens during evaporation.
- Apply and Agitate: Spray the solution liberally. Use a clean, high-pile microfiber cloth to gently wipe the surface. Never use paper towels, as the wood pulp fibers will introduce micro-scratches into the polycarbonate.
- Rinse and Dry: Rinse with a gentle stream of fresh water from a hose (no pressure washers). Dry immediately with a second, dry microfiber cloth to prevent water spotting.
Glass Lenses (Premium Hardscape & Step Lights)
Premium fixtures, like Kichler or WAC Lighting hardscape bars, often use tempered frosted glass. Glass is impervious to ammonia but highly prone to hard water scaling and sap buildup.
- For Hard Water & Sap: Mix a 50/50 solution of white vinegar and distilled water. Apply to the glass, let it dwell for 3 minutes to break down calcium and tree sap, then wipe clean.
- For Stubborn Grime: Use 70% isopropyl alcohol (IPA) on a lint-free wipe. IPA cuts through organic deck stains and evaporates instantly without streaking.
Solar Panel Maintenance (Solar Post Caps)
Solar deck lights rely on a small photovoltaic cell on the top of the fixture. Pollen, dust, and oxidized deck stain overspray can reduce solar charging efficiency by up to 30%, leading to dim or flickering nighttime output.
Electrical and Wiring Maintenance for Low-Voltage Systems
For hardwired 12V or 15V AC deck lighting systems, the physical wiring and connections require annual inspection. The National Fire Protection Association (NFPA) outlines strict guidelines for outdoor low-voltage wiring in the National Electrical Code (NEC), emphasizing the need for moisture-proof connections in wet locations.
Upgrading Wire Connections
The most common failure point in deck lighting is the wire nut connection under the deck. Standard plastic wire nuts trap condensation, leading to copper oxidation, voltage drop, and eventual fixture failure. During your annual under-deck inspection, cut out any standard wire nuts and replace them with silicone-filled wire connectors (such as King Innovation DryConn or GREMLO connectors). The silicone gel completely displaces moisture and prevents galvanic corrosion, effectively waterproofing the splice.
Transformer and Voltage Drop Check
Use a digital multimeter to test the voltage at the transformer terminals and at the furthest fixture on the run. If the transformer reads 12V but the furthest light reads 10.5V or lower, you are experiencing voltage drop. This causes LEDs to flicker, dim, or fail prematurely. To fix this, either switch the transformer's multi-tap terminal to the 13V or 14V output, or upsize the main trunk wire from 12 AWG to 10 AWG.
Troubleshooting Matrix: Symptoms and Fixes
Use this diagnostic matrix to quickly identify and resolve common deck lighting anomalies without unnecessarily replacing entire fixtures.
| Symptom | Root Cause | Actionable Fix |
|---|---|---|
| All lights dim or flickering in unison | Severe voltage drop on the main trunk line or failing transformer capacitor. | Test voltage at transformer. Move to a higher voltage tap (13V/14V) or replace the transformer if AC output fluctuates wildly. |
| Single light flickering while others are stable | Failing internal AC/DC LED driver or localized moisture corrosion in the splice. | Cut the wire 2 inches behind the fixture to bypass the corroded segment. Re-splice using silicone-filled connectors. If flickering persists, replace the LED puck module ($15-$25). |
| Water pooling inside the lens | O-ring compression set (flattening) or using an IP65 fixture in a recessed, water-trapping application. | Remove the lens, clean the groove, and replace the silicone O-ring. Apply a thin bead of dielectric grease to the new O-ring before reseating. Ensure recessed lights are IP67 rated. |
| Solar post cap stays on during daylight | Dirty solar sensor/panel or heavy shading from nearby foliage blocking the photocell's ability to detect ambient lux levels. | Clean the panel with isopropyl alcohol. Trim back overhanging branches to ensure at least 4 hours of direct, unshaded sunlight on the cell. |
| Yellow or brown tint to the light output | Polycarbonate lens UV degradation (yellowing) or insect carcasses trapped inside the housing. | UV yellowing cannot be reversed; replace the lens cap or the entire fixture. For insects, open the housing, vacuum out debris, and seal wire entry holes with clear exterior silicone. |
Seasonal Maintenance Calendar
Structuring your maintenance by season ensures you address environmental threats exactly when they occur, maximizing the lifespan of your outdoor lighting investment.
Spring: The Deep Clean and Electrical Audit
- Task: Perform the polycarbonate/glass lens cleaning protocol outlined above to remove winter grime and road salt spray.
- Task: Inspect all under-deck wiring. Look for wires resting on the ground (which invites rodent chewing). Secure all wiring to the joists using UV-resistant nylon cable ties or metal P-clips, maintaining at least 2 inches of clearance from the ground.
- Task: Adjust the transformer's photocell or digital timer to account for longer daylight hours.
Summer: Solar and Thermal Management
- Task: Bi-weekly wiping of solar post cap panels with 70% IPA to remove pollen and dust.
- Task: Check recessed deck lights for heat buildup. If your composite decking gets excessively hot in direct sun, ensure the recessed puck lights have adequate airflow clearance beneath the joists to prevent the internal LED drivers from thermal-throttling.
Fall: Debris Clearing and Winterization Prep
- Task: Clear wet leaves from the tops of post cap lights and hardscape step lights. Decomposing leaves produce acidic tannins that will permanently stain polycarbonate lenses and accelerate the corrosion of metal housings.
- Task: Apply a light spray of silicone lubricant to the threads of any removable glass lens housings to prevent them from freezing and seizing to the metal body over the winter.
Winter: Snow Load and Ice Management
- Task: Gently brush heavy snow off post cap lights using a soft-bristled broom. Never use a metal snow shovel or ice scraper near deck lighting fixtures.
- Task: Avoid piling snow directly onto recessed deck lights. While IP67 fixtures can handle submersion, the repeated freeze-thaw cycle of a solid ice block expanding over the lens can crack the polycarbonate or shatter the glass.
When to Repair vs. Replace: Cost and Component Guide
Understanding the modular nature of modern deck lighting saves significant money. According to research from the Lighting Research Center at Rensselaer Polytechnic Institute, LED outdoor fixtures are increasingly designed with modular, replaceable light engines rather than integrated, non-serviceable boards.
- Replace the Lens ($10 - $20): If the housing and wiring are intact but the polycarbonate is heavily scratched, yellowed, or cracked, order replacement lenses directly from the manufacturer (e.g., Trex or TimberTech). Do not throw away a $60 post cap fixture for a $12 lens issue.
- Replace the LED Module ($15 - $35): If the fixture housing is fine but the light won't turn on (and wiring is verified good), the internal LED board or driver has failed. Most premium recessed lights use plug-and-play modular LED pucks that simply unclip from the housing and plug into the existing wire harness.
- Replace the Entire Fixture ($40 - $85): Total replacement is only necessary if the metal or composite housing is physically cracked, the internal wiring harness is corroded beyond the splice point, or the fixture is an outdated, non-LED halogen model that is no longer energy efficient.
By adhering to this targeted maintenance playbook, you protect the aesthetic integrity of your outdoor living space and ensure your deck lighting system operates safely and brilliantly for its maximum engineered lifespan.