Framing a Composite Decking Substructure: Pro Steps
Master composite decking substructure framing with pro joist spacing, flashing tape, and blocking techniques to prevent sagging and voided warranties.
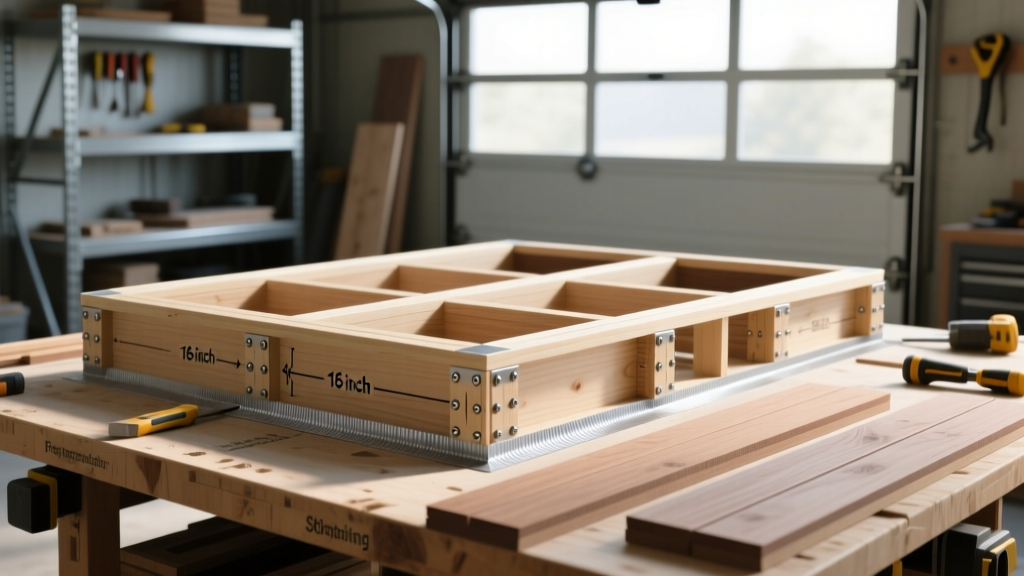
The Structural Demands of Composite Decking
Building a composite deck requires a fundamentally different approach to framing than traditional wood decking. While pressure-treated pine or cedar boards are rigid and can bridge minor structural gaps, composite and PVC decking materials are heavier and possess higher thermal expansion rates. A standard capped composite board weighs between 2.8 and 3.5 pounds per linear foot—nearly double the weight of a standard 5/4x6 pressure-treated pine board. If the underlying composite decking substructure is not engineered to handle this dead load alongside dynamic live loads (such as snow or foot traffic), the boards will sag, the hidden fasteners will fail, and the manufacturer's warranty will be immediately voided.
Material Selection: Pressure-Treated Lumber vs. Steel Framing
The two primary materials used for a composite decking substructure are ground-contact pressure-treated (PT) lumber and light-gauge steel framing. While PT lumber remains the industry standard due to cost and familiarity, steel framing is rapidly gaining market share for high-end composite installations because it eliminates warping, twisting, and rot.
| Feature | Pressure-Treated Lumber (UC4A/UC4B) | Light-Gauge Steel (e.g., Trex Elevate) |
|---|---|---|
| Material Cost (per sq. ft.) | $4.50 - $6.00 | $9.00 - $13.50 |
| Dimensional Stability | Prone to twisting, cupping, and shrinking | 100% stable; no warping or shrinking |
| Flashing Tape Required? | Yes (Critical for rot prevention) | No |
| Maximum Span (2x8 equivalent) | 10' to 12' (depending on load) | Up to 16' with specialized joists |
| Fastening Method | Nails, structural screws, joist hangers | Self-drilling tek screws, specialized clips |
When selecting pressure-treated lumber, verify the treatment level via the end tag. According to the American Wood Protection Association (AWPA) Use Category System, joists and beams exposed to weather but elevated above the ground must meet the UC4A (Ground Contact) standard, while posts buried in concrete or resting on footings must meet UC4B (Heavy Ground Contact). Using standard above-ground (UC3B) lumber for joists will lead to premature substructure failure.
Critical Framing Procedures for Composite Substructures
1. Joist Spacing and Layout
Composite decking lacks the longitudinal stiffness of natural wood. Therefore, joist spacing must be tightened. For standard 5/4-inch composite deck boards installed perpendicular (90 degrees) to the joists, the maximum allowable spacing is 16 inches on-center (OC). However, if you are installing the boards at a 45-degree diagonal angle, you must reduce the joist spacing to 12 inches OC to prevent the boards from bowing between the joists underfoot.
Pro Insight: Even on perpendicular installs, many high-end custom builders default to 12-inch OC spacing. This creates a noticeably stiffer deck surface, reduces the 'spongy' feel common to composite, and provides a larger nailing flange for hidden fastener clips, reducing installation errors.
2. Joist Flashing and Protection
Water pooling on top of wooden joists is the primary cause of substructure rot. Furthermore, the alkaline chemicals in modern pressure-treated lumber (like Copper Azole or ACQ) can degrade composite boards from the bottom up if direct wood-to-composite contact occurs without a barrier. You must apply a high-quality butyl-based flashing tape to the top of every joist, beam, and ledger board before laying the decking.
- Material: Use butyl-based tape (e.g., Trex Protect or DeckWise WiseTape). Avoid asphalt-based tapes, which can melt and bleed through the composite surface during high summer temperatures.
- Application: Apply the tape continuously over the joists. Where joists intersect or meet the ledger board, cut and fold the tape to ensure a watertight seal without puncturing the membrane.
3. Blocking and Rim Joist Reinforcement
Unlike wood, composite decking cannot be used as a structural diaphragm to keep joists plumb. You must install solid wood blocking between joists to prevent them from rolling or twisting under load. Install 2x8 solid blocking in a staggered pattern every 4 to 6 feet along the span of the joists. Additionally, blocking is strictly required at all deck perimeter rim joists and at any point where deck boards butt end-to-end over a joist, ensuring both board ends have a full 1.5-inch bearing surface.
'Proper blocking not only stabilizes the joists against lateral movement but also provides the necessary attachment points for picture-framing the deck perimeter and securing fascia boards, which are critical for the aesthetic finish of a composite deck.'
Hardware and Fastener Specifications
The chemical preservatives in modern pressure-treated lumber are highly corrosive to standard metals. Using standard zinc-plated nails or bright common nails will result in severe corrosion, staining the composite decking and compromising structural integrity within a few years.
For joist hangers, utilize double-shear hangers like the Simpson Strong-Tie LUS or ZMAX series. When attaching joists to the ledger board, avoid toe-nailing. Use structural screws (such as GRK RSS or Simpson SDWS) that are specifically rated for ledger-to-joist connections, ensuring they penetrate the ledger and the house framing by at least 1.5 inches. For securing blocking, use 3-inch structural screws rather than nails to prevent the blocking from working loose over time due to the vibration of foot traffic on the composite surface above.
Ventilation and Ground Clearance Requirements
Composite decking requires adequate cross-ventilation to allow moisture to escape and to moderate the temperature of the boards, which can expand significantly in direct sunlight. The Trex Official Installation Guidelines, which serve as a benchmark for the industry, mandate a minimum of 12 inches of unobstructed air space between the ground and the bottom of the joists for standard installations.
If your design requires a low-clearance deck (less than 12 inches from the ground), you must take specialized engineering steps:
- Use a gravel base or concrete pad beneath the deck to prevent ground moisture from wicking up into the substructure.
- Ensure open perimeter skirting to allow lateral airflow.
- Reduce joist spacing to 12 inches OC regardless of the board installation angle, as low-clearance decks experience higher humidity and temperature differentials.
- Consider transitioning to a non-wood substructure, such as adjustable pedestal systems paired with aluminum or steel joists, which are impervious to the high-moisture, low-airflow environment of low-profile decks.
By treating the composite decking substructure as a precision-engineered system rather than a standard wood deck frame, you eliminate the primary failure points of composite installations. Strict adherence to 12-inch or 16-inch OC spacing, mandatory butyl flashing, and G185 galvanized hardware will ensure the substructure outlasts the 25-to-50-year fade and stain warranties provided by modern composite manufacturers.