How to Install 5/4 Deck Boards: Joist Spacing and Fastener Guide
Learn the exact installation procedures for 5/4 deck boards, including optimal joist spacing, fastener selection, and expansion gap calculations.
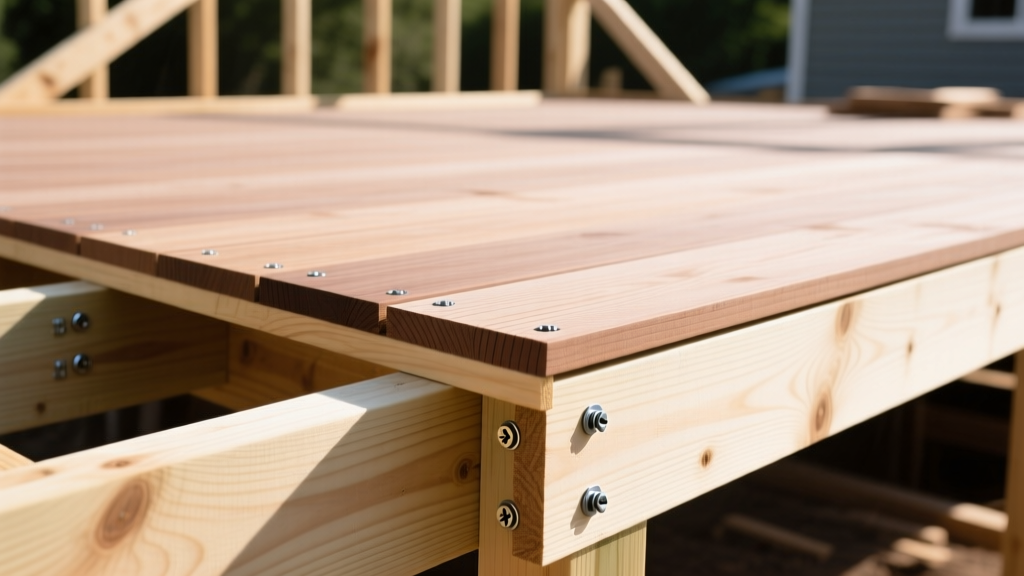
Understanding 5/4 Deck Board Dimensions and Material Properties
When procuring and installing 5/4 deck boards (pronounced "five-quarter"), the first critical step is recognizing the variance between nominal and actual dimensions. In the lumber industry, a nominal 5/4 x 6 board does not measure 1.25 inches by 6 inches. For pressure-treated Southern Yellow Pine or Cedar, the milled actual dimensions are typically 1 inch thick by 5.5 inches wide. However, if you are installing composite or PVC 5/4 decking, the actual width often shrinks to 5.36 inches or 5.25 inches to accommodate hidden fastener grooves.
This 0.25-inch to 0.14-inch discrepancy in width drastically alters your layout calculations over a 16-foot span. Failing to account for the actual milled width of your specific 5/4 material will result in a fractional board rip-cut at the fascia edge, compromising the structural integrity and aesthetic symmetry of the deck perimeter.
Before laying any 5/4 deck boards, ensure all horizontal joist surfaces are covered with butyl joist tape. According to the American Wood Council's DCA 6 Prescriptive Residential Deck Construction Guide, unprotected joists trap moisture against the bottom of the 5/4 boards, accelerating rot in wood and causing mold accumulation in composite grooves.
Pre-Installation: Joist Spacing and Framing Tolerances
The maximum allowable joist spacing for 5/4 deck boards is strictly dictated by the material composition and the installation angle. Exceeding these spans will cause excessive deflection, leading to a spongy feel and eventual fastener failure.
| Material Type | Perpendicular (90°) | Diagonal (45°) | Minimum Fastener Count per Joist |
|---|---|---|---|
| Pressure-Treated Wood (No. 2 Grade) | 16 inches | 12 inches | 2 |
| Capped Wood-Composite | 16 inches | 12 inches | 2 (or hidden clips) |
| Hollow PVC / Mineral-Based | 12 to 16 inches* | 12 inches | 2 |
| Tropical Hardwood (Ipe, Cumaru) | 16 inches | 12 inches | 2 (pre-drilled) |
*Note: Always verify the specific manufacturer's span table. Some mineral-based composites allow 16" OC, while certain hollow PVC profiles mandate 12" OC for residential applications.
Acclimation and Board Layout Strategy
Wood and composite materials react differently to ambient job-site conditions. Pressure-treated 5/4 pine is often installed "wet" directly from the treatment plant. If installed tightly, these boards will shrink up to 1/4 inch in width as they cure, opening massive gaps. Conversely, kiln-dried hardwoods and composites must acclimate to the site's ambient temperature and humidity for 48 to 72 hours before fastening to prevent post-installation expansion and buckling.
The Chalk Line Snap Method
Never rely on the outer rim joist as a straight reference for your first 5/4 board. Rim joists often bow or crown. Instead, measure out 5.5 inches (or the exact actual width of your board) from the outer edge of the framing at 3-foot intervals. Snap a chalk line and align the first board to this line, allowing a uniform 1/8-inch overhang past the rim joist to hide framing imperfections and provide a clean edge for routing later.
Step-by-Step Fastening Procedure
Proper fastening prevents cupping, warping, and the dreaded "nail pop" or screw back-out. Follow this sequence for face-screwing 5/4 wood or composite boards:
- Pre-Drilling End Zones: When driving face screws within 1 inch of the board's end or edge, you must pre-drill a pilot hole using a 5/32-inch bit. This prevents the wood fibers from splitting or the composite cap from mushrooming and fracturing.
- Fastener Selection: Use #9 or #10 coated deck screws, minimum 3 inches in length. For coastal or high-humidity zones, mandate 304 or 316 stainless steel screws to prevent tannin staining (black streaks) on the 5/4 board surface.
- Driving Technique: Drive two screws per joist intersection. Place the screws 3/4 inch in from each edge of the 5/4 board. Do not over-drive; the screw head should sit flush with the surface. Over-driving crushes the wood fibers or breaches the polymer cap on composite boards, creating a moisture pocket.
- Gap Spacing (The Dime Rule): Maintain a consistent side-to-side gap between 5/4 boards. For wet pressure-treated wood, install boards tight (they will shrink to 1/8" or 3/16"). For kiln-dried wood and composites, use a 16d nail or a specialized 3/16-inch spacing jig to maintain the gap during installation.
Fastener System Comparison Matrix
Selecting the right fastening system impacts both the installation speed and the long-term maintenance of the deck surface.
Face Screws (Top-Down)
- Cost: $0.08 - $0.15 per fastener
- Install Speed: Fast (approx. 45 sec/board)
- Best For: Pressure-treated wood, tight budgets
- Drawback: Visible holes; water ingress points
Hidden Side Clips
- Cost: $1.80 - $2.50 per linear foot
- Install Speed: Moderate (requires grooved boards)
- Best For: Composite/PVC 5/4 decking
- Drawback: Difficult to replace a single middle board
Top-Down Hidden (e.g., Cortex)
- Cost: $0.85 - $1.10 per fastener
- Install Speed: Slow (drill, set, plug)
- Best For: PVC, Hardwoods, premium finishes
- Drawback: High labor cost; plugs can pop in freeze/thaw
Managing Thermal Expansion and End Joints
Unlike wood, which expands and contracts primarily across its width due to moisture, composite and PVC 5/4 deck boards expand and contract longitudinally (along their length) due to thermal fluctuations. According to Trex installation specifications, a 16-foot composite board can expand or contract up to 1/8 inch for every 20°F change in temperature.
End Joint Protocol: When butting two 5/4 boards end-to-end over a joist, never leave them floating. Both boards must be fastened to the same joist. If installing on a hot day (above 80°F), butt the composite ends tightly together; they will shrink and open a clean gap in winter. If installing on a cold day (below 40°F), leave a 1/8-inch gap between the ends to prevent them from buckling against each other when summer heat hits.
Bevel Cuts for Aesthetics
For wood 5/4 boards, end joints should be cut at opposing 45-degree miters (a scarf joint) rather than square butt cuts. This ensures that if the wood shrinks longitudinally, the joint slides along the bevel rather than opening a highly visible, uneven vertical gap. Always apply a coat of end-sealant (like Anchorseal) to the exposed end grain of hardwoods and pressure-treated pine to prevent rapid moisture loss and end-checking (splitting).
Common Installation Failures and Troubleshooting
Cause: Improper grain orientation during installation or lack of underside ventilation.
Fix: For wood boards, always install them "bark side up" (growth rings curving downward like a smile) so water sheds off the edges. Ensure the deck substructure has at least 18 inches of clear ventilation to the ground to equalize moisture content on the top and bottom of the board.
Cause: Using smooth-shank nails or under-sized screws, or driving screws into the pith (center core) of the tree.
Fix: Remove the popped fastener. Pre-drill a new hole 1 inch away from the original hole and drive a #10 x 3-inch structural deck screw with a threaded shank that extends all the way to the head.
Cause: Exceeding the manufacturer's maximum span or failing to account for thermal expansion at the end joints.
Fix: Install supplementary blocking between the joists to reduce the span from 16" OC to 12" OC. Cut 1/4 inch off the ends of the buckled boards to provide adequate thermal relief space against the fascia or adjacent boards.