How to Install Deck Privacy Panels on Composite Railings
Learn how to securely install deck privacy panels on composite and wood railings. Includes post mounting, wind load tips, and 2026 material costs.
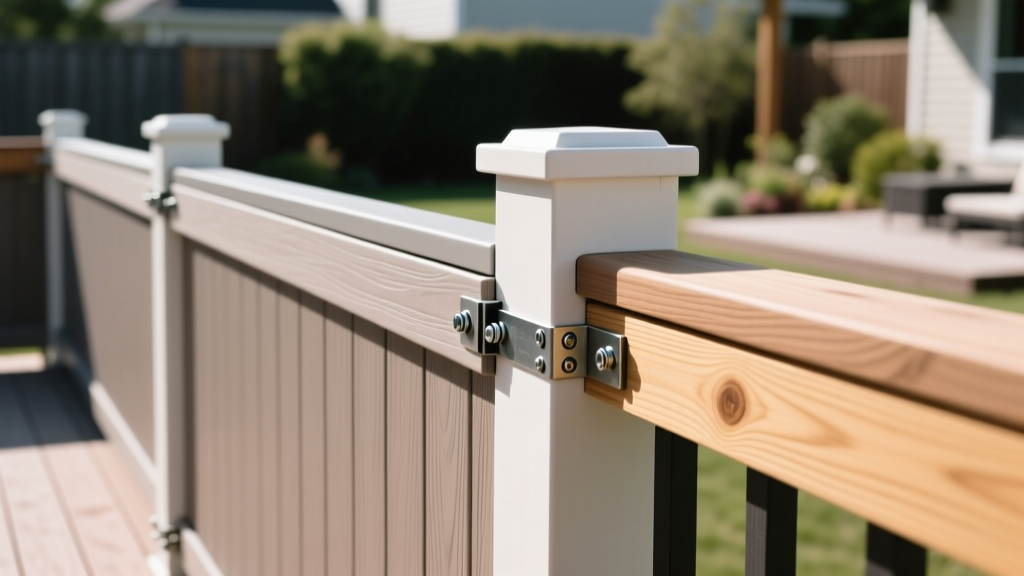
Pre-Installation Assessment & Wind Load Calculations
Installing deck privacy panels introduces a significant structural variable to your outdoor space: the sail effect. Unlike open balustrades, solid or semi-solid privacy panels catch wind, transferring immense lateral force to your deck's railing posts and framing. According to the American Wood Council's Deck Construction Guide, standard 4x4 railing posts are typically engineered to handle a 200-pound concentrated load applied horizontally. However, a solid 6-foot by 6-foot privacy panel subjected to 90 mph wind gusts can generate over 150 pounds of sustained lateral pressure across its entire surface area, creating a lever-arm effect that can snap unblocked posts at the base.
Before purchasing materials, verify your local building department's specific wind speed requirements. In coastal or high-wind zones (where ultimate design wind speeds exceed 115 mph), semi-solid panels with louvered or spaced slats are strongly recommended over fully solid composite panels to allow wind passage and reduce structural strain.
Material & Hardware Selection Matrix
Choosing the correct mounting hardware is just as critical as selecting the panel material. Composite and aluminum panels expand and contract at different rates, requiring specific fastening strategies to prevent binding, buckling, or hardware shear.
| Panel Material | Weight (per 6x6 panel) | Thermal Expansion Rate | Required Hardware & Mounting Strategy |
|---|---|---|---|
| Capped Composite (e.g., Trex, Fiberon) | 45 - 65 lbs | High (~1/16" per 10°F per 10 ft) | Hidden U-channel brackets with 316 stainless steel screws. Must leave 1/4" expansion gap at lateral edges. |
| Extruded Aluminum (e.g., Aeratis, Trex Aluminum) | 20 - 30 lbs | Low (Negligible for residential spans) | Self-tapping aluminum structural screws or rivet-nut inserts. Can be face-mounted or flush-mounted. |
| Hardwood (e.g., Ipe, Cumaru) | 70 - 90 lbs | Low (Swells with moisture, not heat) | Hot-dipped galvanized or polymer-coated structural screws (e.g., FastenMaster HeadLok). Pre-drilling mandatory. |
Never use standard zinc-plated deck screws to mount privacy panel brackets. The zinc coating will degrade within three to five years when exposed to outdoor moisture, leading to rust streaks on your composite panels and eventual structural failure. Always specify 316 marine-grade stainless steel or polymer-coated structural fasteners rated for outdoor use.
Step-by-Step Installation Procedure
The following procedure applies to mounting composite deck privacy panels to existing composite or wood railing systems. For detailed manufacturer-specific tolerances, always cross-reference the Trex Railing Installation Guide or your specific brand's documentation.
Step 1: Post Reinforcement and Blocking
Locate the railing posts where the privacy panel will be mounted. If the deck is already built, access the framing from below or remove the deck boards immediately adjacent to the post. Install solid 2x8 blocking between the joists directly beneath the post. Secure the blocking with 3-inch structural screws. This prevents the post from twisting under the torsional load of the privacy panel. If using a surface-mounted post, ensure the Simpson Strong-Tie post base is fastened with through-bolts rather than just lag screws.
Step 2: Bracket Alignment and Mounting
- Mark the Layout: Use a laser level to mark the exact height for the bottom and top mounting brackets. The bottom bracket should be positioned exactly 1.5 inches above the deck surface to allow for water drainage and debris clearance.
- Pre-Drill the Posts: If drilling into composite post sleeves, use a 1/8-inch titanium drill bit. Drilling without a pilot hole will cause the composite cap to blow out or crack, compromising the waterproof seal.
- Secure the Brackets: Attach the heavy-duty aluminum or composite U-channel brackets using 2.5-inch 316 stainless steel structural screws. Drive the screws until the head is flush with the bracket, but do not over-torque, which can warp the aluminum channel.
Step 3: Panel Hanging and Expansion Gaps
Lift the privacy panel into the mounted U-channels. This typically requires two people, as a 6x6 composite panel can weigh over 60 pounds and is awkward to maneuver. Slide the panel down into the bottom channel and push it flush against the side channel. Critical: Do not force the panel tightly against the opposite side bracket. You must leave a minimum 1/4-inch gap on the non-fixed lateral side to accommodate thermal expansion during peak summer temperatures. Secure the top bracket cap using the provided color-matched composite plug screws.
Common Installation Failure Modes & Troubleshooting
Even experienced contractors make specific errors when transitioning from standard railings to privacy screens. Review these failure modes to ensure your installation lasts.
- Failure Mode: Panel Rattling in High Winds.
Cause: The panel was cut 1/2 inch too short, creating excessive play inside the U-channel brackets.
Fix: Insert closed-cell foam backer rod into the gap between the panel edge and the bracket. This provides a friction fit that dampens vibration without restricting thermal expansion. - Failure Mode: Water Staining at the Base.
Cause: The bottom rail channel was installed flush against the deck boards, trapping rainwater and causing the composite core to wick moisture.
Fix: Remove the bottom bracket, route a 1/4-inch weep channel into the bottom of the composite panel, and reinstall the bracket with 1.5 inches of vertical clearance from the decking. - Failure Mode: Visible Screw Heads on the Finished Side.
Cause: Using face-mounting brackets instead of hidden U-channel systems.
Fix: Always specify hidden fastening bracket kits (often sold as "Privacy Panel Mounting Kits" by the decking manufacturer) which secure the panel from the edges and top cap, leaving the primary viewing side completely smooth.
2026 Cost Breakdown for Privacy Panel Installation
Budgeting for deck privacy panels requires accounting for both the panel material and the specialized structural hardware required to support it. The following table outlines average market costs for a standard 6-foot by 6-foot installation in 2026.
| Component | Material Type | Estimated Cost Range (2026) |
|---|---|---|
| Privacy Panel (6x6) | Capped Composite | $280 - $450 |
| Privacy Panel (6x6) | Extruded Aluminum | $190 - $320 |
| Hidden Mounting Hardware Kit | Aluminum Brackets + SS Screws | $55 - $95 |
| Post Reinforcement Blocking | Pressure-Treated 2x8 + Structural Screws | $25 - $40 |
| Professional Installation Labor | Per Panel (2-3 hours) | $150 - $250 |
For a standard 12x16 deck requiring three 6x6 privacy panels to shield a neighboring property line, expect total material and hardware costs to range between $1,100 and $1,750, with an additional $450 to $750 for professional installation.
Frequently Asked Questions
Can I attach privacy panels directly to existing glass or cable railings?
No. Glass and cable railing systems are engineered strictly for vertical and minimal lateral loads. The wind load generated by a solid privacy panel will shatter glass infill or snap cable tensioners. Privacy panels must be mounted to independent, structurally reinforced 4x4 or 6x6 posts that transfer the load directly to the deck joists.
Do I need a permit to install deck privacy panels?
In most municipalities, adding privacy panels to an existing, code-compliant deck railing does not require a separate building permit, provided the panels do not exceed the maximum allowable railing height (typically 42 inches for residential decks, though some jurisdictions allow privacy screens up to 6 or 8 feet if they are set back from the deck edge). Always verify with your local zoning office regarding sightline triangles and lot-line setback restrictions before installation.
How do I clean composite privacy panels without damaging the cap?
Use a soft-bristle brush and a solution of warm water mixed with a mild, non-abrasive detergent (such as Simple Green or a dedicated composite deck cleaner). Never use a pressure washer on a setting above 1,500 PSI, and keep the nozzle at least 12 inches from the surface. High-pressure water can etch the protective polymer cap, exposing the wood-flour core to moisture and UV degradation.