How to Install Popular Deck Railing Materials: A Pro's Step Guide
Master the installation of wood, composite, and aluminum deck railing materials with precise measurements, post-mounting techniques, and pro tips.

Pre-Installation Code & Load Requirements (The 200-lb Rule)
Before unboxing your deck railing materials, you must understand the structural demands placed on guardrails. According to the International Residential Code (IRC) Section R507.10, any deck surface located more than 30 inches above the surrounding grade requires a guardrail. The critical metric for installation is the 200-pound concentrated load requirement. This means your railing system must withstand 200 lbs of force applied in any direction (downward or outward) at any point along the top rail without yielding.
For comprehensive framing and fastening specifications, always cross-reference your local amendments with the American Wood Council's DCA-6 Prescriptive Residential Wood Deck Construction Guide, which remains the industry standard for structural integrity.
Material-Specific Post Mounting Matrix
The mounting strategy shifts dramatically depending on the deck railing materials you select. Composite and wood require robust internal blocking, while aluminum and cable systems often rely on specialized base shoes or tension anchors. Use the matrix below to plan your structural prep.
| Railing Material | Standard Post Size | Required Fastener Spec | Blocking Requirement |
|---|---|---|---|
| Pressure-Treated Wood | 4x4 or 6x6 | 1/2" x 6-3/4" Structural Bolts (e.g., ThruLok) | Mandatory 2x8 solid blocking between joists |
| Composite (Capped) | 4x4 (with composite sleeve) | 1/2" x 5" Galvanized Lag Screws or Structural Screws | Mandatory 2x8 solid blocking, flush to joist top |
| Aluminum Panel | 2x2 or 2.5" Aluminum Post | 3/8" Stainless Steel Carriage Bolts with Base Shoe | Recommended 2x6 blocking for base shoe anchoring |
| Cable (Marine-Grade) | 4x4 Wood or 2" Metal | 1/2" Through-Bolts with Swage Fittings | Mandatory double 2x8 blocking (high tension load) |
Step-by-Step Installation: Wood and Composite Deck Railing Materials
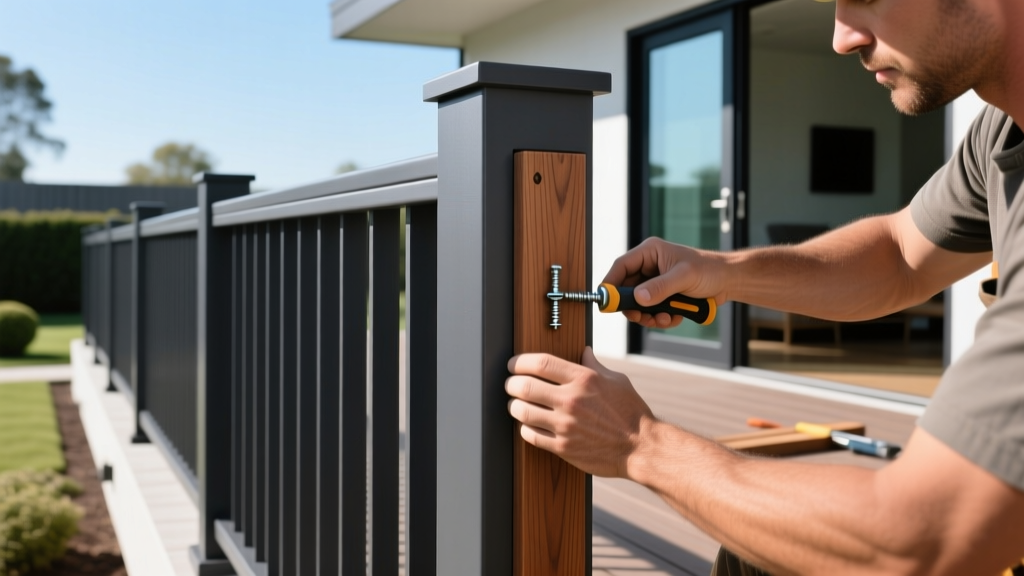
Wood and composite railings share a similar structural skeleton. The most common failure point in these systems is post wobble caused by relying solely on the rim joist. Follow these steps to ensure a rigid, code-compliant installation.
- Install Solid Blocking: Before laying your decking boards, install 2x8 solid blocking between the joists wherever a railing post will be located. The blocking must be tight against the rim joist and fastened with structural screws (like Simpson Strong-Tie SDWS). This prevents the rim joist from rolling outward under the 200-lb lateral load.
- Notch or Flush-Mount the Post: For 4x4 wood posts, notching the post to fit over the joist and blocking is acceptable, but never rely on nails. For composite sleeves, mount the 4x4 structural wood post flush against the outside of the rim joist. Ensure the post is perfectly plumb using a torpedo level on two adjacent sides.
- Secure with Structural Bolts: Drill a 1/2-inch hole through the post, rim joist, and blocking. Insert a 1/2" x 6-3/4" structural bolt (such as FastenMaster ThruLok). Use a ratchet wrench to tighten the hex nut until the washer bites into the wood, but stop before crushing the wood fibers. Never use standard lag bolts into end-grain or unblocked rim joists.
- Attach the Bottom and Top Rails: Slide the composite sleeves over the 4x4 posts. Using the manufacturer's specific bracket kits (e.g., Trex Universal Post Sleeve Hardware), attach the bottom rail brackets. Ensure the bottom rail maintains a maximum 4-inch gap from the deck surface. Fasten the top rail using the provided color-matched composite screws, pre-drilling to prevent the cap stock from mushrooming.
- Install Balusters and Post Caps: Snap a chalk line to ensure uniform baluster spacing. Fasten balusters using stainless steel trim-head screws to prevent rust streaking. Finally, apply a bead of exterior-grade silicone under the post cap before pressing it into place to prevent water infiltration and wind uplift.
Step-by-Step Installation: Aluminum and Cable Systems
Aluminum and cable deck railing materials require an entirely different approach, focusing on precision cutting, non-ferrous tooling, and mechanical tensioning rather than heavy timber framing.
Cutting and Fitting Aluminum Rails
Aluminum rails are typically pre-routed and come in standardized 6-foot or 8-foot lengths. When cutting aluminum to fit your specific span, never use a standard wood-cutting blade. The aggressive hook angle will grab the aluminum, causing dangerous kickback and severe burring. Instead, equip your miter saw with an 80-tooth or 100-tooth carbide-tipped non-ferrous metal cutting blade. Apply a light wax lubricant to the blade before cutting to ensure a clean, burr-free edge that slides perfectly into the post brackets. Always deburr the cut edge with a fine metal file before inserting the baluster locks.
Tensioning Cable Railings
Cable railings utilize 316 marine-grade stainless steel wire (typically 1/8" or 3/16" diameter). The structural integrity of this system relies entirely on post rigidity and proper swaging.
- Drilling Jigs: Use the manufacturer's drill jig to mark your post holes. Holes must be perfectly level; even a 2-degree variance will cause the cables to sag unevenly across a long span.
- Swaging Fittings: Thread the cable through the terminal end and the swage sleeve. Use a hydraulic swaging tool for a uniform crimp. Manual hand-crimpers often result in ovalized sleeves that slip under high tension.
- Tension Limits: Cables should be tensioned to approximately 150-200 lbs. Over-tensioning (pulling cables "guitar-string tight") will bow your 4x4 posts inward, ruining the structural alignment and violating the 4-inch sphere rule by pulling the top and bottom rails together.
Troubleshooting Common Installation Failures
Even experienced installers encounter issues when working with diverse deck railing materials. Use this diagnostic table to identify and rectify common field problems.
| Symptom | Root Cause | Pro Fix |
|---|---|---|
| Post wobbles laterally when pushed | Missing internal blocking; rim joist is rolling. | Retrofit 2x8 blocking using structural screws driven at an angle (toe-screwed) into the joist and rim board. |
| Composite balusters rattle in the wind | Thermal contraction widened the routing slots. | Inject a small bead of clear exterior silicone into the baluster shoe or use manufacturer-specific rubber gaskets. |
| Aluminum top rail feels loose at the joint | Internal splice key was not fully seated before tightening. | Loosen the set screw, tap the splice key with a rubber mallet until flush, then re-tighten using a hex driver. |
| Cable railing sags in the middle of the span | Posts bowed inward from over-tensioning adjacent cables. | Release tension on all cables. Install a temporary 2x4 spreader between posts, re-tension evenly to 150 lbs, then remove spreader. |
Final Inspection & Maintenance Checklist
Before signing off on the project, conduct a rigorous physical inspection. The North American Deck and Railing Association (NADRA) emphasizes that railing failures are among the most catastrophic deck-related accidents, making final verification non-negotiable.
"A guardrail is only as strong as its weakest connection. Inspect every fastener, bracket, and swage fitting before allowing foot traffic on the elevated surface."
- The 200-lb Push Test: Apply firm, heavy body weight against the top rail at the mid-span and at the post connections. There should be zero lateral deflection at the base.
- The 4-Inch Sphere Check: Pass a 4-inch diameter physical sphere (or a cut piece of 4" PVC pipe) through all baluster gaps and the gap between the bottom rail and the deck boards.
- Hardware Verification: Ensure no standard zinc-plated interior screws were used. All exposed fasteners must be hot-dipped galvanized, stainless steel, or manufacturer-coated exterior grade.
- Clean-Up: Wipe down composite rails with a mild soap solution to remove installation dirt. Never use acetone or harsh solvents on composite materials, as this will strip the protective polymer cap and lead to premature UV fading.
By adhering to these material-specific protocols and structural codes, your deck railing installation will not only pass municipal inspections but will provide decades of safe, maintenance-free performance.
Written by
Sarah WhitfieldSarah Whitfield is a chartered quantity surveyor (MRICS) and construction cost analyst with 15 years of experience in material pricing, procurement strategy, and project budgeting. She earned her degree in Construction Management from the University of Reading (UK) and has worked on projects ranging from $2M custom homes to $180M mixed-use developments across North America and Europe. Sarah currently leads cost estimating for BuildMat Insight, maintaining a proprietary database of 4,000+ material price points updated quarterly. She is a frequent contributor to RSMeans cost data panels and has presented at the International Cost Engineering Council (ICEC) congress. Based in Denver, CO, Sarah is an avid trail runner and volunteer mentor for Women in Construction.
More from Sarah Whitfield
View all
Wood & Lumber
What Are the Different Types of Wood? A Builder's Guide
Compare structural softwoods, finish hardwoods, and engineered lumber. Analyze Janka ratings, MOE values, and 2026 pricing for construction.
Aug 4, 2026

Walls & Panels
Steel Framing vs Wood Framing: Corrosion and Moisture Defense
Compare steel framing vs wood framing for moisture resistance. Learn about galvanized coatings, condensation risks, and corrosion protection strategies.
Jul 21, 2026

Stone & Masonry
How to Cut Stone Veneer: Wet Saw vs Grinder Comparison
Compare the best tools for cutting stone veneer. We review wet saws, angle grinders, and chop saws to help you achieve clean, chip-free cuts.
Jul 21, 2026