Install Plastic Deck Material: Framing, Spacing, and Fastening Guide
Master plastic deck material installation with our expert guide on PVC and HDPE framing, thermal expansion spacing, and hidden fastener techniques.

Defining the Material: PVC vs. HDPE vs. Composite
Before unloading the first board, it is critical to distinguish true plastic deck material from wood-plastic composites (WPC). While WPC contains wood fibers, pure plastic decking is manufactured from either Cellular Polyvinyl Chloride (PVC) or High-Density Polyethylene (HDPE). This distinction dictates your entire installation strategy. PVC boards (such as TimberTech Advanced PVC or AZEK) are rigid, lightweight, and feature a capped polymer shell. HDPE boards (like Lumberock or Tangent) are heavier, more flexible, and possess a significantly higher coefficient of thermal expansion. Treating HDPE like PVC during installation will result in catastrophic buckling in summer or fastener pull-through in winter.
Cellular PVC expands primarily in length at a rate of approximately 1/16 inch per 10°F per 10 feet of board. HDPE expands at nearly double that rate and also experiences lateral (width) expansion. You must calculate your gap spacing based on the ambient temperature on the exact day of installation, not the seasonal average.
Substructure Preparation and Joist Spacing
Plastic decking does not contribute to the structural integrity of the deck frame; it acts purely as a wearing surface. Because plastic materials lack the shear strength of natural wood or dense composites, your substructure must be over-engineered to prevent sagging. According to the North American Deck and Railing Association (NADRA), all joists must be perfectly level, as plastic boards will telegraph any unevenness in the framing.
Joist Spacing Matrix by Material Type
| Material Type | Standard Joist Spacing (OC) | Diagonal Layout Spacing (OC) | Minimum Joist Size |
|---|---|---|---|
| Capped Cellular PVC | 16 inches | 12 inches | 2x6 or 2x8 |
| Solid HDPE Plastic | 12 inches (Strict Max) | 10 inches | 2x8 minimum |
Protecting the wood substructure is non-negotiable. Apply a high-quality butyl flashing tape (such as Trex Protect or Grace Vycor) to the top of every joist. This prevents moisture intrusion and protects the wood from the corrosive effects of trapped water beneath the impermeable plastic boards. Ensure your framing lumber meets the American Wood Protection Association (AWPA) UC4A or UC4B standards for ground-contact or above-ground decay resistance, depending on your deck's clearance from the soil.
Fastening Methodologies: Hidden vs. Face
Because plastic decking expands and contracts significantly, the fastening system must allow for longitudinal movement while securing the board laterally. Never use rigid nails or smooth-shank screws.
Fastener Comparison Framework
- Hidden Clip Systems (Recommended for PVC): Stainless steel clips (e.g., TimberTech CONCEALoc or Tiger Claw TC-G) seat into pre-routed grooves. They provide a clean, fastener-free surface and naturally accommodate 1/8-inch lateral movement. Limitation: Cannot be used on the outermost perimeter boards or stair treads without specialized starting clips.
- Cortex Hidden Fastening System (Best for Perimeters & Stairs): This system uses a specialized torque-setting screw to pull the board tight, followed by a PVC plug made from the exact same deck material. The plug is fused using a proprietary bonding agent, creating a completely invisible face-fastened joint that moves monolithically with the board.
- Face Screws (HDPE Specific): If face-screwing HDPE, you must use 305 or 316-grade stainless steel screws with a reverse-thread tip to prevent the soft plastic from 'mushrooming' around the screw head. Pre-drilling is mandatory within 2 inches of any board end to prevent splitting.
Step-by-Step Board Placement and Gap Calculation
Follow this precise sequence to ensure structural stability and proper thermal accommodation.
- Acclimate the Material: Store the plastic boards flat on the job site for at least 48 hours prior to installation. Keep them out of direct sunlight during storage to prevent premature thermal expansion before fastening.
- Establish the Starter Line: Snap a chalk line exactly 1/2 inch from the house ledger board. This gap is vital for drainage and preventing moisture wicking into the home's exterior cladding.
- Calculate the End Gaps: Use the manufacturer's thermal expansion chart. If installing 20-foot PVC boards at 60°F, and the local summer high is 100°F (a 40°F swing), you must leave a minimum 1/4-inch gap at all butt joints and end walls. If installing at 90°F, boards can be placed nearly tight (1/16-inch gap).
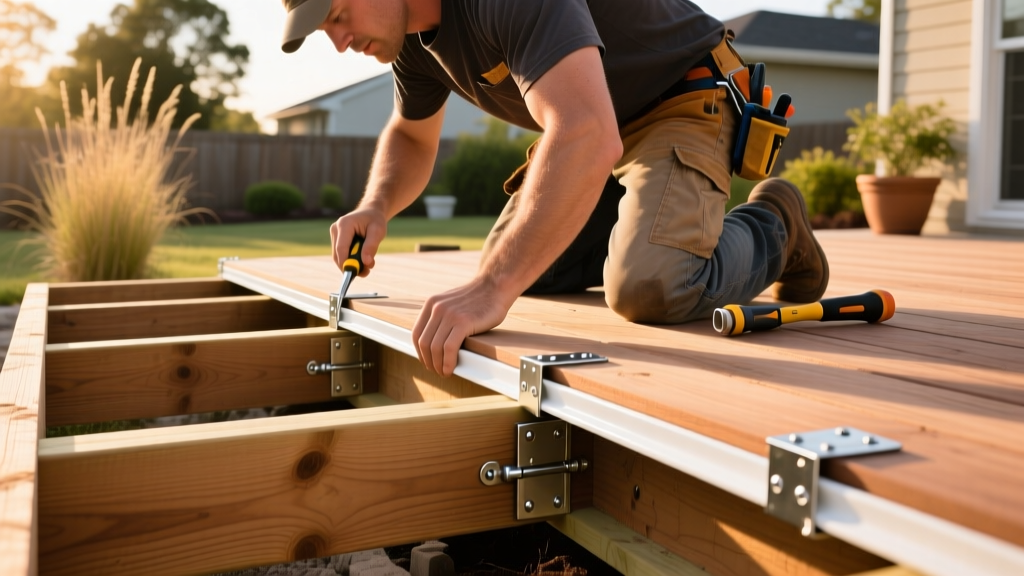
- Engage the Hidden Clips: Seat the hidden clips into the groove of the first board, driving the fastener into the joist at a 45-degree angle. Ensure the clip's spacer tab is flush against the board.
- Slide and Lock: Slide the next board's groove over the exposed clip tabs. Use a specialized composite/plastic board bender or a dead-blow mallet with a sacrificial wood block to tap the board into place. Never strike plastic decking directly with a metal hammer.
- Maintain Lateral Spacing: Most hidden clips automatically set a 3/16-inch to 1/4-inch lateral gap between boards. Do not force boards tighter than the clip allows, as this restricts drainage and invites mold growth in shaded areas.
Managing Long Runs and Miter Joints
Plastic decking presents unique challenges for runs exceeding 20 feet and for decorative picture-framing.
The Scarf Joint Solution
When two boards must meet end-to-end on a single joist, avoid straight 90-degree butt joints. Plastic ends expand and contract visibly, causing straight butt joints to open and close like an accordion. Instead, cut a 45-degree scarf joint. Overlap the two angled cuts, securing the top board with Cortex PVC plugs. As the boards expand and contract, the angled seam slides over itself, maintaining a visually continuous line without exposing the substructure.
Picture Framing and Miter Corners
When mitering corners for a picture-frame border, the intersecting boards will move in perpendicular directions. This will inevitably cause the miter point to open or overlap. To mitigate this, secure the miter joint using a concealed biscuit jointer and exterior-grade polyurethane adhesive (such as Loctite PL Premium) combined with stainless steel trim screws driven from the bottom up. This locks the corner geometry while allowing the tails of the boards to expand freely away from the joint.
Troubleshooting Common Installation Failures
Cause: Boards were installed too tightly against fixed structures (like house walls or fascia) on a cold day, with no expansion gap provided.
Fix: Immediately remove the perimeter fasteners and cut a 1/2-inch relief gap using a track saw. Install a flexible PVC crush-block at 24-inch intervals inside the gap to maintain spacing while allowing expansion.
Cause: Using standard wood screws or failing to pre-drill HDPE material, causing the soft plastic to displace upward around the screw head.
Fix: Switch to reverse-threaded composite screws (e.g., GRK Kameleon) that pull the displaced material back down into the hole, or use a specialized countersink bit designed specifically for cellular PVC prior to driving the fastener.
Adhering to the International Code Council (ICC) residential deck building standards and respecting the unique thermal properties of pure plastic materials will ensure your deck remains structurally sound and visually flawless for decades. Always defer to the specific Installation and Care Guide provided by your exact board manufacturer, as polymer formulations and clip tolerances vary slightly between brands.
Written by
Priya KapoorPriya Kapoor is a real estate market analyst and construction economics researcher with expertise in housing affordability, development feasibility, and infrastructure investment. She holds a Master of Regional Planning from Cornell University and previously worked as a senior analyst at CBRE's Investment Properties group, where she modeled returns for $4B in mixed-use development pipelines. Priya now runs an independent research practice advising developers, municipalities, and REITs on construction cost forecasting and market timing. She publishes the quarterly "BuildMat Market Pulse" report tracking material price indices across 12 commodity categories. Based in Austin, TX, Priya serves on the board of Habitat for Humanity Austin and is a marathon runner.
More from Priya Kapoor
View all
Construction Cost
Cost to Build a 1600 Sq Ft Home in 2026: Full Breakdown
Accurate 2026 cost to build a 1600 sq ft home—material, labor, and regional pricing breakdowns included. Plan your budget with real-time estimates.
Aug 11, 2026

Wood & Lumber
Name the Types of Wood for Pressure Treatment and Preservation
Learn how to name the types of wood best suited for pressure treatment. Compare species treatability, chemical retention levels, and 2026 preservation costs.
Aug 4, 2026

Stone & Masonry
Stone Veneer Suppliers Lindenhurst: 2026 Cost Analysis
Analyze 2026 stone veneer costs in Lindenhurst, NY. Compare local supplier pricing, delivery fees, and Suffolk County installation labor rates.
Aug 4, 2026