Smart Deck Installation: Matching Methods to Site Scenarios
Match your deck installation method to site conditions. Compare foundations, fasteners, and framing for clay, sand, and coastal climates.
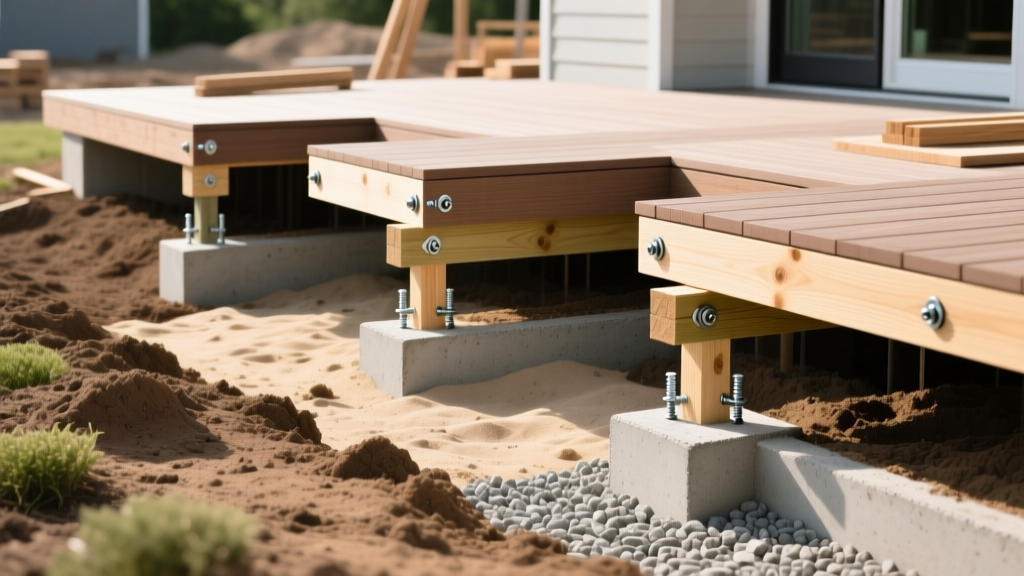
The Foundation Matrix: Matching Substructure to Soil and Frost
A successful deck installation begins below grade. The most common structural failure in outdoor builds stems from applying a uniform foundation strategy to variable soil conditions and frost lines. According to the American Wood Council's DCA 6 guidelines, footings must extend below the local frost line to prevent heaving, but the specific hardware and pier type must adapt to the soil's bearing capacity.
| Soil Scenario | Frost Risk | Recommended Foundation | Critical Hardware Spec |
|---|---|---|---|
| Expansive Clay | High Heave | Helical Piles (e.g., Techno Metal Post) | G185 Galvanized or Stainless brackets |
| Sandy / Loam | Low Heave | Precast Concrete Deck Blocks (Floating) | Direct wood bearing; no metal-to-earth |
| Solid Bedrock | N/A | Surface-mounted Pedestals or Drilled Piers | 1/2" x 4" Stainless Wedge Anchors |
| High Water Table / Wetlands | Variable | Driven Steel Pipe Piles with Concrete Caps | Hot-dipped galvanized post bases (ZMAX) |
For expansive clay soils, traditional poured concrete sonotubes often fail because the clay grips the smooth concrete cylinder and lifts it during freeze-thaw cycles. Helical piles bypass this by screwing past the active frost zone and relying on the bearing plates for support, completely eliminating the friction-lift failure mode.
Climate-Driven Framing and Fastener Selection
The ambient environment dictates the corrosion resistance required for your deck installation hardware. Using standard zinc-coated screws in a coastal or high-humidity environment will result in catastrophic fastener failure within 3 to 5 years.
Beyond fasteners, climate impacts the framing lumber itself. In high-termite and high-moisture zones (like the US Southeast), standard pressure-treated Southern Yellow Pine (SPF) may not suffice. Specify UC4B or UC4C ground-contact rated borate-treated lumber for any framing members within 18 inches of the soil. Furthermore, apply a butyl-based joist tape (such as Trex Protect) to the top edge of all joists before laying deck boards. This prevents water pooling in the screw holes, extending the life of the substructure by an estimated 15 to 20 years.
Elevation and Load Scenarios: Floating vs. Structurally Attached
Deciding between a floating deck (unattached to the house) and a ledger-attached deck depends on the home's structural envelope and the site's slope. The DCA 6 standard mandates a minimum uniform live load of 50 psf (pounds per square foot) and a dead load of 10 psf for residential decks.
- Scenario A: Flat Grade, Brick Veneer Home. Never attach a ledger board to brick veneer; the veneer cannot support the sheer load. Install a freestanding floating deck using deck blocks, maintaining a 1-inch gap between the deck fascia and the home's siding to prevent moisture trapping.
- Scenario B: Sloped Grade, Wood-Framed Home. Use a structurally attached ledger board with 1/2" galvanized lag screws driven into the house's rim joist. Install continuous metal flashing behind the home's weather-resistant barrier (WRB) and over the ledger board to prevent water intrusion into the floor system.
- Scenario C: Deep Frost Line, Unheated Crawlspace. If the home's foundation is shallow and the deck footings must be deep (e.g., 48 inches in the Midwest), an attached deck will experience differential frost heave. The deck will push against the house in winter. Opt for a freestanding design with independent footings.
Thermal Expansion Tolerances by Material
Material selection fundamentally alters the installation sequence, specifically regarding gapping. Wood expands primarily across the grain (width), while synthetic materials expand along the grain (length). Failing to account for the installation day's temperature results in buckled boards in summer or massive gaps in winter.
| Decking Material | Primary Expansion Axis | Gap Required (Installed at 40°F) | Gap Required (Installed at 80°F) |
|---|---|---|---|
| Pressure-Treated Wood | Width (Cross-grain) | 1/8" (Tight, will shrink as it dries) | 1/4" (Allows for swelling if wet) |
| Capped Composite (e.g., Trex) | Length (End-to-end) | 3/8" End Gap | 1/8" End Gap |
| Cellular PVC (e.g., Azek) | Length (End-to-end) | 1/2" End Gap | 3/16" End Gap |
| Aluminum Decking | Length (Minimal) | 1/16" End Gap | 1/16" End Gap |
Joist Spacing and Diagonal Layout Adjustments
The orientation of your deck boards dictates the required joist spacing. While standard wood decking can span 16 inches on-center (OC) when laid perpendicular to the joists, diagonal installations increase the span distance by roughly 41%.
If you are installing composite decking diagonally, you must reduce the joist spacing from 16" OC to 12" OC to prevent sagging and bounce. For heavy-duty commercial applications or hot tub integration, drop the joist spacing to 8" OC and double the rim joists to handle the concentrated dead loads, which can exceed 100 psf when a spa is filled with water and occupants.
Scenario-Based Cost and Labor Timelines
Site conditions directly impact the labor hours and overall budget of a deck installation. Below is a breakdown of how different scenarios alter the baseline costs for a standard 400-square-foot (20x20) deck.
| Installation Scenario | Substructure Labor Hours | Cost Multiplier vs. Baseline | Primary Cost Driver |
|---|---|---|---|
| Flat grade, stable soil, floating | 12 - 16 hours | 1.0x (Baseline) | Pre-cast blocks, minimal digging |
| Sloped grade (3ft drop), attached | 28 - 36 hours | 1.6x | Deep sonotubes, extra bracing, stairs |
| Expansive clay, helical piles | 20 - 24 hours (with machinery) | 1.8x | Helical pile material and machine rental |
| Bedrock surface mount | 18 - 22 hours | 1.4x | Hammer drilling, epoxy anchors, shimming |
By accurately diagnosing your site's soil, climate, and elevation constraints before purchasing materials, you eliminate the risk of mid-build redesigns and ensure the structural longevity of the outdoor space. Always pull local building permits and verify the specific frost depth and wind uplift requirements with your municipal building department before breaking ground.