DIY Aluminum Fence Installation: Post Setting and Panel Alignment
Master DIY aluminum fence installation with our expert guide on concrete post setting, sloped yard racking, and precise panel alignment techniques.
Pre-Installation: Site Prep and Utility Clearance
Successful aluminum fence installation begins long before the first hole is dug. Aluminum fencing is highly unforgiving of layout errors; unlike wood, you cannot easily trim a rail or force a panel into an out-of-square opening. Begin by contacting your local utility marking service (call 811 in the US) at least 72 hours before breaking ground. This is a non-negotiable legal and safety requirement to avoid striking buried gas, water, or fiber-optic lines.
For the layout, abandon cheap cotton mason line, which sags and stretches in humidity. Use a 20-pound test braided synthetic string line. Pull the line taut between batter boards set at least 2 feet outside your corner posts. This ensures the string remains perfectly level and undisturbed while you operate a power auger or manual post-hole digger along the fence run. According to guidelines published by the American Fence Association (AFA), maintaining strict string-line tension is the primary factor in preventing the "wavy" top-rail effect that plagues amateur installations.
The Mathematics of Post Hole Depth and Spacing
Aluminum posts are typically hollow and lightweight, meaning they rely entirely on the concrete collar for structural stability and frost-heave resistance. The industry standard rule for hole diameter is three times the width of the post. A standard 2.5-inch line post requires a minimum 7.5-inch to 8-inch diameter hole. Depth is dictated by your local frost line; setting posts above the frost line guarantees that seasonal ground freezing will push the concrete collar upward, permanently ruining your fence's plumb alignment.
When using a manual digger or auger, flare the bottom 6 inches of the hole outward to create a bell shape. This wider base acts as a mechanical anchor. If frost grips the top of the concrete collar, the bell-bottom prevents the entire post from lifting out of the ground.
| Post Dimension | Hole Diameter | Min. Depth (Zone 4/5) | Min. Depth (Zone 6/7) | Concrete Yield (50lb bags) |
|---|---|---|---|---|
| 2" x 2" (Line Post) | 6" to 8" | 36" | 42" | 1.5 bags |
| 2.5" x 2.5" (Line/Terminal) | 8" to 10" | 36" | 48" | 2.0 bags |
| 3" x 3" (Gate/Hinge Post) | 10" to 12" | 42" | 48" | 3.0+ bags |
Step-by-Step Aluminum Fence Installation: Setting the Posts
Setting aluminum posts requires a different approach than heavy wood or steel. Because the posts are lightweight, the buoyancy of wet concrete can actually push them upward if not managed correctly. Follow this precise sequence for terminal (corner and end) posts first, then run your string line to set the intermediate line posts.
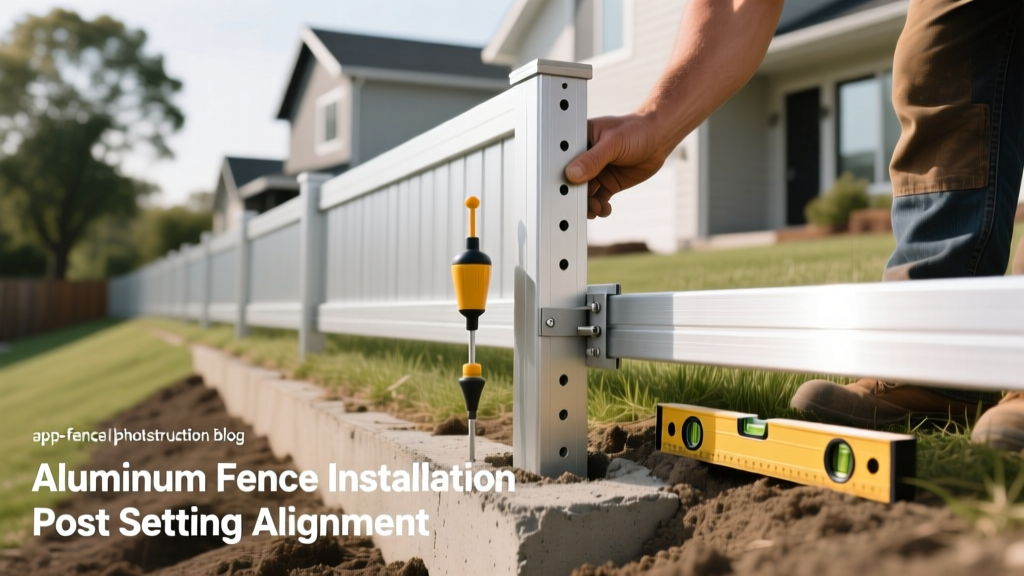
- Dry-Set and Check Plumb: Drop the post into the hole. Use a dual-axis post level to check plumb on two adjacent sides. Brace the post temporarily with 2x4s staked into the ground.
- Add Gravel Base: Pour 3 to 4 inches of 3/4-inch crushed gravel into the bottom of the hole. This provides drainage and prevents the aluminum post from sitting directly in water, which can cause galvanic corrosion over decades.
- Mix and Pour Concrete: For line posts, a fast-setting concrete mix (like Quikrete Fast-Setting) is ideal as it requires no mixing in a wheelbarrow—just pour the dry mix into the hole and add water. For gate posts, use a standard 5000 PSI high-strength mix to handle dynamic swing loads.
- Manage the Buoyancy: As you pour concrete, the post will attempt to float. Apply downward pressure and re-check your plumb. Do not over-water; a soupy mix reduces compressive strength and increases floating.
- Slope the Crown: Use a trowel to slope the top 2 inches of the concrete collar away from the post at a 45-degree angle. This sheds water and prevents pooling at the metal-to-concrete interface, which is the most common cause of premature aluminum oxidation.
Navigating Sloped Terrain: Racking vs. Stepping
Yards are rarely perfectly flat. Aluminum fence panels handle slopes using one of two methods: racking or stepping. Choosing the wrong method will result in broken brackets or severe aesthetic gaps.
The Racking Method (Moderate Slopes)
Racking involves pivoting the horizontal rails to follow the contour of the ground while keeping the vertical pickets plumb. Most standard aluminum panels feature hidden internal brackets or pivot pins that allow the rails to drop up to 12 inches over a standard 6-foot span (a 2-inch drop per linear foot). If your slope exceeds this 12-inch threshold, the picket-to-rail joints will bind, causing the aluminum extrusions to kink or the internal fasteners to snap under tension.
The Stepping Method (Steep Slopes)
For drops exceeding 12 inches per panel, you must step the fence. Panels are installed perfectly level, and the vertical pickets are cut at the bottom to follow the grade. This creates a triangular gap under the downhill side of the panel. To maintain compliance with pool safety codes—which mandate that no gap under a fence exceeds 4 inches to prevent small children from crawling underneath—you must install custom aluminum filler panels or landscape berms to close the gap. The Consumer Product Safety Commission (CPSC) strictly enforces this 4-inch maximum clearance for any barrier surrounding a residential pool.
If your aluminum fence encloses a swimming pool, ensure your chosen panel style does not feature horizontal rails or decorative elements on the outside face that could act as a ladder. The CPSC requires that climbable horizontal elements be spaced at least 45 inches apart.
Panel Alignment and Hardware Fastening
Once the concrete has cured for a minimum of 24 hours (or 4 hours for specific fast-setting blends), you can hang the panels. Aluminum fence panels typically attach to the posts using horizontal rail brackets or by driving self-tapping screws directly through the post face into the hollow rail ends.
Use only #12 x 3/4-inch hex-washer head self-drilling screws, preferably stainless steel or zinc-coated with a ceramic topcoat to match the fence color. Never use Phillips-head screws for aluminum fencing; the cam-out risk is extremely high and will strip the screw head and mar the powder-coated finish of the post. Equip your impact driver with a magnetic 5/16-inch nut setter. Crucially, adjust the torque clutch on your drill to a low-to-medium setting (typically 5 through 7 on a standard 18V drill). Aluminum is a soft metal; overtightening will strip the threads inside the hollow rail, resulting in a loose, rattling panel that cannot be easily re-tightened.
Common Failure Modes and Corrections
Even with careful planning, specific failure modes frequently appear during DIY aluminum fence installation. Recognizing these early saves hours of rework.
- Gate Post Wobble: If a gate post shifts after the concrete sets, it is usually due to an undersized hole or standard concrete used under heavy dynamic load. Correction: For future installations, embed a 1/2-inch steel rebar cross-pin through the base of the post before pouring, or weld a steel base plate to distribute the leverage.
- Rail Binding on Slopes: If the horizontal rails refuse to pivot down the slope and the pickets bow outward. Correction: You have exceeded the manufacturer's racking limit. Remove the panel, step the fence instead, or purchase specialized "steep-slope" panels engineered with wider pivot tolerances.
- Finish Scratching: White or black powder-coat scratches exposing raw silver aluminum. Correction: Keep a can of manufacturer-matched cold galvanizing compound or touch-up paint on site. Never use standard spray paint, as it lacks the UV stabilizers required for exterior architectural aluminum and will chalk within a single season.
By adhering to precise hole dimensions, respecting the physical limits of aluminum racking joints, and utilizing the correct torque settings for self-tapping hardware, your installation will achieve the structural longevity and clean sightlines that make aluminum fencing a premium property upgrade.