The Complete Maintenance Playbook for Post Fence Solar Lights
Keep your post fence solar lights shining bright with our expert maintenance playbook. Learn cleaning, battery replacement, and winterization tips.
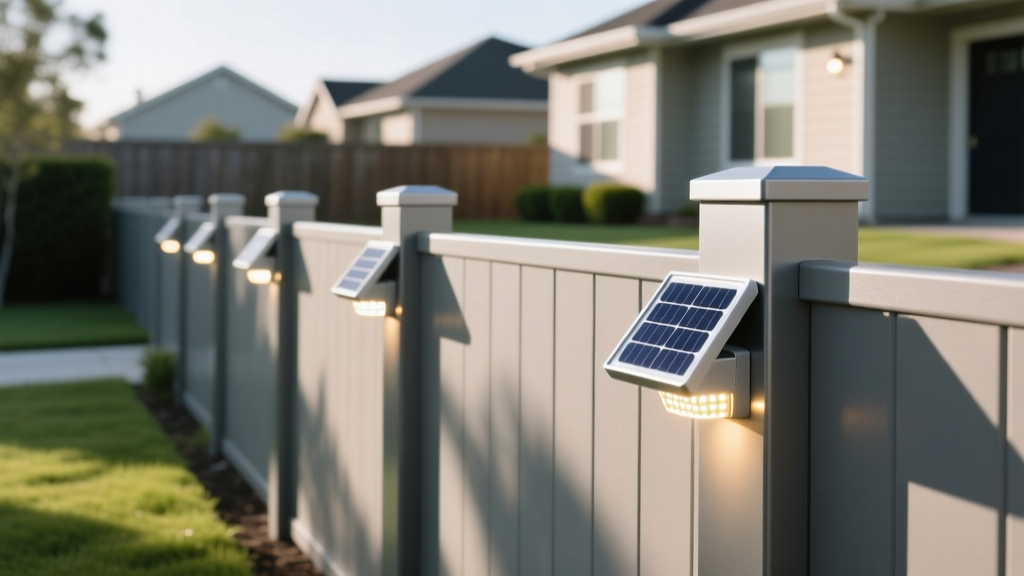
The Anatomy of Post Fence Solar Lights
Before executing any maintenance protocol, it is critical to understand the internal architecture of modern post fence solar lights. A standard 4x4 or 6x6 post cap light consists of four primary subsystems: the monocrystalline or polycrystalline photovoltaic (PV) panel, the rechargeable energy storage cell, the light-emitting diode (LED) array, and the photocell (ambient light sensor). Failure to maintain any single component will result in cascading performance degradation. For instance, a soiled PV panel reduces voltage output, which prevents the internal charging circuit from reaching the threshold required to fully charge the battery, ultimately leading to premature battery sulfation or memory-effect degradation.
- Monthly: Visual inspection for debris and physical damage.
- Quarterly: Deep clean of the PV panel and polycarbonate lens.
- Bi-Annually: Check battery voltage and clean terminal contacts.
- Annually: Inspect waterproofing seals and replace degraded O-rings.
Step-by-Step Cleaning Protocol
Environmental soiling is the primary enemy of solar efficiency. According to research published by the National Renewable Energy Laboratory (NREL), particulate accumulation on solar panels can reduce energy yield by up to 30% in dry, dusty climates, and up to 15% in humid environments where pollen and dirt form a hardened crust. Because post fence solar lights utilize micro-PV panels (typically 2V to 6V, 100mA to 300mA), even a 10% loss in surface transmission can prevent the unit from charging fully during short winter days.
Cleaning the Photovoltaic Panel
- Dry Brush: Use a soft-bristled, clean makeup brush or a dedicated 300-GSM microfiber cloth to gently sweep away loose dust, pollen, and spider webs. Never use a dry paper towel, as the wood fibers will create micro-scratches on the panel's epoxy or glass coating.
- Wet Wash: Mix a solution of 1 part white vinegar to 8 parts distilled water. Tap water contains dissolved minerals (calcium and magnesium) that will leave hard water spots, further blocking light transmission.
- Wipe and Dry: Dampen a lint-free cloth with the solution and wipe the panel in a single direction. Immediately dry with a second clean microfiber cloth to prevent streaking.
Cleaning the Housing and Polycarbonate Lens
The clear or frosted diffuser lens on post fence solar lights is almost universally made of polycarbonate or ABS plastic. These materials are highly susceptible to chemical degradation.
Battery Maintenance and Replacement Guide
The rechargeable battery is the most frequent point of failure in post fence solar lights. Most units sit in direct sunlight and endure extreme temperature fluctuations, which accelerates chemical degradation. If your lights are turning off after only 1-2 hours at night, the battery has likely lost its capacity to hold a charge.
| Battery Chemistry | Typical Voltage | Cycle Life | Cold Weather Performance | Replacement Cost |
|---|---|---|---|---|
| NiCd (Nickel-Cadmium) | 1.2V | 300-500 | Poor (Voltage drops significantly) | $3 - $5 |
| NiMH (Nickel-Metal Hydride) | 1.2V | 500-1000 | Moderate | $4 - $8 |
| Li-ion (Lithium-Ion) | 3.2V / 3.7V | 800-1200 | Good | $6 - $12 |
| LiFePO4 (Lithium Iron Phosphate) | 3.2V | 2000+ | Excellent (Stable voltage in freezing temps) | $8 - $15 |
Safe Battery Replacement Procedure
When replacing batteries in your post fence solar lights, always match the exact voltage and chemistry specified by the manufacturer. Swapping a 1.2V NiMH battery for a 3.2V LiFePO4 cell without a compatible internal charge controller will instantly fry the LED driver circuit.
Before inserting the new battery, use a fiberglass scratch pen or a cotton swab dipped in isopropyl alcohol (90% or higher) to clean the metal contact springs. Corrosion on these contacts introduces electrical resistance, which drops the charging voltage below the battery's acceptance threshold. Once installed, properly dispose of the old cells. The Call2Recycle program provides a network of drop-off locations for safe recycling of NiCd and Li-ion batteries, preventing heavy metals from leaching into landfills.
Troubleshooting Common Failure Modes
When a post fence solar light fails to illuminate, use this systematic diagnostic tree to isolate the fault before discarding the unit.
Symptom: Light Does Not Turn On at Night
- Test 1 (The Photocell Check): The ambient light sensor dictates when the LED activates. Cover the solar panel completely with your hand or a dark cloth during the day. If the light turns on, the photocell and LED circuit are functional; the issue is likely a dead battery or insufficient daytime charging.
- Test 2 (The Battery Bypass): Remove the battery. Connect a standard 1.5V alkaline AA battery directly to the terminals for 5 seconds. If the LED illuminates brightly, the internal wiring and LED are intact. Your rechargeable battery has failed and needs replacement.
- Test 3 (The Switch Corrosion): Many post caps feature a physical ON/OFF toggle switch underneath. These switches are notorious for internal oxidation. Toggle the switch rapidly 20-30 times to scrape off internal oxidation, or bypass it entirely by soldering the two switch leads together if you prefer the light to remain permanently active.
Symptom: Light Flickers or is Dim
Flickering is almost always caused by a loose battery connection or a failing LED driver chip. Remove the battery and gently pry the negative contact spring outward with a small flathead screwdriver to increase tension against the battery terminal. If dimness persists after cleaning the PV panel and installing a fresh battery, the internal step-down resistor has likely degraded, and the entire post cap unit should be replaced.
Winterization and Seasonal Care
Winter presents unique challenges for post fence solar lights. The sun sits lower on the horizon, reducing the intensity and duration of direct sunlight hitting the horizontal PV panel. Furthermore, snow accumulation on 4x4 and 6x6 post caps can completely bury the light unit.
Proactive Winter Steps:
- Clear Snow Accumulation: After heavy snowfalls, use a soft push broom to clear snow off the top of your fence posts. Leaving snow packed against the polycarbonate lens will block all light emission and can cause moisture to seep past the O-ring seals as the snow melts and refreezes.
- Seal Inspection: In late autumn, inspect the silicone gasket or rubber O-ring where the top solar panel meets the base housing. If the rubber is brittle, cracked, or flattened, apply a thin bead of clear, outdoor-rated marine silicone sealant around the seam to prevent winter meltwater from infiltrating the battery compartment.
- Storage for Harsh Climates: If you live in a region with prolonged sub-zero temperatures and heavy ice storms, the most effective maintenance strategy is removal. Twist or unscrew the post caps, remove the batteries, and store them indoors in a climate-controlled environment until spring. According to the U.S. Department of Energy, protecting sensitive solar components from extreme weather events significantly extends their operational lifespan.
When to Replace vs. Repair
Not all post fence solar lights are worth saving. Determining whether to invest time in repair or simply purchase a replacement requires a quick cost-benefit analysis based on the unit's build quality.
Repair the Unit If:
- The housing is made of powder-coated aluminum, heavy-duty ABS, or real wood (e.g., cedar or teak caps with integrated solar inserts). These housings cost $25 to $60+ to replace, making a $6 battery swap or a $2 switch bypass highly economical.
- The solar panel is glass-covered rather than epoxy-coated. Glass panels resist UV yellowing and micro-scratches, meaning the charging hardware will outlast multiple battery cycles.
Replace the Unit If:
- The housing is made of thin, injection-molded plastic that has become brittle, cracked, or heavily yellowed from UV exposure. UV degradation compromises the structural integrity of the plastic, meaning water intrusion is inevitable regardless of how well you clean it.
- The unit utilizes a sealed, non-replaceable internal battery. Many budget-friendly post fence solar lights (under $10 per unit) are manufactured with batteries soldered directly to the PCB. Once the battery dies after 500 cycles, the entire unit becomes e-waste.
By adhering to this strict maintenance playbook, you can extend the functional lifespan of high-quality post fence solar lights from a single season to five years or more, ensuring your property perimeter remains safely illuminated and aesthetically sharp year-round.