How to Use a 3 Ton Low Profile Floor Jack for Heavy Stone Flooring
Learn how to safely use a 3 ton low profile floor jack to lift, position, and install heavy natural stone slabs and large-format porcelain tiles.
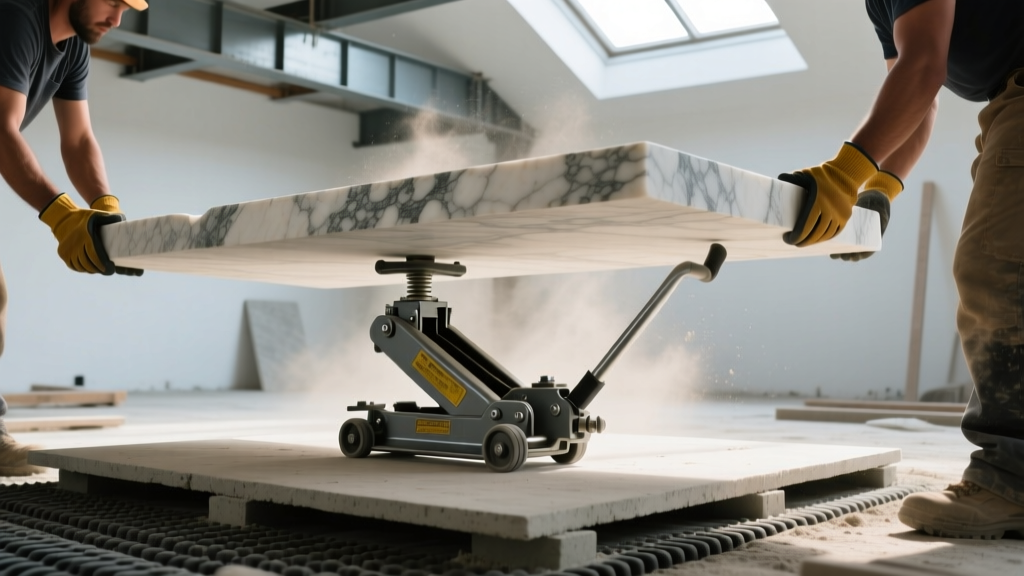
The Challenge of Heavy-Duty Flooring Material Handling
When installing ultra-heavy flooring materials like 3cm natural stone slabs, thick architectural concrete pavers, or massive pallets of large-format porcelain tile (LFT), standard material handling equipment often falls short. A single 3cm granite slab can easily exceed 20 pounds per square foot, meaning a standard 4x8 foot slab weighs over 640 pounds. Moving these materials from the staging area to the exact setting bed without causing micro-fractures, mortar displacement, or severe worker fatigue requires specialized mechanical assistance. This is where a 3 ton low profile floor jack transitions from an automotive garage tool to an indispensable flooring installation asset.
By repurposing high-capacity hydraulic jacks, commercial flooring contractors can achieve millimeter-perfect height alignment between the heavy stone and the freshly troweled thixotropic mortar bed. According to the Occupational Safety and Health Administration (OSHA), mechanical lifting aids are critical for reducing musculoskeletal disorders in construction, making hydraulic floor jacks a vital compliance and safety tool for heavy stone setters.
Selecting the Right 3 Ton Low Profile Floor Jack for Stone
Not every hydraulic jack is suitable for flooring applications. Automotive jacks are designed with grooved saddles for vehicle frames, which will crack natural stone or chip porcelain edges. When sourcing a 3 ton low profile floor jack for flooring installation, you must evaluate three specific engineering criteria:
Minimum Saddle Clearance and Lift Range
Heavy stone slabs are often transported on low-clearance A-frame dollies or flat timber pallets. The jack must feature a minimum saddle height of 3.5 inches or less to slide beneath the material. Furthermore, the maximum lift height must align with your subfloor elevation plus the thickness of your mortar bed (typically 1/2 inch to 3/4 inch for large-format stone). Look for dual-piston, rapid-rise models that minimize the number of pump strokes required in tight commercial corridors.
Flat Polyurethane Saddle and Casters
The lifting saddle must be perfectly flat and ideally covered with a high-durometer polyurethane or thick rubber pad to distribute the 6,000-pound maximum load evenly across the stone or pallet base. Additionally, the jack’s rear casters must be non-marring polyurethane to prevent scuffing or gouging the prepared concrete subfloor or underlying moisture mitigation membranes.
Never use a standard automotive jack with a worn release valve for stone installation. A sudden hydraulic bypass (dropping the load) while a 600-pound slab is partially over the mortar bed will shatter the stone and pose a severe crush hazard. Always use jacks with internal overload protection bypass valves and test the release valve under a controlled, empty load before approaching the setting bed.
Step-by-Step Procedure: Lifting and Setting 3cm Stone Slabs
Integrating a 3 ton low profile floor jack into your stone-setting workflow requires a synchronized team approach. The following procedure outlines the industry-standard method for mechanical stone placement.
- Pallet and Saddle Preparation: Ensure the stone slab is resting on a rigid, flat timber base (minimum 3/4-inch plywood). Slide the low-profile jack completely under the timber base, ensuring the flat padded saddle is centered on the slab’s center of gravity.
- Clearance Lifting: Pump the handle to raise the slab exactly 1/4 inch above the transport dolly. Remove the dolly and ensure the jack’s polyurethane casters are bearing the full load.
- Approach the Mortar Bed: Slowly roll the jack toward the freshly combed mortar bed. Stop exactly 2 inches from the edge of the previously laid stone to allow for seam manipulation.
- Micro-Adjustment and Alignment: Use the jack handle to make micro-pumps, raising the stone so its bottom edge is precisely 1/16 inch higher than the adjacent installed stone. This accounts for the slight compression of the mortar bed once the full weight is transferred.
- Controlled Release: Slowly turn the release valve counter-clockwise. As the jack lowers, use a vacuum cup handle on the top edge of the stone to guide it laterally, closing the grout joint to the exact 1/16-inch specification.
- Extraction: Once the stone is fully bearing on the mortar, lower the jack saddle completely, roll it backward, and immediately clean any mortar squeeze-out from the joint.
Precision Leveling: Using the Jack for Subfloor Compensation
In commercial renovations, concrete subfloors are rarely perfectly flat. The Natural Stone Institute mandates strict flatness tolerances (typically 1/8 inch in 10 feet) for thick stone installations. When a heavy slab encounters a low spot in the subfloor, manual lifting to inject additional mortar is nearly impossible due to the weight.
Contractors use the 3 ton low profile floor jack to perform "floating lifts." By sliding the jack under the installed (but uncured) edge of the stone and applying a fraction of a pump, the slab can be elevated just enough to allow a setter to inject a flowable, high-compressive-strength epoxy or structural patching compound beneath the void. The jack holds the 600-pound slab perfectly suspended while the compound sets, preventing lippage and ensuring structural support across the entire back of the stone.
Load Capacity vs. Flooring Material Weights
Understanding the relationship between your jack’s rated capacity and the actual material weight is critical for preventing hydraulic cylinder blowouts. Below is a reference matrix for common heavy flooring materials and their approximate weights per standard installation unit.
| Material Type | Thickness | Weight per Sq. Ft. | Typical Slab/Pallet Weight | 3-Ton Jack Safety Margin |
|---|---|---|---|---|
| Absolute Black Granite | 3 cm (1.18 in) | 18.5 lbs | 850 lbs (4x8 slab) | Excellent (14% capacity) |
| Travertine (Filled) | 2 cm (0.75 in) | 12.0 lbs | 1,440 lbs (Palletized) | Good (24% capacity) |
| Large Format Porcelain | 12 mm (0.47 in) | 5.5 lbs | 1,800 lbs (A-Frame) | Moderate (30% capacity) |
| Architectural Concrete Pavers | 2.5 in | 31.0 lbs | 2,200 lbs (Banded Stack) | Caution (36% capacity) |
"When operating near 40% of the jack’s maximum 6,000-pound capacity, hydraulic fluid temperatures can increase during prolonged holding periods. Always use mechanical jack stands or specialized stone-setting wedges to support the load if the jack must remain in place for more than five minutes."
Maintenance and Hydraulic Fluid Standards
A floor jack used in a flooring environment is subjected to fine silica dust from mortar, concrete grinding, and stone cutting. This particulate matter is the primary enemy of hydraulic cylinder seals. To maintain the integrity of your 3 ton low profile floor jack, implement the following maintenance protocol:
- Seal Protection: Wipe down the exposed hydraulic ram with a clean, lint-free cloth after every single use. Never allow mortar dust to cake on the ram, as it will score the internal polyurethane seals during retraction.
- Fluid Specifications: Only use high-grade ISO 32 hydraulic jack oil. Avoid brake fluid, motor oil, or transmission fluid, which contain additives that will cause the jack’s internal rubber O-rings to swell and fail under the high pressure required to lift stone pallets.
- Release Valve Cleaning: The release valve is highly susceptible to silica dust ingress. Purge the valve mechanism with compressed air weekly and apply a light coating of lithium grease to the external threads to prevent binding, which could lead to uncontrolled load drops.
Mastering the application of a 3 ton low profile floor jack transforms the installation of ultra-heavy natural stone and architectural concrete from a high-risk, labor-intensive gamble into a precise, engineered procedure. By selecting the correct saddle configuration, adhering to strict hydraulic safety margins, and utilizing the jack for micro-leveling adjustments, flooring professionals can guarantee lippage-free, structurally sound installations that meet the most demanding commercial specifications.