How to Install the Best Material for Chicken Run Floor Safely
Learn to install the best material for chicken run floors. Step-by-step techniques for gravel, sand, and hardware cloth for drainage and predator safety.

Why Subgrade Preparation Dictates Floor Longevity
Choosing the best material for chicken run floor systems is only half the battle; the installation technique determines whether the floor survives its first winter. A premium crushed gravel surface will turn into a stagnant, bacteria-filled mud pit within six months if the subgrade lacks proper compaction and drainage. Similarly, the most robust predator barriers fail when installed without accounting for the digging mechanics of local wildlife. According to Penn State Extension, subterranean predators like foxes and coyotes do not dig randomly; they dig at the base of barriers, making trenching techniques far more critical than the depth of the fence itself.
This guide details the exact installation specifications, material grades, and structural techniques required to build a permanent, hygienic, and predator-proof chicken run floor in 2026.
Material Selection Matrix: Matching Floor Type to Soil and Climate
Before breaking ground, match your surface material to your site conditions. The table below outlines the installation requirements and performance metrics for the three most effective flooring systems.
| Floor Material | Subgrade Prep Required | Drainage Rate | Approx. Cost (per 100 sq ft) | Predator Resistance |
|---|---|---|---|---|
| Crushed Angular Gravel | 4 in. excavation, geotextile fabric | Excellent | $45 - $70 | High (deters digging) |
| Washed Construction Sand | 3 in. excavation, compacted base | Good (if graded) | $35 - $55 | Moderate (requires L-footer) |
| Poured Concrete Slab | 6 in. excavation, gravel base, forms | Superior (if sloped) | $800 - $1,200 | Absolute |
Installing the Ultimate Predator-Proof Base: The L-Footer Technique
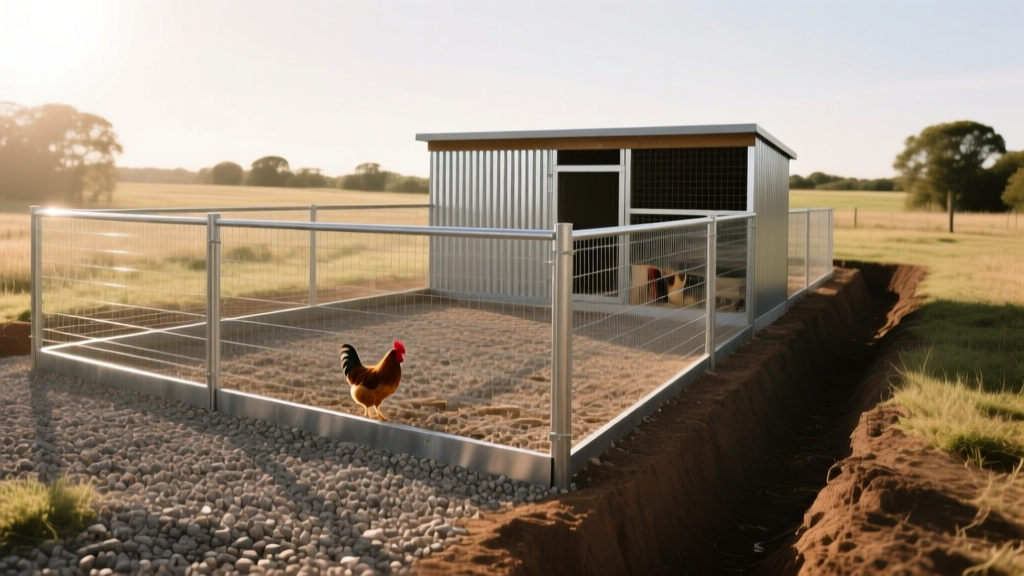
Regardless of whether you choose sand, gravel, or concrete, the perimeter must be secured against burrowing predators. Chicken wire is entirely ineffective for ground contact; raccoons can tear it, and it rusts rapidly in soil. You must use 19-gauge, 1/2 in. galvanized hardware cloth.
- Dig the Trench: Excavate a trench 12 inches deep and 12 inches wide along the entire perimeter of the run, extending outward from the coop walls.
- Position the Mesh: Unroll the 19-gauge hardware cloth. Attach the top edge securely to the run frame using heavy-duty galvanized poultry staples (not standard staples) spaced every 6 inches.
- Form the L-Shape: Bend the bottom 12 inches of the mesh outward at a 90-degree angle so it lays flat in the bottom of the trench, pointing away from the run.
- Backfill and Compact: Fill the trench with native soil and tamp it down aggressively. When a predator digs at the base of the wall, they will hit the horizontal wire mesh and stop, unable to comprehend digging further back.
Step-by-Step Installation: Crushed Gravel and Sand Systems
Crushed gravel and construction sand are the most popular choices for the best material for chicken run floor applications due to their balance of cost, drainage, and hygiene. Proper ventilation and flooring work in tandem to reduce ammonia, as noted by University of Minnesota Extension. Here is how to install them correctly.
Phase 1: Excavation and Grading
Remove the top 4 inches of topsoil across the entire run footprint. Topsoil retains moisture and organic matter, which leads to anaerobic bacterial growth beneath your floor. Once excavated, grade the exposed subsoil with a 1/4 in. per foot slope away from the main coop structure to ensure surface water naturally flows away from the flock's shelter.
Phase 2: Geotextile and Base Layer
Lay down a heavy-duty, permeable geotextile landscape fabric (minimum 4 oz per square yard). Overlap all seams by at least 12 inches and secure them with landscape pins every 3 feet. This fabric prevents the gravel or sand from sinking into the mud during heavy rains while allowing water to pass through. For gravel systems, add a 2-inch base layer of 3/4 in. crushed stone and compact it with a hand tamper to create an unyielding foundation.
Phase 3: The Final Surface Application
- For Crushed Gravel: Apply a 2 to 3-inch top layer of 3/8 in. to 1/2 in. angular crushed gravel. Do not use pea gravel. Pea gravel is round, shifts underfoot, and creates deep pockets where moisture and feces accumulate. Angular gravel locks together, creating a stable, porous mat that allows droppings to wash through while remaining firm enough for the chickens to scratch.
- For Sand: Apply a 3 to 4-inch layer of washed construction sand (ASTM C33 specification). Never use play sand or masonry sand; the particles are too fine, which causes severe compaction, eliminates drainage, and poses a fatal crop impaction risk if the hens ingest it while foraging.
Pouring a Concrete Run: Slope and Cure Specifications
For urban flocks or areas with extreme rodent pressure, a concrete slab is the undisputed best material for chicken run floor installations. However, a flat concrete slab will pool water and create a biohazard.
- Formwork and Slope: Build wooden forms with a strict 1/4 in. per foot drop from the coop door to the opposite end of the run.
- Reinforcement: Lay a 4-inch base of compacted crushed stone, followed by 6x6 inch W1.4xW1.4 welded wire mesh elevated on 1-inch concrete chairs. This prevents the slab from cracking under frost heave.
- The Pour and Finish: Use a 3000 PSI concrete mix. After screeding, use a float to create a smooth finish, followed by a stiff-bristle broom finish to provide traction for the chickens. A slick trowel finish will cause severe leg splay injuries in heavy breeds.
- Curing: Keep the concrete continuously moist for 7 days. Do not introduce the flock to the run until the concrete has fully cured for 28 days, as the high alkalinity of curing concrete can cause chemical burns on chicken footpads.
Common Installation Failures and How to Avoid Them
Avoid the most frequent contractor mistake: using a vapor barrier (solid plastic sheeting) instead of permeable geotextile fabric under gravel or sand. A solid vapor barrier traps rainwater and coop wash-water, turning the floor into a shallow, foul-smelling swimming pool. Permeability is non-negotiable for biological flooring systems.
By adhering to these exact excavation depths, material grades, and predator-deterrent geometries, your chicken run floor will remain structurally sound, biologically safe, and entirely impervious to local wildlife for decades.
Written by
Marcus ChenMarcus Chen is a licensed structural engineer (PE) and building materials analyst with over 12 years of experience across residential, commercial, and industrial construction. He holds a Master of Science in Civil Engineering from UC Berkeley and spent six years at Thornton Tomasetti before transitioning to independent consulting and technical writing. Marcus specializes in material selection for seismic-prone regions, concrete reinforcement strategies, and lifecycle cost analysis. His work has been cited by the American Concrete Institute (ACI) and the Structural Engineers Association of California (SEAOC). When he is not on a job site or at his desk, you will find him hiking the Sierra Nevada or restoring a 1920s craftsman bungalow in Oakland, CA.
More from Marcus Chen
View all
Construction Cost
How Much Did the Eiffel Tower Cost to Build?
How much did the Eiffel Tower cost to build in 1889? We adjust for inflation and compare its budget to modern skyscraper construction.
Aug 4, 2026

Fire Resistance
What Is a Fire Resistant Material? Testing & Certification Guide
Discover what is a fire resistant material through ASTM and UL testing. Learn how fire ratings, certifications, and assemblies work in construction.
Aug 4, 2026

Construction Cost
How Much Did the Burj Khalifa Cost to Build?
How much did the Burj Khalifa cost to build? We break down the $1.5B project and extract 5 money-saving strategies for your next build.
Jul 30, 2026