Permanent Basement Floor Crack Repair: Epoxy vs. Polyurethane Injection Guide
Learn professional basement floor crack repair techniques. Compare epoxy and polyurethane injections, costs, and step-by-step application procedures.
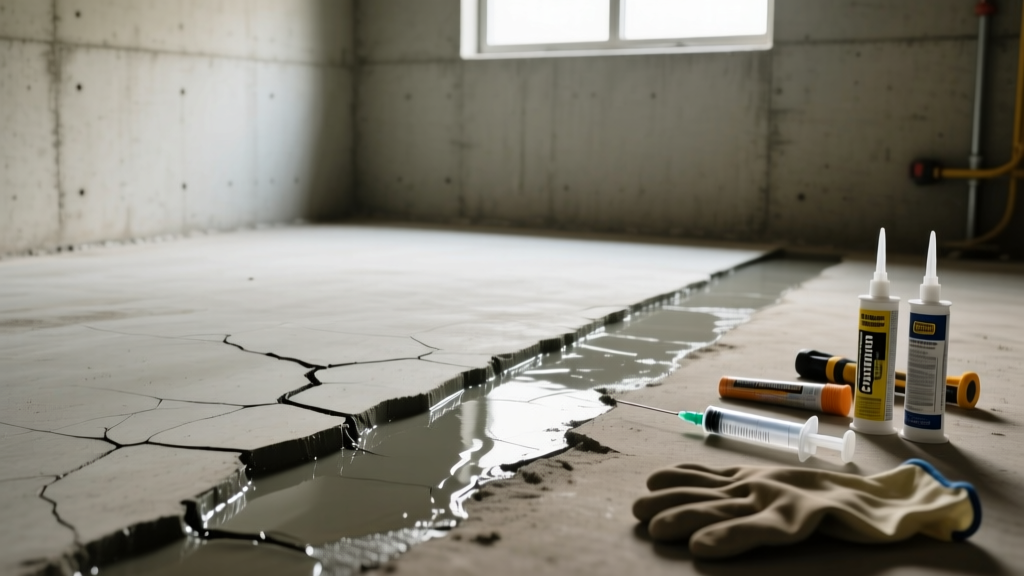
Diagnosing the Crack: Structural vs. Non-Structural
Before purchasing any sealant, you must accurately diagnose the mechanics driving the concrete failure. Basement slab-on-grade foundations are subjected to thermal cycling, shrinkage during initial curing, and hydrostatic pressure from the surrounding water table. A successful basement floor crack repair hinges on matching the material to the crack's behavior.
Measure the crack width using a feeler gauge. Hairline cracks (less than 1/16 inch) are typically plastic shrinkage cracks and pose minimal structural threat. Cracks between 1/8 inch and 1/4 inch are usually settlement cracks. If a crack exceeds 1/4 inch, exhibits vertical displacement (one side is higher than the other), or is actively widening, it indicates differential settlement or severe hydrostatic uplift. These structural anomalies require professional underpinning or mudjacking before any cosmetic or waterproofing sealant is applied.
Unsealed floor cracks are the primary entry point for soil gases. According to the Environmental Protection Agency (EPA), radon gas enters homes primarily through cracks in solid floors and construction joints. Furthermore, the U.S. Department of Energy notes that unsealed basement cracks wick ground moisture, destroying floor finishes and promoting mold growth. Sealing is not just about aesthetics; it is a critical health and building envelope intervention.
Material Selection Matrix: Epoxy vs. Polyurethane
The two dominant chemical systems for basement floor crack repair are epoxy and polyurethane. Choosing the wrong chemistry is the leading cause of repair failure. Epoxy creates a rigid, structural bond, while polyurethane creates a flexible, watertight seal.
| Property | Epoxy Injection Systems | Polyurethane Injection Systems |
|---|---|---|
| Primary Use | Dormant, dry, structural cracks | Active, wet, leaking cracks |
| Tensile Strength | High (2,000 - 4,000 PSI) | Low (300 - 600 PSI) |
| Flexibility | Rigid (will snap if slab moves) | Highly flexible (elongation up to 400%) |
| Moisture Tolerance | Requires bone-dry substrate | Reacts with moisture to cure and expand |
| Expansion Rate | None (1:1 volume) | Expands 20x to 30x its liquid volume |
| Top Product Examples | Sikadur 52, PC-Concrete Two-Part | RadonSeal Crack-Sealant, SikaFlex |
Step-by-Step Polyurethane Injection (Active & Wet Cracks)
Use a two-part, low-pressure polyurethane system for cracks that are currently weeping water or are subject to seasonal thermal movement. The chemical reaction with water causes the resin to expand, forcing it deep into the capillary network beneath the slab.
1. Routing and Preparation
Do not simply inject into a surface-level fissure. Use an angle grinder equipped with a 1/4-inch diamond V-notch blade to route the crack to a depth of 1/2 inch. This creates a reservoir for the resin and removes degraded concrete at the surface. Vacuum the routed channel with a HEPA-filter shop vac, then flush with compressed air to remove microscopic dust that can inhibit adhesion.
2. Port Installation (For Deep Slab Injections)
For slabs thicker than 4 inches, surface injection is insufficient. Drill 3/8-inch holes at a 45-degree angle, intersecting the crack plane every 6 to 8 inches along the fissure. Tap mechanical injection ports into these holes. This ensures the polyurethane reaches the sub-grade soil interface.
3. Injection and Curing
Load the dual-cartridge into a low-pressure caulk gun (maximum 10:1 thrust ratio). Attach the static mixing nozzle. Begin injecting at the lowest point of the crack (or one end of a horizontal floor crack) and move upward/forward. Stop when the resin begins to extrude from the adjacent port or the surface channel. Polyurethane cures in 15 to 30 minutes upon contact with moisture, forming a closed-cell foam that permanently blocks water migration.
Step-by-Step Epoxy Routing and Sealing (Dormant & Dry Cracks)
If the crack is completely dormant (no movement for at least 12 months), dry, and you need to restore the structural monolith of the floor, a high-modulus epoxy is required.
1. Substrate Moisture Testing
Epoxy will catastrophically fail if applied to a damp substrate. Tape a 2-foot square of 6-mil clear polyethylene sheeting over the crack. Wait 24 hours. If condensation forms under the plastic, the slab is emitting too much moisture vapor (MVER exceeds 3 lbs/1000 sq ft/24 hrs). You must use a moisture-mitigating primer or switch to polyurethane.
2. Surface Sealing and Gravity Feeding
For floor slabs, high-pressure injection is rarely necessary. Instead, use a gravity-fed or low-viscosity epoxy. First, seal the surface of the routed crack with a fast-setting epoxy paste (like Sikadur 31) to create a dam. Once the surface paste cures (usually 2 hours), pour or inject the low-viscosity liquid epoxy into the channel. The low surface tension allows the resin to wick deep into the micro-fissures via capillary action.
3. Grinding and Leveling
After 24 to 48 hours of cure time, the epoxy will be harder than the surrounding concrete. Use a 7-inch variable-speed polisher with a 40-grit metal-bonded diamond cup wheel to grind the repaired area flush with the surrounding slab, preparing it for floor coverings like LVP or tile.
Epoxy viscosity is highly temperature-dependent. If your basement is below 60°F (15°C), the epoxy will become too viscous to wick into tight cracks. Store the dual-cartridges in a bucket of 80°F warm water for 15 minutes prior to mixing to lower the viscosity and ensure deep penetration.
Cost Breakdown: DIY vs. Professional Repair
Understanding the financial scope of basement floor crack repair helps in deciding between a weekend DIY project and hiring a foundation specialist.
- DIY Polyurethane Kit (10 linear feet): $80 - $140. Includes dual-cartridge resin, static mixers, and basic routing tools.
- DIY Epoxy Kit (10 linear feet): $120 - $180. Higher material cost due to the complex chemistry of high-modulus structural resins.
- Professional Polyurethane Injection: $8 - $15 per linear foot. Pros use high-pressure hydraulic pumps (up to 3,000 PSI) to inject hydrophobic grouts deep beneath the slab, which DIY kits cannot achieve.
- Professional Structural Epoxy Stitching: $40 - $75 per linear foot. Involves drilling, inserting stainless steel corrugated staples, and epoxying them in place to mechanically lock the slab together.
Common Failure Modes and How to Avoid Them
Even with premium materials, basement floor crack repair frequently fails due to improper application techniques. Avoid these critical edge cases:
- Injecting Over Damp Dust: Skipping the compressed air blow-out after routing leaves a layer of damp concrete dust in the fissure. Epoxy will bond to the dust, not the concrete matrix, resulting in a superficial peel within months. Always blow out the crack immediately before injection.
- Using Rigid Epoxy on Active Settlement: If the foundation is still settling, rigid epoxy will not stop the movement. The concrete will simply crack again, usually parallel to the repair, creating a new leak. Always use flexible polyurethane for foundations with a history of ongoing movement.
- Incorrect Mixing Ratios in Manual Kits: Some budget polyurethane kits require manual mixing of Part A and Part B. If the 1:1 ratio is off by even 5%, the resin will remain a sticky, uncured gel indefinitely. Always opt for dual-cartridge systems with static mixing nozzles to guarantee a perfect chemical ratio.
- Ignoring the Control Joint: Do not route and seal designated saw-cut control joints with rigid epoxy. These joints are intentionally placed to force the concrete to crack in a straight, hidden line. Fill control joints exclusively with a self-leveling polyurethane sealant (like Sikaflex Self-Leveling) that accommodates the designed thermal expansion and contraction.