Carpet Tack Strip Selection Guide: Types, Sizing, and Subfloor Matching
Master carpet tack strip selection with our taxonomy guide. Compare wood, concrete, and metal strips, pin angles, and exact subfloor installation specs.
The Anatomy and Physics of Carpet Tack Strips
Often misnamed as "tackless strips" because they lack traditional upholstery tacks, the carpet tack strip is the foundational hardware for power-stretching woven and tufted textiles. Its primary function is to grip the carpet backing at the perimeter, allowing installers to use a knee-kicker or power stretcher to apply 300 to 500 pounds of lateral tension. This tension prevents premature buckling, wrinkling, and delamination of the secondary backing.
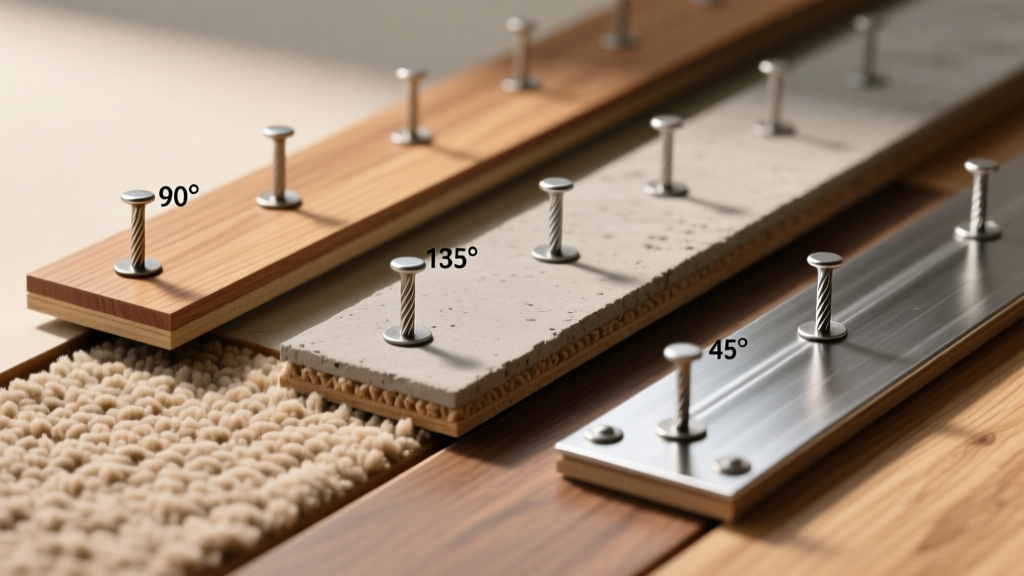
A standard strip consists of a rigid base (wood, metal, or composite) embedded with angled, case-hardened steel pins. The bevelled edge facing the wall creates a "tuck zone" where the carpet edge is forced downward, hiding the raw cut and securing the textile beneath the baseboard. Selecting the correct strip taxonomy is not arbitrary; it is dictated by the subfloor material, the carpet pile construction, and the ambient moisture profile of the room.
Material Taxonomy: Wood, Concrete, and Specialty Strips
The flooring industry categorizes tack strips into distinct material profiles, each engineered for specific structural and environmental conditions.
1. Standard Wood Strips (Residential / Light Commercial)
Manufactured from multi-layered plywood, poplar, or luan, standard wood strips are the most ubiquitous. They measure 1/4-inch thick by 1-1/4 inches wide, typically sold in 4-foot lengths. The layered plywood construction prevents the wood from splitting when driven by pneumatic flooring nailers. These are specified for standard cut-pile and saxony carpets installed over wood or OSB subfloors.
2. Architectural (Thick) Wood Strips
Measuring 1/2-inch thick by 1-1/4 inches wide, architectural strips are mandatory for high-pile plush carpets, thick berbers, or carpets with heavy attached polyurethane cushions. The extra 1/4-inch of thickness elevates the pin height, ensuring the pins fully penetrate the thicker carpet backing without bottoming out against the subfloor, which would cause the carpet to pop off during stretching.
3. Concrete Nail-In Strips
Used for below-grade or slab-on-grade installations, these strips feature hardened, fluted masonry nails pre-driven at an angle. The base is often a denser, moisture-resistant wood composite or solid hardwood to resist the alkalinity and moisture inherent in concrete slabs.
4. Concrete Adhesive Strips
When power-nailing into concrete is impossible (due to embedded radiant heating tubes or post-tension cables), adhesive-backed strips are used. However, these require strict moisture mitigation. According to the Carpet and Rug Institute (CRI), concrete slabs must pass an ASTM F2170 relative humidity test (reading below 75-80%) before adhesive strips can be applied. High alkalinity or moisture vapor transmission (MVT) will degrade the acrylic or urethane adhesives, leading to catastrophic perimeter release.
5. Metal and Aluminum Strips
Reserved for specialty applications, metal strips (often aluminum with welded or epoxied steel pins) are used over radiant heating systems where wood might scorch or dry out, or in high-traffic commercial zones requiring extreme dimensional stability. They are also utilized as transition anchors between carpet and hard surface flooring like ceramic tile.
Subfloor-to-Strip Selection Matrix
Use the following decision matrix to specify the correct strip profile based on your exact site conditions.
| Subfloor Type | Carpet Profile | Recommended Strip Type | Fastening Method | Max Moisture Tolerance |
|---|---|---|---|---|
| Plywood / OSB | Standard Cut-Pile | 1/4" Standard Wood | Pneumatic Ring-Shank Nails | 12% MC (Wood Moisture Content) |
| Plywood / OSB | High-Pile / Thick Pad | 1/2" Architectural Wood | Pneumatic Ring-Shank Nails | 12% MC |
| Concrete Slab | Commercial Loop / Berber | Concrete Nail-In | Hardened Masonry Nails | 5 lbs/1000sqft (Calcium Chloride) |
| Radiant Heat Slab | Any Textile | Aluminum / Metal Strip | High-Temp Urethane Adhesive | Per Manufacturer Spec (Usually <75% RH) |
| Gypsum / Lightweight Concrete | Standard Cut-Pile | Adhesive Wood Strip | Acrylic Construction Adhesive | Must be sealed; <75% RH |
Pin Angles and the Mechanics of Grip
The steel pins on a tack strip are not driven straight down; they are angled toward the wall. This geometry is critical for the physics of carpet stretching.
- 60-Degree Pins (Standard): The industry default. When the installer pulls the carpet toward the wall with a power stretcher, the 60-degree angle allows the pins to bite deeply into the primary and secondary backing. When tension is released, the angle prevents the carpet from sliding back toward the center of the room.
- 45-Degree Pins (Heavy Duty): Used for stiff commercial carpets, woven wiltons, or heavy berbers. The steeper angle provides a more aggressive bite required to penetrate dense, tightly woven backings without tearing the yarn tufts.
- Dual-Angle / Architectural Pins: Feature two rows of pins at opposing angles to grip exceptionally thick or problematic textiles that tend to slip off standard strips during high-tension stretching.
Always specify rust-resistant, zinc-plated, or galvanized pins for installations in basements, humid climates, or over concrete. Standard uncoated steel pins will oxidize when exposed to the alkaline moisture of a concrete slab, eventually bleeding rust stains through the carpet backing and into the textile face yarn. The EPA notes that managing indoor moisture is critical not just for air quality, but for preventing material degradation and mold growth beneath flooring assemblies.
Critical Installation Clearances (CRI Standards)
The gap between the wall (or baseboard) and the edge of the tack strip is the most frequently miscalculated metric by novice installers. The Carpet and Rug Institute (CRI) CRI 105 residential installation standard dictates strict parameters for this clearance.
- The Golden Rule: The gap should be slightly less than the total thickness of the carpet, but never exceed 1/2 inch.
- Standard Residential: A 3/8-inch gap is the standard specification for most cut-pile carpets with standard 7/16-inch rebond padding.
- Thick Plush / High Pile: Reduce the gap to 1/4 inch. If the gap is too wide on a thick carpet, the carpet will bottom out in the tuck zone before the pins can grip the backing, resulting in a visible roll at the baseboard and inadequate tension.
- Commercial Loop: Maintain a 1/4-inch to 3/8-inch gap. Loop pile carpets do not compress as easily as cut pile, and a wide gap will cause the loops to crush against the wall, creating a permanent crease.
"Proper pin exposure and wall clearance are non-negotiable. If the gap exceeds the carpet thickness, the textile will fail to engage the pins during the tucking process, guaranteeing a callback for re-stretching within six months." — Flooring Installation Best Practices Manual
Troubleshooting Common Grip Failures
Symptom: Carpet Pulls Away from the Wall (Delamination)
Cause: Pins failed to penetrate the secondary backing. This happens when using a standard 1/4-inch strip with a thick carpet and heavy pad, or when the pins are dulled from being dragged across the subfloor during layout. Fix: Upgrade to a 1/2-inch architectural strip. Ensure the strip is placed with the bevel facing the wall, and never slide the strip across the floor once positioned; lift and place it to protect the pin tips.
Symptom: Visible Ridge or Bulge Near the Baseboard
Cause: The gap between the tack strip and the wall is too narrow, or the padding is overlapping the tack strip. Padding must be trimmed flush with the inner edge of the tack strip. Fix: Remove the baseboard, pull back the carpet, trim the pad, and if necessary, re-nail the strip to widen the tuck zone to the proper 3/8-inch clearance.
Symptom: Strip Pops Up from Wood Subfloor
Cause: Inadequate nailing schedule or hitting floor joists at an angle that splits the wood strip. Fix: According to guidelines referenced by the National Wood Flooring Association (NWFA) regarding subfloor integrity, fasteners must hit solid wood. Nail the strip every 6 to 8 inches. Avoid nailing directly into the edge of OSB panels where the density is lowest; offset the strip slightly to hit the panel's core or use construction adhesive in tandem with nails.
Summary Checklist for Procurement
Before ordering materials for your next flooring project, verify the following data points:
- Subfloor material and moisture test results (ASTM F2170 or F1869).
- Total carpet thickness (face yarn + primary + secondary backing).
- Pad thickness and density (to calculate the required tuck zone drop-off).
- Presence of radiant heating or post-tension cables (dictates nail vs. adhesive vs. metal).
Matching the precise taxonomy of the carpet tack strip to these site variables ensures a high-tension, wrinkle-free installation that will endure the lifespan of the textile.