Pro Installation Techniques for Industrial Floor Covering Options
Master installation techniques for industrial floor covering options. Learn substrate prep, urethane trowel-down, and epoxy broadcast methods.

Substrate Preparation: The Non-Negotiable First Step
The longevity of any heavy-duty flooring system relies entirely on substrate preparation. When evaluating industrial floor covering options, facility managers often focus on chemical resistance or compressive strength, but improper surface profiling guarantees premature delamination. According to the International Concrete Repair Institute (ICRI), achieving the correct Concrete Surface Profile (CSP) is mandatory for mechanical adhesion.
For standard 100% solids epoxy systems, a CSP 3 to 5 is required, typically achieved via diamond grinding. However, for heavy-duty urethane cement mortars (1/8-inch to 1/4-inch thick), a CSP 5 to 7 is necessary, which demands aggressive shot blasting using S330 or S390 steel shot.
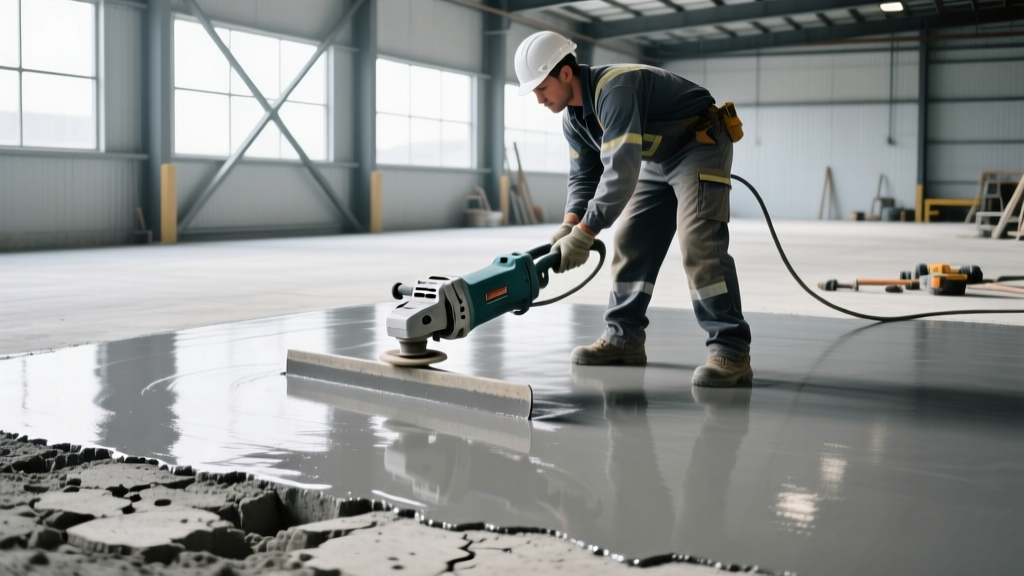
Installation Matrix: Matching Technique to Material
Different industrial environments dictate specific material choices and installation methodologies. The matrix below outlines the technical requirements for the most common heavy-duty systems in 2026.
| Material System | Required CSP | Mil Thickness | Cure Time (Foot Traffic) | Installed Cost (per sq ft) |
|---|---|---|---|---|
| 100% Solids Epoxy Broadcast | CSP 3-5 | 30-45 mils | 12-16 hours | $4.50 - $7.00 |
| Urethane Cement (PU) Mortar | CSP 5-7 | 125-250 mils | 8-12 hours | $8.00 - $14.00 |
| Methyl Methacrylate (MMA) | CSP 3-5 | 40-60 mils | 1-2 hours | $9.00 - $13.00 |
| Polished Concrete (with Densifier) | N/A (Grind) | Penetrating | Immediate | $3.50 - $6.50 |
Deep Dive: Urethane Cement Trowel-Down Technique
Urethane cement (often referred to by brand names like Stonhard Stonclad or Flowcrete Flowfresh) is the premier choice for food and beverage facilities due to its thermal shock resistance (withstanding steam cleaning up to 250°F) and zero-VOC profile. Installing a 1/4-inch (250 mil) urethane mortar requires strict adherence to timing and temperature.
- Priming the Substrate: Unlike epoxies, urethane cements are typically installed directly over the shot-blasted concrete without a primer, provided the slab is dry. However, a thin "grout coat" of the same urethane material, scraped flat with a rubber squeegee, is often applied to fill concrete voids and prevent outgassing.
- Mixing the 4-Component System: Urethane mortars consist of Part A (isocyanate), Part B (polyol), Part C (aggregate powder), and Part D (color pigment). Mix the liquids first for 30 seconds, then add the powder. You have a strict pot life of 15 to 20 minutes at 70°F. Never mix more than one unit at a time.
- Spreading and Troweling: Pour the mixture onto the floor and spread using a gauge rake set to 1/4-inch depth. Immediately follow with a steel finishing trowel to compact the material and burnish the surface. Keep the trowel angle low (10-15 degrees) to avoid pulling the aggregate out of the matrix.
- Sealing the Edges: Urethane cements require a saw-cut termination trench (1/2-inch deep by 1/2-inch wide) at all doorways and free edges to prevent the thick mortar from peeling up under forklift traffic.
Deep Dive: 100% Solids Epoxy Quartz Broadcast
For automotive shops, warehouses, and light manufacturing, a 100% solids epoxy with a full quartz sand broadcast provides exceptional impact resistance and slip resistance. This is a multi-layer build process.
- Base Coat Application: Apply a 100% solids epoxy primer at a rate of 100 to 150 square feet per gallon using a 1/4-inch nap roller. This coat must remain tacky for the broadcast.
- Quartz Broadcasting: While the base coat is wet, broadcast graded silica quartz (typically 30-40 mesh) by hand or using a mechanical spreader until the floor is completely saturated and no wet epoxy is visible. The application rate is approximately 1.5 lbs per square foot. Allow to cure for 12 hours.
- Scraping and Vacuuming: Once cured, use a heavy-duty floor scraper with a carbide blade to knock off any loose or standing quartz. Follow immediately with a commercial HEPA vacuum to remove all dust.
- Grout Coat and Topcoat: Apply an epoxy grout coat to fill the voids between the quartz grains, followed by a final aliphatic polyurethane topcoat. The polyurethane topcoat is critical; standard epoxies will yellow and chalk under UV exposure from skylights or loading dock doors, whereas aliphatic urethanes maintain color stability and offer superior abrasion resistance.
Curing and Environmental Controls
Resinous flooring chemistry is highly sensitive to ambient conditions. Facility managers must ensure HVAC systems are operational or temporary climate control is in place before installation begins.
Furthermore, proper ventilation is required not just for worker safety, but to carry away exothermic heat and VOCs. When handling isocyanates or MMA catalysts, installers must adhere strictly to OSHA Hazard Communication Standards, utilizing supplied-air respirators when applying MMA systems in confined spaces due to their high vapor pressure and strong odor.
Common Installation Failures and Troubleshooting
Even with premium materials, poor technique leads to expensive remediation. Here are the most frequent failure modes in industrial settings:
- Delamination at Cold Joints: Occurs when the installer stops work and restarts the next day without saw-cutting a clean, straight edge. Fix: Always terminate the day's work at a saw-cut control joint or tape off a straight line to grind and feather the next day.
- Pinholing and Outgassing: Small bubbles that pop and leave craters in the finish. This happens when air trapped in porous concrete expands as the room warms up, pushing through the wet epoxy. Fix: Apply a thin, penetrating primer coat to seal the slab pores before the main broadcast or trowel-down coat.
- Soft Spots in Urethane: Caused by improper mixing of the 4-part system, specifically scraping the sides of the bucket inadequately, leaving unmixed Part A (isocyanate) on the walls. Fix: Use a Jiffy mixer paddle and scrape the sides and bottom of the pail continuously during the 2-minute mix cycle.
Frequently Asked Questions
Can industrial floor coverings be installed over existing tile or VCT?
Generally, no. Resinous systems require a porous, mechanically profiled substrate. Existing adhesives from VCT or the glazed surface of ceramic tile will prevent proper adhesion. The existing floor must be removed, and the concrete beneath must be shot-blasted to remove residual mastic.
How long must new concrete cure before applying an industrial floor covering?
Standard practice dictates a 28-day cure for new concrete slabs. However, even after 28 days, the slab must pass the ASTM F2170 RH test. If the slab was poured with a high water-to-cement ratio or lacks a vapor barrier beneath the slab, it may take months to reach the required <75% RH threshold.
What is the best industrial floor covering option for extreme cold storage?
Methyl Methacrylate (MMA) systems are the superior choice for freezers and cold storage facilities. Unlike epoxies and urethanes that become brittle or fail to cure at low temperatures, MMA can be installed and fully cured at temperatures as low as -20°F (-29°C), allowing facilities to remain operational without shutting down the refrigeration systems.
Written by
James ThorntonJames Thornton is a construction industry veteran with 25 years of hands-on experience in wood framing, lumber grading, and residential building codes. He started as a framing carpenter in rural Oregon, earned his ICC Residential Building Inspector certification, and eventually became a senior plan reviewer for the City of Portland Bureau of Development Services. James holds a B.S. in Wood Science & Technology from Oregon State University and is a certified lumber grader through the West Coast Lumber Inspection Bureau (WCLIB). He has inspected over 3,000 residential construction sites and authored the city's internal guide on advanced framing techniques (2x6 at 24" O.C.). James lives in Bend, OR, where he builds custom timber-frame cabins and competes in lumberjack sports.
More from James Thornton
View all
Insulation
Best Home Insulation Materials: Complete 2026 Guide
Compare top home insulation materials for 2026. Find R-values, installed costs per square foot, and best uses for fiberglass, spray foam, and mineral wool.
Aug 4, 2026

Sustainable Building
Certify Your Green Building Material for LEED and WELL
Step-by-step guide to certifying a green building material for LEED v5 and WELL v2. Master EPDs, HPDs, and VOC limits for 2026 project specifications.
Aug 4, 2026

Stone & Masonry
Veneer Stacked Stone Panels: Interior Design & Style Showcase
Discover how veneer stacked stone panels transform interiors. Explore modern design profiles, material pairings, and technical installation specs.
Aug 4, 2026