Cork Flooring and Radiant Heat: Installation Rules
Learn the strict installation rules for cork flooring and radiant heat systems. Discover compatible products, temperature limits, and acclimation steps.
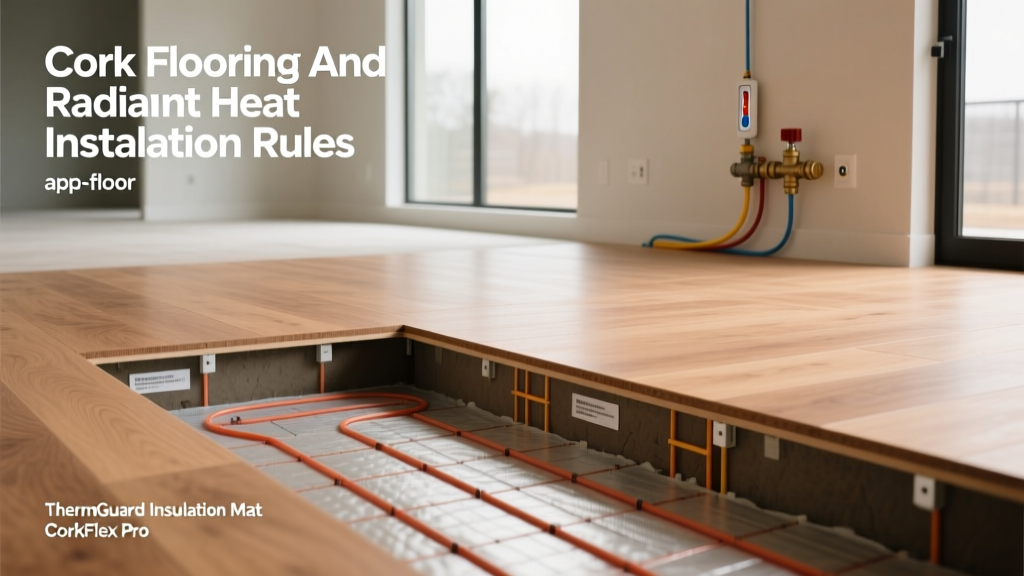
The Thermal Dynamics of Cork and Radiant Systems
Pairing cork flooring and radiant heat requires a precise understanding of thermal resistance. Cork is inherently a thermal insulator; its cellular structure contains millions of microscopic air pockets, which is exactly what gives it excellent acoustic and thermal insulation properties. However, when installed over a hydronic or electric radiant heating system, this insulating quality becomes a significant hurdle. The thermal resistance (R-value) of cork is approximately 0.39 per 1/4-inch (6mm) of thickness. While this keeps rooms warm by preventing heat loss downward, it actively resists the upward transfer of heat from the subfloor into the living space.
To ensure efficient heat transfer without overworking the boiler or electrical grid, the total thickness of the cork layer must be strictly managed. Industry guidelines dictate that the total flooring assembly over radiant heat should not exceed an R-value of 1.5. For cork, this means the maximum allowable thickness is generally 1/2-inch (12mm), though 3/16-inch (5mm) to 5/16-inch (8mm) glue-down tiles are vastly preferred for optimal thermal conductivity.
Floating vs. Glue-Down: The Air Gap Problem
When evaluating cork flooring and radiant heat compatibility, the installation method is the most critical variable. Floating cork floors (typically 7/16-inch thick planks with a click-lock mechanism) are generally discouraged over radiant systems. Floating floors rely on an underlayment and inherently possess microscopic air gaps between the subfloor and the flooring material. Air is a highly effective insulator. This air gap creates a thermal break, forcing the radiant system to work significantly harder to push heat through the floor, often resulting in overheated subfloors and sluggish room heating.
Glue-down cork tiles eliminate the air gap entirely, creating a direct thermal bridge from the heating element through the adhesive and into the cork. According to the Radiant Professionals Alliance (RPA), direct-adhered floor coverings yield the highest thermal efficiency and lowest risk of system failure.
| Feature | Glue-Down Cork Tiles (Recommended) | Floating Cork Planks (Not Recommended) |
|---|---|---|
| Typical Thickness | 3/16" (5mm) to 5/16" (8mm) | 7/16" (11mm) to 1/2" (12mm) |
| Thermal Transfer | Excellent (Direct bond to subfloor) | Poor (Air gap and underlayment act as thermal breaks) |
| Adhesive Required | Yes (Silane-terminated polymer or Urethane) | No (Click-lock mechanism) |
| Risk of Overheating | Low | High (Trapped heat can damage heating elements) |
| Dimensional Stability | High (Fully restrained by adhesive) | Moderate (Prone to expansion/contraction with temp shifts) |
Subfloor Preparation and Moisture Testing
Radiant heating systems are most commonly embedded in concrete slabs (hydronic) or installed over concrete/gypsum underlayments. Concrete is highly porous and retains moisture. When the radiant system is activated, it drives this moisture upward. If the cork is installed before the slab is fully cured and dried, the trapped vapor will push through the adhesive, causing bond failure and mold growth beneath the tiles.
ASTM F1869 vs. ASTM F2170 Testing Protocols
Before any adhesive is applied, you must conduct quantitative moisture testing. The US Department of Energy emphasizes that subfloor moisture mitigation is the primary factor in radiant floor longevity. Do not rely on visual inspections or plastic sheet tests.
- ASTM F1869 (Calcium Chloride Test): Measures the Moisture Vapor Emission Rate (MVER). For cork installations over radiant concrete, the MVER must not exceed 3 lbs per 1,000 square feet per 24 hours. If it does, a two-part epoxy moisture barrier (such as Bostik Vapor-Lock) must be applied.
- ASTM F2170 (In-Situ Probe Test): Measures the internal Relative Humidity (RH) of the concrete slab at 40% depth. The RH must read below 75% before installation can proceed. This test is vastly superior for radiant slabs, as it measures the moisture deep within the slab where the heating tubes reside, rather than just the surface emissions.
Step-by-Step Glue-Down Installation Procedure
Proper installation of cork flooring and radiant heat systems requires strict adherence to adhesive chemistry and environmental controls. Use a high-quality, flexible, moisture-cured polyurethane or silane-terminated polymer (STP) adhesive, such as Bostik Ultra-Set SingleStep or DriTac 6200. These adhesives remain slightly elastomeric after curing, allowing the cork to expand and contract microscopically without breaking the bond.
- System Shutoff (48 Hours Prior): Turn off the radiant heating system completely at least 48 hours before installation begins. The subfloor temperature must stabilize between 65°F and 75°F (18°C - 24°C). Applying adhesive to a warm slab will cause it to skin over and flash-cure before the cork is laid, resulting in a false bond.
- Acclimation: Unbox the cork tiles and stack them in a crisscross pattern in the installation room for a minimum of 72 hours. The room's ambient humidity must be maintained between 35% and 55%.
- Primer Application: If required by your specific adhesive manufacturer, apply a concrete primer using a 3/8-inch nap roller. Allow it to dry to the touch (usually 2-4 hours).
- Adhesive Troweling: Use a 1/8-inch x 1/8-inch x 1/8-inch square-notch trowel for 3/16-inch cork, or a 3/16-inch x 5/32-inch V-notch trowel for 5/16-inch cork. Spread the adhesive evenly, maintaining a 30-degree angle to the subfloor to ensure proper ridge height.
- Tile Placement and Rolling: Lay the cork tiles into the wet adhesive, ensuring tight seams without forcing the tiles (which causes peaking). Immediately after laying a section, roll the entire floor with a minimum 100-pound, three-section floor roller. This step is non-negotiable; it forces the adhesive into the microscopic pores of the cork backing, ensuring 100% coverage and eliminating air pockets that could act as localized thermal insulators.
The 14-Day Heat Ramp-Up Protocol
Once the adhesive has fully cured (typically 72 to 96 hours, depending on ambient humidity), the radiant system must be brought back online gradually. Shocking the newly installed cork with immediate high heat will cause rapid moisture expulsion, leading to severe cupping and adhesive crystallization.
Troubleshooting Thermal and Moisture Failures
Even with meticulous preparation, environmental shifts can cause issues. Understanding the failure modes of cork flooring and radiant heat systems allows for rapid diagnosis and correction.
- Edge Cupping (Upward curling at tile edges): This almost always indicates a moisture imbalance. The bottom of the cork is absorbing moisture from the concrete slab (or a damp crawl space below), while the top is being dried out by the radiant heat and low indoor winter humidity. Fix: Check subfloor RH levels. Install a whole-home humidifier to maintain 40% ambient RH.
- Tile Gapping and Shrinkage: Caused by excessive surface temperatures exceeding 85°F, or ambient humidity dropping below 30% during winter months. The cork physically loses its bound moisture and shrinks. Fix: Lower the boiler output temperature and introduce ambient moisture to the space.
- Adhesive Degradation (Spongy feel or hollow sound): If the floor sounds hollow when tapped with a brass mallet, the adhesive bond has failed. This is typically caused by applying adhesive to a slab that was too hot (flash curing), or failing to use a 100-lb roller during installation, leaving the cork resting on the adhesive ridges rather than embedded in them. Fix: Inject a subfloor repair adhesive (like DriTac Repair Kit) through a 1/16-inch drilled hole, or remove and replace the affected tiles.
Industry Standards and References
For further technical specifications regarding subfloor tolerances, adhesive selection, and environmental controls, consult the National Wood Flooring Association (NWFA) guidelines on radiant heat installations, which apply equally to natural cork assemblies. Always defer to the specific technical data sheets (TDS) provided by your cork and adhesive manufacturers, as proprietary chemical formulations may dictate slight variations in trowel size and curing times.