Flooring Options for Kitchen: Installation Techniques & Prep
Master kitchen flooring installation. Compare tile, LVP, and engineered wood techniques, subfloor prep, and cabinet sequencing for a flawless finish.
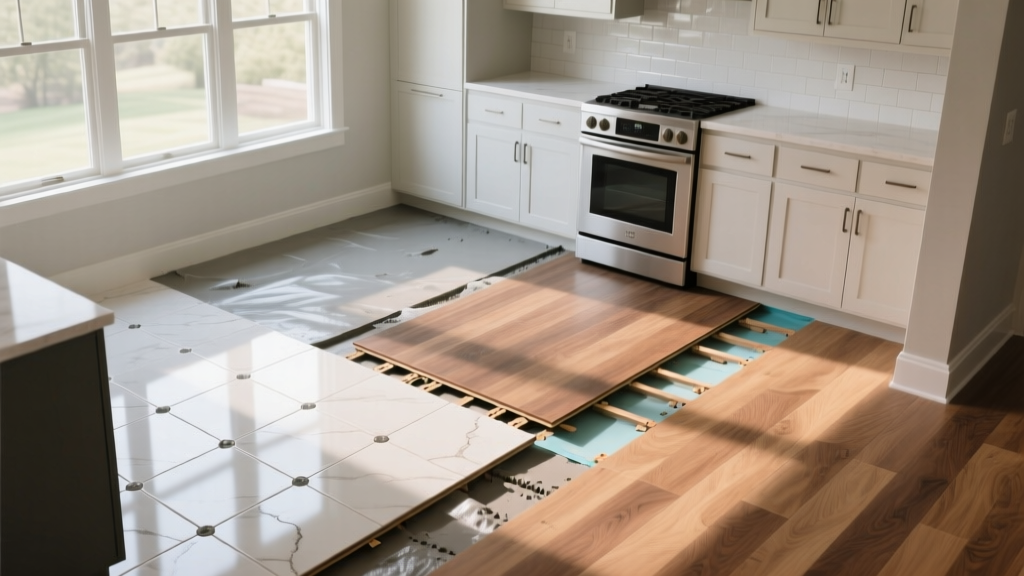
The Kitchen Subfloor Reality Check
Selecting the right flooring options for kitchen environments requires looking past surface aesthetics to evaluate subfloor tolerances, moisture mitigation, and structural deflection. The kitchen is a high-impact zone characterized by heavy point loads (refrigerators, cast-iron ranges, stone islands) and frequent temperature fluctuations from ovens and dishwashers. Before unboxing any material, you must verify the subfloor's structural integrity.
For ceramic and porcelain tile, the Tile Council of North America (TCNA) mandates a maximum deflection rating of L/360 under live and dead loads. If you are installing natural stone, that requirement tightens to L/720. Standard 3/4-inch OSB (Oriented Strand Board) is highly susceptible to edge swelling if exposed to plumbing leaks or dishwasher condensation. For premium kitchen installations, upgrade to engineered wood subfloor panels like AdvanTech or exterior-grade CDX plywood, fastened with ring-shank nails and subfloor adhesive (such as Loctite PL 400) every 6 inches along the joists to eliminate squeaks and micro-movements.

Porcelain & Ceramic Tile: The Mortar & Membrane Method
Large-format porcelain tile (e.g., 12x24 or 24x48 planks) remains a dominant choice for kitchens due to its impervious nature. However, the installation technique dictates its longevity. Direct-bonding tile to plywood with standard thinset is a primary cause of cracked grout and popped tiles.
Uncoupling Membranes and Thinset Selection
Install an uncoupling membrane, such as Schluter-Ditra, over the plywood subfloor. This membrane absorbs lateral shear stresses caused by seasonal wood expansion and thermal shifts from radiant heating systems. For setting the membrane to the plywood, use a modified thinset mortar. For setting the porcelain tile to the membrane, the Schluter Systems guidelines traditionally recommend an unmodified thinset, though modern polymer-modified Large and Heavy Tile (LHT) mortars like Mapei Ultraflex LFT are now widely accepted and provide superior non-sag performance for heavy kitchen tiles.
Luxury Vinyl Plank (LVP): Floating vs. Glue-Down in Wet Zones
Rigid core Stone Plastic Composite (SPC) LVP has captured significant market share due to its waterproof core and realistic wood visuals. While often marketed as a simple click-lock floating floor, kitchen installations introduce severe mechanical complications regarding cabinetry and heavy appliances.
The Island Pinch-Point Failure
Floating floors require a continuous 1/4-inch to 3/8-inch expansion gap around all vertical obstructions to accommodate thermal expansion. When a heavy kitchen island (weighing 400+ lbs with stone countertops) is bolted to the floor on top of a floating LVP installation, it creates a 'pinch point.' The floor cannot expand or contract freely, leading to buckling, seam separation, or broken click-lock mechanisms within the first year.
Engineered Hardwood: Nail-Down vs. Floating Over Concrete
Solid hardwood is generally discouraged in kitchens due to its dimensional instability when exposed to water leaks. Engineered hardwood, featuring a plywood or HDF core with a real wood veneer, offers the warmth of wood with superior structural stability. The National Wood Flooring Association (NWFA) provides strict acclimation and moisture testing protocols that must be followed.
Moisture Testing and Adhesive Selection
Before installing engineered wood over a concrete slab (common in slab-on-grade kitchen extensions), conduct a quantitative moisture test. Use an in-situ Relative Humidity (RH) probe test (ASTM F2170) or a calcium chloride test (ASTM F1869). If the concrete exceeds the adhesive manufacturer's limits, apply a moisture mitigation system like Bona D501 or Custom TechMVP.
For a full-spread glue-down installation, use a silane-based adhesive such as Bona R848. Silane adhesives remain permanently flexible, allowing the wood to expand and contract naturally with kitchen humidity spikes (e.g., boiling pasta water, running the dishwasher) without breaking the bond. Apply the adhesive with a 3/16-inch x 5/32-inch V-notch trowel, and roll the floor with a 100-lb roller within 45 minutes to ensure full transfer.
Installation Matrix: Kitchen Flooring Comparison
| Material | Install Method | Subfloor Tolerance | Pro Install Cost (2026) | Cabinet Sequence |
|---|---|---|---|---|
| Large Porcelain Tile | Thinset + Membrane | L/360 (L/720 for stone) | $8.50 - $14.00 / sq.ft. | Cabinets first, tile to toe-kick |
| Rigid Core SPC (LVP) | Click-Lock Floating | 3/16' in 10 ft radius | $2.50 - $4.50 / sq.ft. | Cabinets first, float around |
| Engineered Hardwood | Full-Spread Glue-Down | Flat, dry concrete/plywood | $5.00 - $9.00 / sq.ft. | Either (if glued), Cabinets first (if floating) |
| Sheet Vinyl | Full-Spread Adhesive | Underlayment grade ply | $3.00 - $5.50 / sq.ft. | Cabinets first, template and scribe |
Critical Installation Failures to Avoid
Even premium materials will fail in a kitchen if installation details are ignored. Watch for these common edge cases:
- Dishwasher Clearance: Modern dishwashers often have adjustable front legs. If you install thick porcelain tile or engineered wood after the cabinets are set, the new floor height may prevent the dishwasher from sliding out for future maintenance. Always calculate the finished floor elevation (FFE) and adjust cabinet toe-kicks or appliance legs accordingly before laying the floor.
- Transition Moldings at Doorways: Never butt kitchen tile directly against hallway hardwood without a transition profile. Use a Schluter-Reno or Schluter-Schiene profile to protect the raw edge of the tile and accommodate the different expansion rates of the two materials.
- Refrigerator Ice Line Leaks: When installing floating floors near refrigerator water lines, apply a bead of 100% silicone sealant around the penetration hole in the subfloor before the flooring goes down. This prevents a slow ice-maker leak from migrating under the floor and destroying the subfloor.
Written by
James ThorntonJames Thornton is a construction industry veteran with 25 years of hands-on experience in wood framing, lumber grading, and residential building codes. He started as a framing carpenter in rural Oregon, earned his ICC Residential Building Inspector certification, and eventually became a senior plan reviewer for the City of Portland Bureau of Development Services. James holds a B.S. in Wood Science & Technology from Oregon State University and is a certified lumber grader through the West Coast Lumber Inspection Bureau (WCLIB). He has inspected over 3,000 residential construction sites and authored the city's internal guide on advanced framing techniques (2x6 at 24" O.C.). James lives in Bend, OR, where he builds custom timber-frame cabins and competes in lumberjack sports.
More from James Thornton
View all
Insulation
Best Home Insulation Materials: Complete 2026 Guide
Compare top home insulation materials for 2026. Find R-values, installed costs per square foot, and best uses for fiberglass, spray foam, and mineral wool.
Aug 4, 2026

Sustainable Building
Certify Your Green Building Material for LEED and WELL
Step-by-step guide to certifying a green building material for LEED v5 and WELL v2. Master EPDs, HPDs, and VOC limits for 2026 project specifications.
Aug 4, 2026

Stone & Masonry
Veneer Stacked Stone Panels: Interior Design & Style Showcase
Discover how veneer stacked stone panels transform interiors. Explore modern design profiles, material pairings, and technical installation specs.
Aug 4, 2026