Expert Installation Techniques for the Best Gym Flooring Options
Master the installation of top gym flooring options. Learn subfloor prep, adhesive selection, and cutting techniques for rubber, turf, and polyurethane.

Subfloor Assessment and Preparation Protocols
The longevity of any commercial or high-end residential gym flooring options depends entirely on the substrate beneath it. Concrete slabs must be fully cured (minimum 28 days) and structurally sound. Before unrolling any material, installers must perform rigorous moisture testing. According to the ASTM F2170 standard, relative humidity (RH) in the concrete must not exceed 75% when tested via in-situ probes. For calcium chloride testing (ASTM F1869), the limit is 3 lbs per 1,000 square feet per 24 hours.
If moisture levels exceed these thresholds, a two-part epoxy moisture mitigation system (such as Mapei Primer EP or Bostik MVER Block) is mandatory. Applying standard polyurethane adhesives over a damp slab will result in adhesive emulsification, leading to catastrophic bond failure and bubbling within weeks.
Mechanical Profiling and Leveling
Acid etching is no longer considered an acceptable preparation method for heavy gym flooring. Subfloors must be mechanically profiled using shot blasting or diamond grinding to achieve a Concrete Surface Profile (CSP) of 2 to 3. This opens the pores of the concrete, allowing moisture-cured adhesives to penetrate deeply. For slabs with variations exceeding 3/16 inch over a 10-foot radius, apply a high-strength self-leveling underlayment (SLU) like Ardex K 15 or Mapei Novoplan 710, ensuring a minimum compressive strength of 4,000 psi to withstand the impact of dropped barbells.
Material Acclimation: The Most Skipped Step
Vulcanized rubber and synthetic turf are highly sensitive to thermal expansion and contraction. Failing to acclimate materials is the primary cause of seam peaking and tile migration. All gym flooring options must be brought into the installation environment and unrolled or unboxed for a minimum of 48 to 72 hours prior to installation.
- Temperature Parameters: The HVAC system must be operational, maintaining an ambient temperature between 65°F and 85°F (18°C - 29°C).
- Humidity Control: Indoor relative humidity should be stabilized between 35% and 65%.
- Material Relaxation: Rubber rolls shipped on pallets often retain a 'memory' curve. Unroll them face-down in a staggered pattern to allow the edges to flatten naturally. Do not force them flat with heavy weights, which can cause micro-tears in the vulcanized backing.
Installation Techniques by Material Type
Vulcanized Rubber Rolls (e.g., Ecore, Regupol)
Rubber rolls (typically 4mm to 12mm thick) require a full-spread adhesive application for commercial spaces. Use a 1/16-inch x 1/16-inch x 1/16-inch square-notched trowel. Fold the roll in half, apply the adhesive to the exposed subfloor, and allow it to flash off (usually 15-30 minutes, depending on the manufacturer's specifications) until it is tacky but does not transfer to your knuckle. Lay the material into the adhesive and immediately roll it with a 100-pound segmented floor roller in two perpendicular directions to ensure 100% adhesive transfer.
Interlocking Rubber Tiles
For interlocking tiles (e.g., 2x2 foot or 3x3 foot formats), a perimeter-installed, center-pinned method works best. Snap two intersecting chalk lines in the exact center of the room. Apply a high-tack acrylic or polyurethane adhesive only to the center four tiles to pin them in place. Assemble the remaining tiles outward in a pyramid pattern. This technique allows the floor to expand and contract uniformly toward the walls, preventing the tiles from buckling in the center of the room.
Synthetic Turf with Shock Pads
Indoor turf installation requires a multi-layer approach. First, adhere the closed-cell foam shock pad (typically 10mm to 20mm thick) to the concrete using a standard rubber flooring adhesive. Once the pad is secured, roll out the turf. Turf seams must be joined using a 12-inch wide polyethylene seaming tape and a two-part methacrylate or polyurethane seam adhesive. Use a specialized turf comb to brush the fibers away from the seam line before applying the adhesive, preventing the grass blades from being permanently glued into the joint.
Adhesive Selection and Moisture Mitigation Matrix
Selecting the correct adhesive is critical for passing impact tests and preventing off-gassing in enclosed gym environments. Below is a comparison of industry-standard adhesives for various gym flooring options in 2026.
| Adhesive Model | Chemistry | Best Application | Approx. Cost (2026) | Coverage Rate |
|---|---|---|---|---|
| Bostik DuraGrip | 1-Part Moisture-Cured Polyurethane | Rubber rolls, heavy weight areas | $85 - $95 / gallon | 120 - 140 sq ft / gal |
| Mapei Ultrabond ECO 990 | 2-Part Polyurethane | Turf, high-impact Olympic platforms | $110 - $130 / kit | 130 - 150 sq ft / gal |
| Roberts 6700 | Solvent-Free Acrylic | Light-duty interlocking tiles, cardio zones | $45 - $55 / gallon | 150 - 170 sq ft / gal |
| Custom MVER Epoxy | 2-Part Epoxy Primer | Moisture mitigation (pre-adhesive) | $180 - $220 / kit | 80 - 100 sq ft / gal |
Cutting, Seaming, and Expansion Gaps
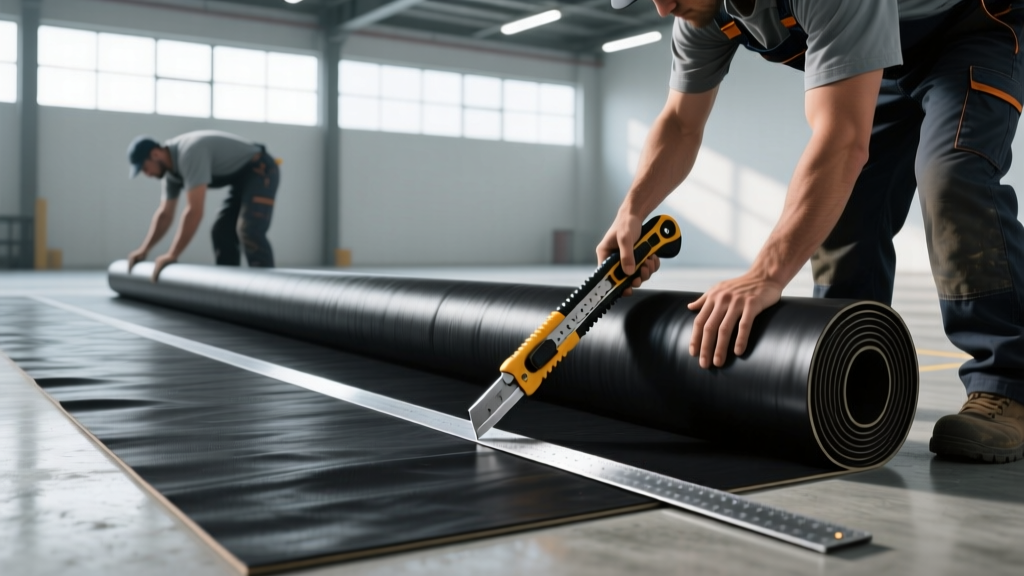
The difference between an amateur and a professional gym floor lies in the seams. When joining rubber rolls, never rely on factory edges, as they are often slightly beveled or damaged during transit. Use the double-cut seaming technique:
- Overlap two adjacent rolls by exactly 2 inches.
- Place a heavy aluminum straightedge or a specialized seam cutter over the overlap.
- Using a heavy-duty utility knife with a fresh hook blade, cut through both layers simultaneously. A hook blade prevents the blade from riding up and slicing the face of the rubber.
- Remove the waste strips, apply a 4-inch strip of double-sided flooring tape or a bead of seam sealer underneath the joint, and press the edges together.
Expansion Gaps: All floating or semi-adhered gym flooring options require a 1/4-inch expansion gap around the entire perimeter of the room, including around pillars and door jambs. This gap is later concealed by rubber cove base or architectural molding. Failing to leave this gap will result in the floor 'tenting' or buckling when the ambient temperature rises.
Troubleshooting Common Installation Failures
Failure Mode 1: Seam Peaking and Separation
Cause: Insufficient adhesive transfer at the seams, or rolling the floor after the adhesive has skinned over.
Solution: Always use a 100-lb roller within 30 minutes of laying the material. For high-traffic seams, apply a 2-inch band of two-part polyurethane adhesive directly beneath the joint, rather than relying solely on the surrounding full-spread adhesive.
Failure Mode 2: Tile Migration and Gapping
Cause: Installing interlocking tiles without pinning the center, or failing to account for the thermal expansion of the rubber.
Solution: Adhere the center tiles to lock the grid in place. Ensure the perimeter expansion gap is clear of debris. If tiles have already gapped, inject a flexible polyurethane caulk into the seams and use a floor pull-bar to tighten the grid.
Failure Mode 3: Adhesive Emulsification (Bubbling)
Cause: Applying moisture-sensitive adhesives over a concrete slab with high alkalinity and excessive moisture vapor emission.
Solution: The floor must be completely removed. Shot-blast the failed adhesive, apply a penetrating epoxy moisture barrier, and re-test the slab per ASTM F2170 before reinstalling.
Post-Installation Curing and Maintenance
After the final roll is laid and rolled, the floor requires a strict curing period. Restrict all foot traffic for a minimum of 24 hours, and prohibit heavy equipment placement (like squat racks and cable machines) for 72 hours. This allows the polyurethane adhesives to fully cross-link and achieve their maximum shear strength. For the first 30 days, clean the floor only with a neutral pH cleaner and a microfiber mop; avoid harsh degreasers or ammonia-based solutions, which can break down the topical sealants applied at the factory to vulcanized rubber surfaces.
Written by
James ThorntonJames Thornton is a construction industry veteran with 25 years of hands-on experience in wood framing, lumber grading, and residential building codes. He started as a framing carpenter in rural Oregon, earned his ICC Residential Building Inspector certification, and eventually became a senior plan reviewer for the City of Portland Bureau of Development Services. James holds a B.S. in Wood Science & Technology from Oregon State University and is a certified lumber grader through the West Coast Lumber Inspection Bureau (WCLIB). He has inspected over 3,000 residential construction sites and authored the city's internal guide on advanced framing techniques (2x6 at 24" O.C.). James lives in Bend, OR, where he builds custom timber-frame cabins and competes in lumberjack sports.
More from James Thornton
View all
Insulation
Best Home Insulation Materials: Complete 2026 Guide
Compare top home insulation materials for 2026. Find R-values, installed costs per square foot, and best uses for fiberglass, spray foam, and mineral wool.
Aug 4, 2026

Sustainable Building
Certify Your Green Building Material for LEED and WELL
Step-by-step guide to certifying a green building material for LEED v5 and WELL v2. Master EPDs, HPDs, and VOC limits for 2026 project specifications.
Aug 4, 2026

Stone & Masonry
Veneer Stacked Stone Panels: Interior Design & Style Showcase
Discover how veneer stacked stone panels transform interiors. Explore modern design profiles, material pairings, and technical installation specs.
Aug 4, 2026