Herringbone Flooring Material Taxonomy: Wood vs Tile vs LVP Selection
Compare herringbone flooring materials including hardwood, LVP, and tile. Expert taxonomy guide for selecting the right pattern and plank.
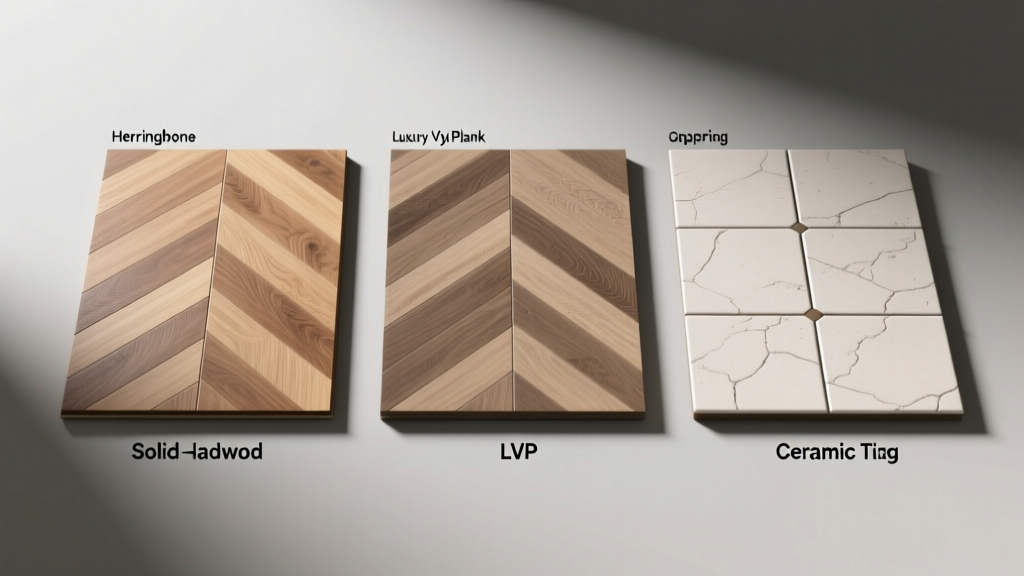
The Herringbone Material Taxonomy: Core Categories
Selecting herringbone flooring requires moving beyond aesthetic preferences to evaluate structural geometry and material physics. The interlocking 90-degree pattern creates inherent shear stress at the joints, meaning material stability is vastly more critical than in a standard straight-lay installation. The modern flooring market segments herringbone options into four distinct material taxonomies, each with specific performance thresholds and installation prerequisites.
Engineered and Solid Hardwood (The Traditionalist)
While solid hardwood is the historical standard for herringbone, engineered hardwood is the superior choice for modern installations. Solid wood expands and contracts significantly across the grain. In a herringbone layout, adjacent planks run perpendicular to one another, meaning one plank's lateral expansion pushes directly against the adjacent plank's longitudinal stability. This cross-grain pressure frequently causes seam gapping or cupping.
High-quality engineered hardwood utilizes a cross-plywood core (typically 7 to 9 layers of Baltic birch) that neutralizes this bi-directional movement. For herringbone, specify engineered planks with a minimum 4mm top wear layer and a tongue-and-groove (T&G) profile. Avoid click-lock engineered wood for this pattern; the mechanical locking mechanisms frequently fracture under the concentrated shear stress of the 90-degree corners.
Stone Polymer Composite (SPC) Vinyl (The Pragmatist)
Not all luxury vinyl plank (LVP) is suitable for herringbone. Flexible LVP will telegraph subfloor imperfections and cause the click-lock joints to separate. You must specify SPC (Stone Polymer Composite) rigid core vinyl. The limestone-infused core provides the dimensional rigidity required to maintain the structural integrity of the herringbone interlock. Ensure the product features a minimum 20-mil wear layer and a pre-attached IXPE or cork underlayment to dampen the hollow acoustic resonance common to rigid core products.
Rectified Porcelain Tile (The Enduring Classic)
Porcelain tile offers the highest moisture tolerance and structural permanence. The critical specification for herringbone tile is rectified edges. Non-rectified tiles have slightly rounded, uneven edges requiring wide grout lines (1/8" to 3/16"), which visually fractures the continuous flow of the herringbone pattern. Rectified tiles are precisely cut after firing, allowing for ultra-narrow 1/16" grout joints that maintain the illusion of a continuous, woven surface. For wood-look porcelain herringbone, specify planks no longer than 24 inches to prevent bowing (warpage) across the length of the tile.
Comparative Selection Matrix
The following matrix outlines the performance characteristics and cost parameters for herringbone materials in the current market.
| Material Category | Optimal Subfloor | Moisture Tolerance | Labor Premium vs. Straight Lay | Avg. Material Cost (per sq. ft.) |
|---|---|---|---|---|
| Engineered Hardwood | 3/4" Plywood (CDX or AdvanTech) | Moderate | +35% to +50% | $8.50 - $14.00 |
| Solid Hardwood | 3/4" Plywood (Nail-down only) | Low | +50% to +70% | $9.00 - $16.00 |
| SPC Rigid Core Vinyl | Concrete or Plywood (Floating) | High (Waterproof) | +25% to +40% | $4.50 - $8.00 |
| Rectified Porcelain Tile | Cement Board or Uncoupling Membrane | Maximum (Impervious) | +40% to +60% | $6.00 - $12.00 |
Dimensional Geometry: Plank Ratios and Angles
The visual impact of herringbone flooring is dictated by the plank's length-to-width ratio and the angle of installation relative to the room's walls.
The Length-to-Width Ratio
Traditional herringbone utilizes a strict 1:4 or 1:5 ratio. Common dimensions include 3" x 15" or 4" x 20". This ratio is mathematically necessary to ensure the "step" of the pattern aligns correctly without requiring excessive field cutting. Modern, large-format herringbone (e.g., 5" x 25" or 6" x 30") creates a more contemporary, elongated aesthetic but demands an absolutely flawless subfloor; any deflection will cause the long planks to lip or separate at the interlocking joints.
45-Degree vs. 90-Degree Orientation
- 90-Degree (Square to Room): The planks run parallel and perpendicular to the walls, forming a "V" that points directly toward the primary entrance. This is easier to install, yields lower waste, and grounds the space symmetrically.
- 45-Degree (Diagonal): The entire pattern is rotated 45 degrees so the "V" points toward the corners of the room. This creates a dynamic, expanding visual effect that makes narrow rooms feel wider, but it increases material waste and requires complex perimeter cuts.
The Waste Factor Reality Check
Standard straight-lay flooring requires a 5% to 7% overage for cuts and defects. Herringbone installations fundamentally alter this math. A 90-degree herringbone layout requires a 12% to 15% waste factor. If you opt for a 45-degree diagonal herringbone, the perimeter cutting complexity pushes the required waste factor to 15% to 20%. Failing to account for this will result in project delays and dye-lot mismatches when ordering supplemental material.
Subfloor Tolerances and Preparation
Herringbone patterns amplify subfloor deflection. A minor dip that would be absorbed by a standard straight-lay plank will cause a herringbone joint to snap or separate. The industry standard for subfloor flatness is 3/16" over a 10-foot radius. For herringbone, you must tighten this tolerance to 1/8" over 10 feet.
According to guidelines published by the National Wood Flooring Association (NWFA), moisture testing is equally critical. Concrete slabs must be tested for moisture vapor emission rates (MVER) using calcium chloride tests or in-situ relative humidity probes. If the slab exceeds the adhesive manufacturer's limits (typically 3 to 5 lbs per 1,000 sq. ft. per 24 hours), a two-part epoxy moisture mitigation system must be applied before leveling and installation.
Room-by-Room Selection Framework
Material selection must align with the environmental realities of the specific room.
Bathrooms and Wet Areas
Selection: Rectified Porcelain Tile or fully waterproof SPC Vinyl.
Rationale: Solid and engineered hardwood will inevitably suffer moisture intrusion at the complex seam intersections of a herringbone pattern. The Tile Council of North America (TCNA) strongly recommends utilizing an uncoupling membrane (like Schluter-DITRA) beneath porcelain herringbone in wet areas to prevent crack telegraphing and ensure waterproof integrity.
Kitchens and High-Traffic Zones
Selection: Engineered Hardwood (glue-down) or SPC Vinyl.
Rationale: Kitchens experience localized water spills and heavy point loads from appliances. Glue-down engineered hardwood provides a solid, monolithic feel that resists denting better than floating floors, while SPC offers total waterproof peace of mind without sacrificing the wood-look aesthetic.
Basements and Below-Grade Spaces
Selection: Floating SPC Vinyl or Floating Engineered Hardwood.
Rationale: Below-grade concrete slabs are inherently prone to hydrostatic pressure and moisture vapor transmission. Nail-down or glue-down wood installations are high-risk. A floating SPC floor with a 6-mil polyethylene vapor barrier beneath it provides the safest, most durable herringbone solution for basements.
Installation Realities and Hidden Costs
The intricate geometry of herringbone flooring directly impacts labor costs and project timelines. Installers typically charge a 30% to 50% premium over standard straight-lay rates. This premium covers the meticulous layout process, which requires snapping dual intersecting chalk lines to establish the primary spine of the pattern before a single plank is laid.
Furthermore, as noted in recent market analyses by Floor Covering News, the demand for specialized pattern installations has outpaced the availability of master-level installers. Expect to vet installers specifically for their herringbone portfolio. A poorly executed herringbone floor will show "drift"—where the 90-degree angles slowly degrade into 88 or 92 degrees across the room, resulting in unsightly wedge-shaped gaps at the perimeter walls. Demand that your installer uses a laser level and frequently checks the diagonal measurements of the room to ensure the pattern remains perfectly square throughout the installation.
Final Procurement Checklist
Before authorizing a purchase order for herringbone flooring, verify the following specifications with your supplier:
- Core Construction: Confirm cross-ply engineered wood or SPC rigid core (reject flexible LVP or HDF laminate).
- Edge Profile: Specify T&G for glue/nail-down wood, or high-density click-lock for floating SPC. Ensure rectified edges for tile.
- Dimensional Ratio: Verify the length-to-width ratio (e.g., 1:4) aligns with your aesthetic goals and subfloor flatness capabilities.
- Overage Calculation: Apply a minimum 15% waste factor for 90-degree layouts, and 20% for 45-degree diagonal layouts.
- Dye-Lot Matching: Ensure the entire square footage, including the waste factor, is pulled from a single manufacturing dye-lot to prevent color banding across the intricate pattern.