How to Install Floor Transition Strips Between Uneven Surfaces
Learn exact measurements, adhesive choices, and track methods to install floor transition strips between floating hardwood, tile, and vinyl.
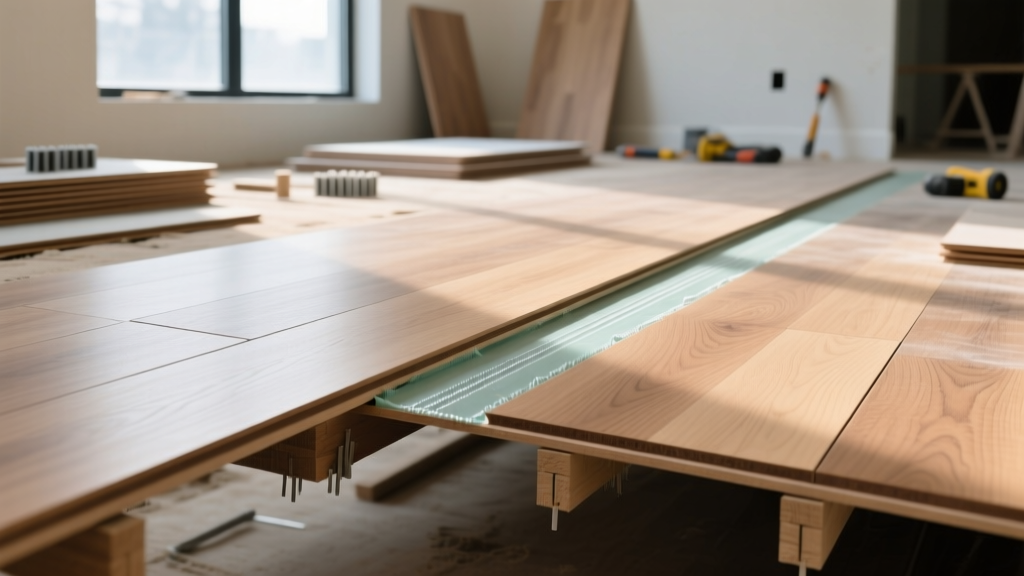
The Critical Role of Expansion Gaps in Transition Installations
The most common cause of catastrophic flooring failure around doorways is the improper handling of expansion gaps during transition installation. Floating floors—such as luxury vinyl plank (LVP), laminate, and engineered click-lock hardwood—must be able to expand and contract independently of the subfloor and adjacent surfaces. According to the National Wood Flooring Association (NWFA), solid hardwood requires up to a 1/2-inch expansion gap at perimeters and transitions, while LVP and laminate typically require 1/4-inch to 3/8-inch gaps.
When installing floor transition strips, the molding must bridge this gap without pinning the flooring down. If a transition strip is glued or nailed directly through a floating floor, the planks will buckle, peak, or separate at the seams when seasonal humidity changes cause the material to expand. The transition strip must be anchored exclusively to the subfloor, allowing the flooring edges to slide freely beneath the molding's lip.
Choosing the Right Transition Profile for Your Flooring Pair
Selecting the correct profile is dictated by the height delta (difference in elevation) between the two adjoining surfaces and the material composition. Using a T-molding for a 1/2-inch height drop will result in a tripping hazard and premature snapping of the molding lip.
| Profile Type | Best Application | Acceptable Height Delta | Average Cost (per 8ft strip) |
|---|---|---|---|
| T-Molding | Hardwood to Hardwood, LVP to Tile (same height) | 0 to 1/8 inch | $18 - $45 (Aluminum/Wood) |
| Reducer | Hardwood to Vinyl, Tile to Carpet | 1/4 inch to 5/8 inch | $15 - $35 (PVC/Wood) |
| Threshold / Baby Threshold | Hardwood to low-pile carpet, exterior doors | 1/8 inch to 3/8 inch | $20 - $50 |
| Stair Nosing (Overlap) | Floating floor over a stair edge | Matches plank thickness (usually 1/2" or 5/8") | $35 - $85 |
Track-Mount vs. Direct-Glue: Which Installation Method to Use
Modern transition systems generally utilize a two-piece design: a metal or PVC track anchored to the subfloor, and a decorative cap that snaps or glues into the track. Direct-glue methods (applying construction adhesive to the back of a solid wood or PVC strip and pressing it to the floor) are only acceptable for glue-down flooring installations or concrete subfloors where nailing is impossible and the flooring itself is not floating.
CRITICAL WARNING: Never Glue to Floating Floors
Never apply construction adhesive or silicone directly to the top edge of a floating LVP, laminate, or click-lock engineered floor. The adhesive will bond the transition strip to the floating planks, effectively pinning them to the subfloor. This restricts lateral movement and will cause the floor to buckle within 3 to 6 months of seasonal temperature shifts.
Step-by-Step Installation Procedure for Metal Track Systems
For high-traffic areas and commercial applications, aluminum track systems (such as the Schluter-RENO-T or similar architectural profiles) provide the highest durability. Follow this precise procedure for a secure, rattle-free installation.
- Measure and Cut the Track: Measure the doorway width. Cut the aluminum track using a miter saw equipped with an 80-tooth carbide-tipped non-ferrous metal blade. Cut the track 1/4-inch shorter than the total width to allow for hidden expansion at the door jambs.
- Position and Mark: Center the track over the expansion gap between the two floors. Ensure there is at least a 1/4-inch clearance between the track's fastening flange and the edge of the floating floor planks. Mark the screw hole locations with a pencil.
- Pre-Drill the Subfloor: Remove the track. For wood subfloors, pre-drill using a 1/8-inch wood bit. For concrete subfloors, use a 3/16-inch masonry bit and a hammer drill to a depth of 1-1/2 inches. Vacuum out all concrete dust from the holes to ensure anchor grip.
- Fasten the Track: Secure the track using #8 x 1-1/4-inch flat-head wood screws for timber subfloors, or 3/16-inch x 1-1/4-inch concrete masonry anchors (Tapcon style) for slabs. Space fasteners every 8 to 10 inches. Ensure the screw heads sit perfectly flush or slightly countersunk so they do not interfere with the snapping mechanism of the cap.
- Apply Adhesive to the Track (Not the Floor): Run a thin, continuous bead of 100% silicone or a high-grade polyurethane adhesive (like Loctite PL Premium 3x) inside the track's receiving channel. Do not overfill; excess adhesive will squeeze out and stain the flooring.
- Snap the Cap in Place: Align the decorative cap over the track. Press down firmly along the entire length, using a rubber mallet to tap it into the locking channel. Wipe away any squeezed adhesive immediately with a damp cloth or mineral spirits, depending on the adhesive type.
Cutting and Mitering Techniques for Clean Joints
When transitioning at an angle (such as a 45-degree doorway or a bay window), precision mitering is required. Cutting wood and aluminum transition caps requires different approaches to prevent splintering or burring.
- Solid Wood Caps: Use a 60-tooth finishing blade. Wrap the molding in painter's tape at the cut line to prevent tear-out on the veneer surface. Cut with the finished face pointing up if using a standard miter saw, or face down if using a sliding compound miter saw.
- Aluminum and PVC Caps: Use an 80-tooth non-ferrous blade. Cut the cap and the track separately. Cutting them together causes the aluminum track to bind the blade, resulting in a jagged edge on the softer PVC or wood cap. After cutting aluminum, use a fine-grit sanding sponge or a metal file to deburr the inside edges so the cap slides smoothly over the track.
Troubleshooting Common Installation Failures
Even with careful planning, transition installations can fail if environmental factors or subfloor conditions are ignored. Use this diagnostic framework to address post-installation issues.
Symptom: The transition strip pops up or squeaks when stepped on.
Cause: The track was not securely fastened to the subfloor, or the subfloor is uneven, causing the track to flex. Alternatively, the adhesive used in the channel has failed due to moisture.
Fix: Remove the cap. Add additional fasteners to the track, ensuring they hit solid joists or using toggle bolts if the subfloor is compromised. If the subfloor is uneven, inject a self-leveling compound or use shims beneath the track before re-fastening. Re-apply a moisture-curing polyurethane adhesive to the channel before snapping the cap back in.
Symptom: The flooring planks adjacent to the transition are buckling or peaking.
Cause: The transition strip was glued or nailed directly through the floating floor, or the expansion gap beneath the transition lip is less than the required 1/4-inch, causing the planks to bottom out against the track during expansion.
Fix: Remove the transition strip immediately. Use a circular saw or oscillating multi-tool to trim an additional 1/8-inch off the edges of the floating floor to restore the proper expansion gap. Clean off any residual adhesive from the plank edges, reinstall the track ensuring it only contacts the subfloor, and replace the cap.
Symptom: Visible gaps at the ends of the transition strip near the door jambs.
Cause: The door casing was not undercut, forcing the installer to cut the transition strip short, or the strip was cut at an improper angle to match the casing profile.
Fix: Use an undercut saw (jamb saw) with a scrap piece of flooring as a height guide to trim the bottom of the door casing. This allows the transition strip to slide completely underneath the trim, hiding the cut ends and providing a seamless, professional finish.