Installing Vinyl Plank Flooring: Core Type Taxonomy & Prep Guide
Master installing vinyl plank flooring by understanding WPC, SPC, and flexible LVP taxonomy. Expert subfloor prep, locking mechanisms, and 2026 costs.
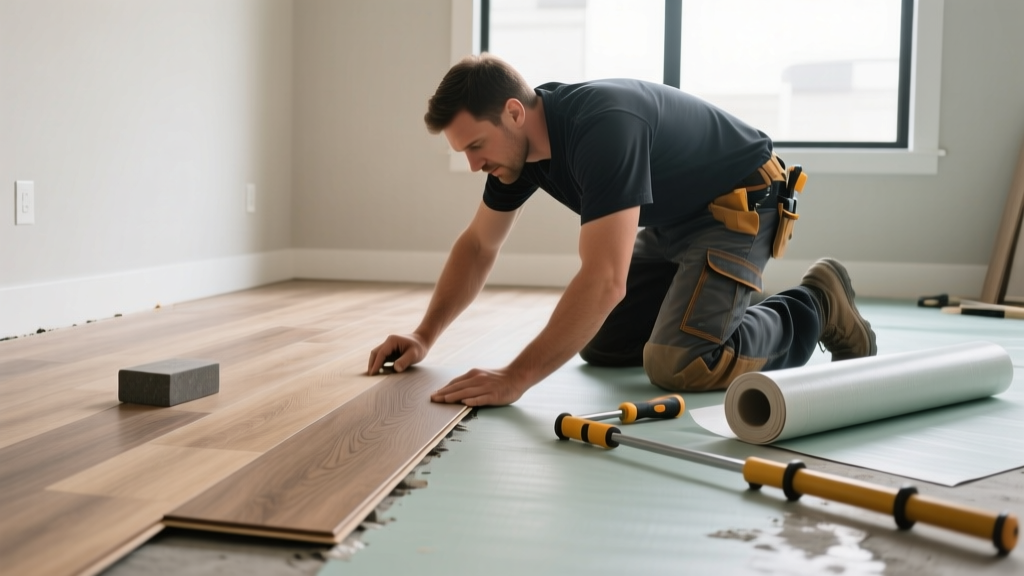
The Core Taxonomy of Luxury Vinyl Plank (LVP)
The success of installing vinyl plank flooring hinges entirely on recognizing the structural taxonomy of the product. Modern luxury vinyl is not a monolith; it is divided into three distinct core categories, each dictating specific subfloor preparation, acclimation, and installation techniques.
- Flexible LVP (Solid Vinyl Core): Composed of PVC and plasticizers. Highly flexible, requiring near-perfect subfloor flatness. Typically installed via full-spread adhesive (glue-down) or loose-lay with perimeter tape.
- WPC (Wood Plastic Composite): Features a foamed, expanded core utilizing wood flour or bamboo dust. Thicker (typically 6mm–8mm), softer underfoot, and offers superior sound absorption. More forgiving of minor subfloor imperfections.
- SPC (Stone Plastic Composite): Constructed from a dense limestone dust and PVC blend. Extremely rigid, thin (typically 4mm–6mm), and highly dimensionally stable. Demands strict subfloor flatness tolerances to prevent joint failure.
Subfloor Tolerance and Moisture Testing
Rigid core flooring (WPC/SPC) is often marketed as capable of hiding subfloor flaws. This is a critical misconception. While the rigid core won't telegraph minor bumps like flexible LVP, an uneven subfloor will cause the planks to flex vertically under foot traffic, eventually snapping the fragile fiberglass-reinforced locking mechanisms.
Flatness Tolerances by Core Type
| Core Type | Industry Standard Tolerance | Recommended Patching Compound |
|---|---|---|
| Flexible LVP (Glue-Down) | 1/8' over 6 feet | Portland-based feather finish (e.g., Ardex K-500) |
| SPC (Rigid Core) | 3/16' over 10 feet | High-compressive strength patch (min 3,000 psi) |
| WPC (Rigid Core) | 3/16' over 10 feet | Standard cementitious floor patch (e.g., Henry 545) |
Moisture Testing Protocols
Concrete subfloors must be tested for moisture vapor emission rates (MVER) and relative humidity (RH) prior to installing vinyl plank flooring, regardless of manufacturer claims of 'waterproof' cores. While the plank itself is waterproof, trapped moisture will breed mold beneath the attached underlayment and degrade adhesive bonds.
According to the Resilient Floor Covering Institute (RFCI), installers should rely on ASTM F2170 (in-situ Relative Humidity testing using embedded probes) rather than the older ASTM F1869 (Calcium Chloride surface test). RH testing measures moisture deep within the concrete slab, providing a highly accurate prediction of future emissions once the vapor-impermeable vinyl floor is installed. Ensure RH levels remain below 75% to 80%, depending on the specific adhesive or click-system manufacturer's warranty requirements.
Acclimation Protocols for Rigid Core Planks
A pervasive myth in the flooring industry is that SPC and WPC planks require zero acclimation because they are 'waterproof' and 'dimensionally stable.' While they do not absorb ambient moisture like hardwood, the PVC binders within the core are highly susceptible to thermal expansion and contraction.
Stack the cartons flat on the floor, no more than three boxes high, and remove the shrink wrap to allow ambient air to circulate around the planks. Never store the planks directly on bare concrete during acclimation; elevate them on a pallet or lay down a temporary vapor barrier to prevent localized cooling from the slab.
Locking Mechanism Anatomy: Unilin vs. Valinge
Understanding the specific mechanical locking profile of your chosen plank is mandatory to prevent edge damage during installation. The two dominant patented systems in the 2026 market are Unilin (angle-angle) and Välinge (drop-lock / 5G).
Unilin (Angle-Angle) Installation
Used heavily by brands like COREtec and many premium European imports. Both the long side and short side require an angling motion.
- Insert the tongue into the groove at a 20° to 30° angle.
- Slide the plank longitudinally until the short end aligns with the adjacent plank.
- Lower the plank flat to the subfloor, engaging the long-side lock.
- Crucial Step: Use a manufacturer-approved tapping block and a rubber mallet. Never strike the locking lip directly, as the force will micro-fracture the extruded PVC profile.
Välinge (Drop-Lock / 5G) Installation
Common in brands like Floorte and Shaw. The long side angles in, but the short side features a mechanical drop-lock trigger.
- Angle the long side into the previous row and lay it flat.
- Align the short end directly above the adjacent plank's short groove.
- Push straight down. You will hear a distinct 'click' as the internal fiberglass or plastic trigger snaps into the locking channel.
- Failure Point: Do not attempt to angle the short end of a drop-lock plank. Angling a drop-lock profile will permanently bend or snap the mechanical trigger, resulting in a failed joint that will separate under lateral tension.
Transition Moldings and Run Limits
Continuous runs of rigid core flooring create massive lateral tension during thermal shifts. To prevent buckling or tenting, strict run limits and transition moldings must be utilized.
- Standard SPC Limits: Maximum 30 linear feet in any direction, or 900 square feet, before requiring a T-molding.
- Premium SPC/WPC Limits: Some high-end, fiberglass-reinforced cores (e.g., COREtec ProPlus) permit runs up to 60 linear feet or 4,000 square feet without transitions.
- Doorways and Asymmetrical Rooms: Always install a T-molding under interior doorways. This breaks the floor into manageable quadrants, preventing a 50-foot hallway from pulling the planks apart in adjacent square bedrooms.
Maintain a strict 1/4-inch to 3/8-inch expansion gap at all vertical obstructions (walls, cabinets, pipes, and stair stringers). Use 1/4-inch spacers during installation, and remove them before installing baseboards. The baseboard or quarter-round must cover the gap without pinning the floor to the wall.
2026 Material Yield and Cost Matrix
When budgeting for installing vinyl plank flooring, factor in the core type's waste percentage and necessary ancillary materials. The following matrix reflects average national pricing and material requirements for 2026.
| Material Category | Avg. Cost (per sq. ft.) | Waste Factor | Underlayment Requirement | Est. Total Cost (1,000 sq. ft.) |
|---|---|---|---|---|
| Flexible LVP (Glue-Down) | $1.80 - $3.50 | 5% - 7% | None (adhesive required: ~$0.40/sq ft) | $2,400 - $4,100 |
| SPC (Rigid Core, 4-5mm) | $2.50 - $4.80 | 7% - 10% | Usually attached; cork upgrade adds $0.60/sq ft | $2,900 - $5,500 |
| WPC (Rigid Core, 6-8mm) | $3.50 - $6.50 | 7% - 10% | Attached pad standard; vapor barrier if over concrete | $4,000 - $7,300 |
For comprehensive environmental and indoor air quality standards, always verify that the selected vinyl plank carries a FloorScore or GREENGUARD Gold certification, ensuring volatile organic compound (VOC) emissions remain well below safe thresholds for enclosed residential spaces.