How to Install Interlocking Rubber Floor Mats Over Concrete
Expert guide to installing interlocking rubber floor mats over concrete. Covers subfloor prep, moisture testing, acclimation, and precision cutting.
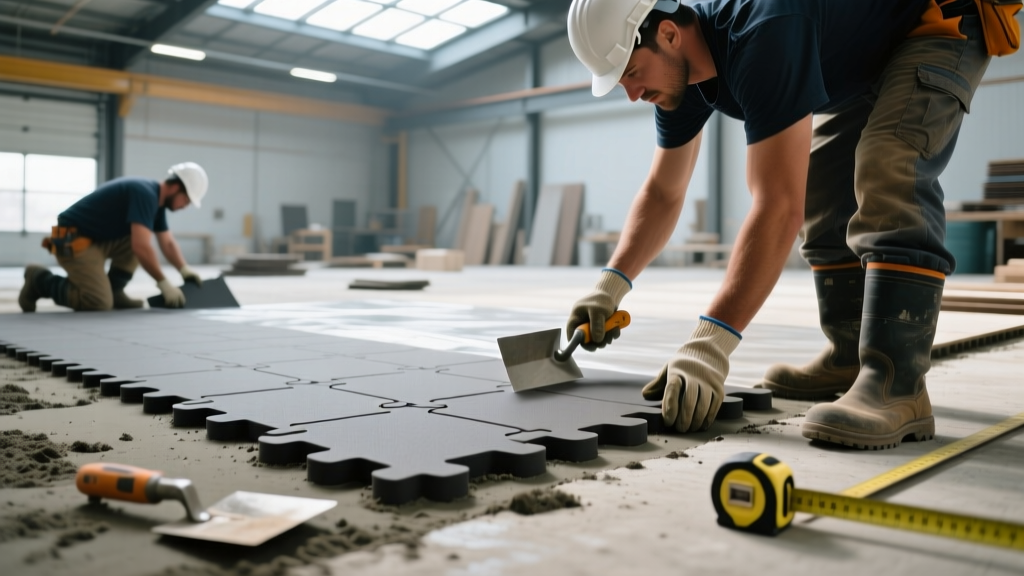
Often missearched online as a "floor floor mat", the correct industry terminology for these modular protective surfaces is interlocking rubber flooring or modular floor mats. While the interlocking puzzle-edge design suggests a simple drop-and-lock installation, 80% of premature failures—such as seam peaking, edge curling, and lateral shifting—stem from ignored subfloor preparation and improper material acclimation. Whether you are outfitting a commercial gym, a residential garage, or an industrial workshop, treating the installation as a precision engineering task rather than a casual DIY project is mandatory for long-term performance.
Phase 1: Subfloor Assessment and Moisture Mitigation
Rubber is entirely impervious to water, which makes it an excellent protective layer but a massive liability if installed over a damp concrete slab. Trapped moisture vapor will breed mold, degrade adhesive bonds, and cause the rubber to off-gas aggressively.
Testing Moisture Vapor Emission Rates (MVER)
Before unrolling a single mat, you must quantify the slab's moisture output. According to EPA guidelines on Volatile Organic Compounds (VOCs) and indoor air quality, trapped moisture exacerbates chemical off-gassing from synthetic materials. Perform a quantitative Calcium Chloride test (ASTM F1869) or an in-situ relative humidity probe test (ASTM F2170).
- Acceptable MVER: Less than 3 lbs per 1,000 square feet per 24 hours.
- Acceptable RH: Less than 75% at 40% depth of the slab.
- Action if failing: Apply a penetrating silane/siloxane moisture vapor barrier or a two-part epoxy moisture mitigation system before laying the mats.
Surface Profiling and pH Balancing
Concrete slabs must be free of laitance, curing compounds, and sealers. Use a diamond cup grinder to achieve a Concrete Surface Profile (CSP) of 2 or 3 if you plan to use perimeter adhesive. Furthermore, test the slab's alkalinity. A pH level outside the 7.0 to 10.0 range will chemically break down rubber-backed adhesives over time. Neutralize highly alkaline slabs with a mild muriatic acid wash (10:1 water-to-acid ratio), followed by a thorough fresh-water rinse and a 48-hour drying period.
New concrete slabs are often treated with film-forming curing compounds. These waxy residues will prevent double-sided acrylic tapes and polyurethane adhesives from bonding. You must mechanically scarify the surface to remove these compounds before installation.
Phase 2: Material Acclimation and Environmental Controls
Vulcanized and recycled rubber are thermoplastic elastomers; they expand in heat and contract in cold. Installing mats directly from a freezing delivery truck into a heated garage guarantees severe seam separation within 48 hours.
- Unpalletize: Break down the pallets and separate the mats. Stacking them tightly prevents air circulation and delays core temperature equalization.
- Climate Control: Maintain the installation environment between 65°F and 85°F (18°C - 29°C) with a relative humidity of 40-60%.
- Duration: Allow a minimum of 72 hours for the rubber to acclimate to the room's ambient temperature. For 3/4-inch thick heavy-duty mats, extend this to 96 hours.
Phase 3: Layout Strategy and Precision Cutting
The structural integrity of a floating interlocking floor relies on seam distribution. Never align the seams in a continuous grid pattern (where four corners meet at a single point). This creates structural weak points prone to "zipper-effect" separation under lateral shear forces.
The Brick-Stagger Layout
Always use a brick-stagger (or ashlar) pattern, offsetting the transverse seams by at least 50% of the mat's length. This distributes kinetic loads across multiple interlocking teeth, vastly improving the floor's shear resistance.
Cutting Techniques for High-Density Rubber
Cutting 1/2-inch or thicker vulcanized rubber requires specific tooling. Standard utility knives will dull after three or four cuts, leading to jagged edges and broken interlocking teeth.
- Straight Cuts: Use a heavy-duty hook-blade utility knife with a carbide scoring edge. Score the surface deeply along a heavy steel straight edge, then snap the mat downward over a 2x4 fulcrum.
- Complex Cuts (Pillars/Drains): Use a jigsaw equipped with a 6-TPI (teeth per inch) bi-metal blade. Lubricate the blade with soapy water to reduce friction heat, which can melt and warp the rubber edges.
- Wall Perimeters: Leave a strict 1/4-inch expansion gap between the outermost mats and all vertical walls. Rubber requires room to expand during summer temperature spikes.
Phase 4: Perimeter Securing and ADA Compliance
While interlocking mats can function as a fully floating floor, heavy equipment or intense lateral foot traffic (like Olympic weightlifting or forklift traffic) will cause the perimeter to creep.
Apply a 4-inch wide strip of double-sided acrylic flooring tape (such as Roberts 50-550) along the perimeter walls, securing only the outer edge of the border mats. Avoid full-spread adhesive under the center of the mats; this restricts natural thermal expansion and causes the center of the floor to buckle upward (tenting).
Navigating Accessibility Standards
If the installation is in a commercial or public space, the transition from the bare concrete to the top of the floor mat must comply with the 2010 ADA Standards for Accessible Design. A sudden 1/2-inch vertical drop is a severe trip hazard and violates wheelchair accessibility codes.
"Changes in level of 1/2 inch (13 mm) high maximum shall be permitted to be vertical. Changes in level between 1/4 inch and 1/2 inch high shall be beveled with a slope not steeper than 1:2." — ADA Section 303.3
To resolve this, install beveled rubber edge ramps. For a 1/2-inch thick mat, use a ramp with a minimum 12-inch horizontal run to maintain a gentle 1:24 slope, ensuring smooth transitions for carts, wheelchairs, and foot traffic. Adhere these ramps using a full-spread polyurethane construction adhesive (e.g., PL Premium 3X) to prevent the ramp from kicking out underfoot.
Material Specification and Tooling Matrix
| Component / Tool | Specification / Requirement | Estimated Cost (2026) |
|---|---|---|
| Interlocking Rubber Mats | 1/2" Thick, Shore A Hardness 60-65, Recycled SBR/EPDM blend | $3.50 - $5.00 / sq ft |
| Moisture Vapor Barrier | Two-part 100% solids epoxy (if MVER > 3 lbs) | $1.20 - $1.80 / sq ft |
| Perimeter Tape | 4" Double-sided acrylic flooring tape | $25.00 / 60 ft roll |
| Beveled Edge Ramps | 1/2" height, 12" width, vulcanized rubber | $18.00 - $25.00 / linear ft |
| Cutting Tools | Heavy-duty hook knife, 6-TPI jigsaw blade, steel straight edge | $45.00 total kit |
Troubleshooting Common Installation Failures
Symptom: Seams are "Peaking" (Pushing Upward)
Cause: The mats were installed too tightly against the perimeter walls without an expansion gap, or the room temperature spiked significantly after a cold installation.
Fix: Remove the border mats along the longest wall. Use a straight edge and utility knife to trim exactly 1/4 inch off the perimeter edge of the border mats, then re-interlock them.
Symptom: Mats Shifting Under Lateral Load
Cause: The concrete subfloor was not properly cleaned, leaving a layer of fine dust that acts as a dry lubricant, or the interlocking teeth were damaged during cutting.
Fix: For existing floors, inject a low-viscosity cyanoacrylate (super glue) specifically formulated for rubber directly into the failing seams. For future installations, ensure the slab is vacuumed with a HEPA-filter shop vac and damp-mopped prior to layout. Furthermore, OSHA's Walking-Working Surfaces standards mandate that slip hazards be mitigated; if the dust layer is causing the entire floor to slide like a hovercraft, immediate perimeter anchoring is a critical safety requirement.
Symptom: Persistent Chemical Odor (Off-Gassing)
Cause: Installation over a damp slab, or using cheap, non-virgin rubber mats with high VOC adhesives.
Fix: Increase HVAC air exchange rates. Place industrial air scrubbers equipped with activated carbon filters (not just HEPA, which only catches particulates) in the center of the room. If the odor persists beyond 30 days, the moisture barrier beneath the slab has likely failed, and the mats must be pulled to remediate the subfloor.