Sub Floor Installation: Prepping Plywood for Hardwood and Tile
Master sub floor installation with our technical guide. Learn fastener schedules, adhesive protocols, and leveling tolerances for hardwood and tile.
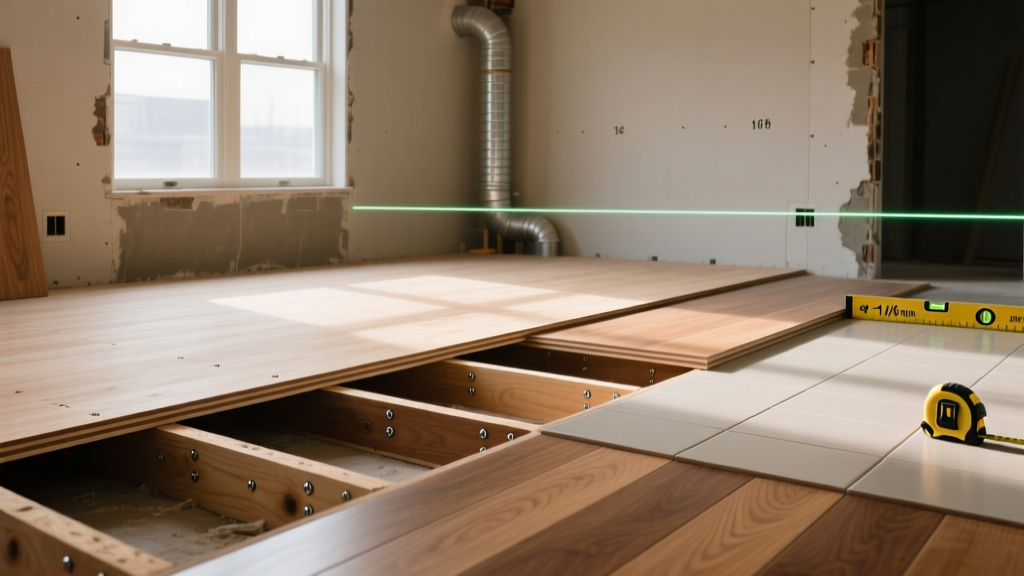
Material Selection: Engineered Wood vs. Traditional Plywood
The sub floor acts as the primary structural diaphragm for your home, transferring live and dead loads to the floor joists while providing a flat, stable base for finish flooring. Selecting the right panel material is the first critical decision. While traditional CDX plywood has been the standard for decades, advanced engineered wood products now dominate high-performance builds.
Standard OSB (Oriented Strand Board) is cost-effective but highly susceptible to edge swelling if exposed to moisture during construction. CDX plywood offers better moisture resistance but can still delaminate under prolonged wet conditions. For premium installations, specify high-density engineered panels like Huber AdvanTech or Georgia-Pacific Sturd-I-Floor. These panels utilize advanced resin systems that resist water absorption, maintaining structural integrity and edge stability even if exposed to weather before the roof is dried in.
Panel Thickness and Joist Spacing Matrix
Panel thickness must correlate directly with joist spacing to prevent deflection, which causes finish floor failure. The following matrix aligns with APA (The Engineered Wood Association) span tables for residential flooring:
| Joist Spacing (On Center) | Minimum Panel Thickness | Recommended Panel Type | Maximum Span Rating |
|---|---|---|---|
| 16 inches | 5/8 inch (or 3/4 inch) | OSB or CDX Plywood | 20 oc / 16 oc |
| 19.2 inches | 3/4 inch | CDX Plywood or AdvanTech | 24 oc / 16 oc |
| 24 inches | 7/8 inch or 1 inch | High-Density Engineered (AdvanTech) | 48 oc / 24 oc |
Moisture Acclimation and Environmental Controls
Installing finish flooring over a wet sub floor guarantees catastrophic failure, including hardwood cupping, tile grout cracking, and mold proliferation. Before laying any panels, verify the moisture content of the floor joists using a pin-type moisture meter (such as a Lignomat or Wagner Orion). Joists must read below 19% moisture content.
Once the sub floor panels are installed, the environment must be conditioned. The National Wood Flooring Association (NWFA) mandates that the sub floor moisture content must be within 2% to 4% of the finished hardwood flooring's moisture content at the time of installation. For homes in humid climates, run the HVAC system for a minimum of 14 days prior to finish flooring installation to stabilize the Equilibrium Moisture Content (EMC) of the wood panels.
Step-by-Step Sub Floor Installation Procedure
- Inspect and Prep Joists: Ensure all joists are crowned upward. Check for any bowed or twisted joists and plane them down to create a uniform bearing surface. Sweep the top chords completely clean of sawdust and debris.
- Apply Construction Adhesive: Run a continuous 1/4-inch bead of polyurethane construction adhesive (e.g., Loctite PL Premium 3x) along the top chord of the joists. Do not use standard latex-based adhesives, as they lack the shear strength and moisture resistance required for sub floors.
- Layout and Stagger Panels: Install panels with the long axis perpendicular to the joists. Stagger end joints in a brick or H-pattern. Never allow four panel corners to meet at a single point, as this creates a structural weak spot and guarantees telegraphing through the finish floor.
- Maintain Expansion Gaps: Leave a 1/8-inch gap between all panel edges and a 1/4-inch gap at perimeter walls. Wood panels expand and contract with seasonal humidity changes; tight seams will cause edge buckling.
- Fasten Immediately: Secure the panel to the joists immediately after laying it in the adhesive bed. Delaying fastening allows the adhesive to skin over, breaking the bond and resulting in squeaks.
Fastener Schedules and Adhesive Protocols
The choice of fastener dictates the long-term acoustic performance of the floor. The industry standard has shifted away from smooth-shank nails toward ring-shank nails and specialized sub floor screws.
Warning: Never use drywall screws or standard deck screws to secure a sub floor. Drywall screws are brittle and will snap under shear loads, while deck screws lack the specific thread geometry required to pull panels tight without jacking them up.
Optimal Fastener Specifications
- Ring-Shank Nails: 2-3/8 inch or 2-1/2 inch galvanized ring-shank nails. The rings act like barbs, gripping the wood fibers and preventing withdrawal.
- Sub Floor Screws: #8 or #9 x 2-1/2 inch specialized sub floor screws (e.g., Simpson Strong-Tie Strong-Drive SUBFLOOR). These feature a self-countersinking head and a specialized thread design that pulls the panel down without pre-drilling.
Fastening Schedule
Follow a strict 6/12 schedule: fasten every 6 inches along the panel edges (where panels meet joists or adjacent panels) and every 12 inches in the field (intermediate joists). Drive fasteners 3/8 inch from the panel edges to prevent splitting the OSB or plywood veneers.
Finish-Specific Leveling Tolerances
A structurally sound sub floor is not necessarily flat enough for modern finish materials. Large-format tiles and wide-plank engineered hardwoods are entirely unforgiving of sub floor deviations. The Tile Council of North America (TCNA) and the NWFA publish strict flatness tolerances that must be met before installation begins.
| Finish Flooring Type | Maximum Allowable Deviation | Remediation Method |
|---|---|---|
| Solid Hardwood (Nail-down) | 3/16 inch over 10 feet | Sand high spots; use asphalt shingles or rosin paper for low spots. |
| Engineered Hardwood (Glue-down) | 1/8 inch over 6 feet | Self-leveling underlayment (SLU) or patching compound. |
| Standard Ceramic Tile | 1/4 inch over 10 feet | Self-leveling underlayment; ensure deflection is L/360. |
| Large Format Tile (>15 inch) | 1/8 inch over 10 feet | Self-leveling underlayment; uncoupling membrane required. |
When using self-leveling underlayment (SLU) over a wood sub floor, you must first seal the panel seams and fastener heads with a manufacturer-approved primer to prevent the SLU from leaking through to the ceiling below. Additionally, staple diamond wire lath over the SLU area if the pour depth exceeds 1/2 inch to prevent cracking.
Troubleshooting Common Sub Floor Failures
- Symptom: Persistent Squeaking Under Load
- Cause: Friction between the sub floor panel and the joist due to missing adhesive, adhesive skin-over before fastening, or smooth-shank nails backing out over time.
- Fix: If accessible from below, inject polyurethane adhesive into the seam and drive wood shims gently between the joist and panel. If working from above, locate the joist and drive a #8 x 2-1/2 inch sub floor screw to pull the panel tight, then snap the screw head below the surface.
- Symptom: Soft or Spongy Spots at Panel Seams
- Cause: Edge swelling from water exposure during construction, or unsupported panel edges where blocking was omitted between joists.
- Fix: For minor swelling, sand the raised edges flush using a 40-grit belt sander. For structural sponginess, cut out the affected panel section and replace it, ensuring solid 2x4 blocking is installed beneath all unsupported end joints.
- Symptom: Tile Grout Cracking or Lippage
- Cause: Excessive joist deflection. The sub floor may be thick enough for span, but the overall floor assembly lacks the rigidity required for brittle finishes (must meet L/360 deflection criteria).
- Fix: Sister the existing joists with additional lumber or steel flitch plates to reduce deflection. Alternatively, install a second layer of 1/2-inch plywood over the existing sub floor, staggering the seams and gluing the layers together with wood glue, before applying an uncoupling membrane like Schluter-Ditra.
Proper sub floor installation is an exercise in precision. By adhering to strict fastener schedules, utilizing advanced adhesives, and respecting material-specific leveling tolerances, you eliminate the root causes of 90% of finish flooring callbacks. Always consult the APA – The Engineered Wood Association span tables and local building codes to ensure your structural diaphragm meets or exceeds regional load requirements.