Hard Flooring Options: Pro Installation Techniques & Subfloor Prep
Discover pro installation techniques for hard flooring options. Learn subfloor prep, moisture testing, and floating vs. glue-down methods.

The Non-Negotiable First Step: Subfloor Diagnostics
The longevity of any hard flooring options you select—whether rigid core luxury vinyl plank (LVP), large-format porcelain, or solid hardwood—is dictated entirely by the substrate beneath it. A premium material installed over a compromised subfloor will fail within months. Professional installation begins with rigorous diagnostic testing, not unboxing materials.
Flatness Tolerances and Mechanical Prep
Manufacturer warranties for rigid core LVP and laminate typically require a flatness tolerance of 3/16-inch over a 10-foot radius, or 1/8-inch over a 6-foot radius. For large-format tile (any side greater than 15 inches), the National Tile Contractors Association (NTCA) mandates an even stricter 1/8-inch in 10 feet. Achieving this on concrete requires mechanical scarification or the application of a self-leveling underlayment (SLU). When using SLU, always apply the manufacturer-specified primer first; skipping primer causes the SLU to draw moisture into the porous concrete too rapidly, resulting in micro-cracking and delamination.
Moisture Vapor Emission Testing
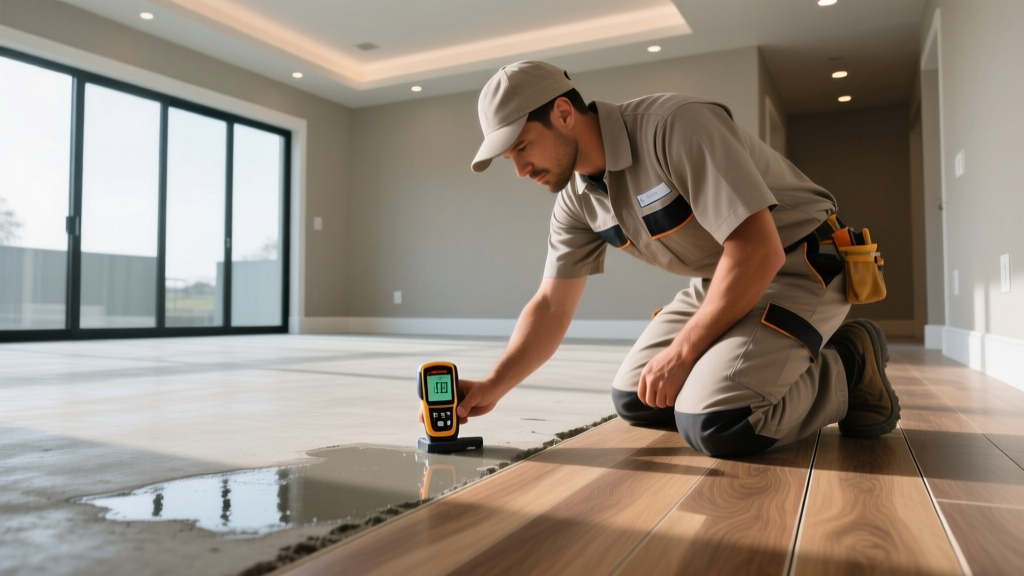
Moisture is the primary enemy of hard surface installations. For concrete slabs, rely on quantitative testing rather than visual inspection. The industry standard is the Relative Humidity (RH) probe test per ASTM F2170. Drilling holes to 40% of the slab depth (for slabs drying from one side) provides an accurate reading of internal moisture. Most moisture-cured urethane adhesives and LVP backing systems require an RH reading below 75% to 80%. For wood subfloors, use a pin-type moisture meter to ensure the subfloor moisture content (MC) is within 2% to 4% of the hardwood flooring's MC.
Material-to-Method Matching Matrix
Choosing the correct installation method prevents structural failure and acoustic issues. The table below outlines the optimal installation techniques for the most common hard flooring options based on current industry standards.
| Material Type | Preferred Method | Subfloor Requirement | Acclimation Protocol |
|---|---|---|---|
| Solid Hardwood (3/4") | Nail/Staple Down | CDX Plywood or OSB (min 5/8") | 7-14 days (unboxed, cross-stacked) |
| Engineered Hardwood | Glue-Down or Float | Concrete or Plywood | 3-7 days (HVAC running at normal levels) |
| Rigid Core LVP/LVT | Floating (Click-Lock) | Any structurally sound, flat surface | 24-48 hours in the installation room |
| Porcelain/Ceramic Tile | Thinset Mortar (Bonded) | Cement backer board, mud bed, or Schluter-Ditra | None for material; room must be 50-80°F |
Deep Dive: Core Installation Techniques
Floating Systems: Managing Expansion and Acoustics
Floating installations are standard for click-lock LVP and laminate. The critical failure point in floating floors is inadequate expansion space. You must maintain a strict 1/4-inch to 3/8-inch expansion gap around the entire perimeter, including at door jambs, pipes, and islands. If a run exceeds 40 feet in length or width, transition moldings are required to break the field and prevent buckling.
For acoustics, select an underlayment with a high Impact Insulation Class (IIC) rating if the product does not feature an attached pad. When installing, use a tapping block and pull bar to engage the click-lock profiles. Never strike the tongue or groove directly with a mallet, as this will micro-fracture the locking mechanism, leading to joint separation over time.
Glue-Down Applications: Adhesive Transfer and Trowel Selection
Glue-down engineered wood and commercial LVT require 100% adhesive transfer to the backing to prevent hollow spots and telegraphing. Trowel notch size dictates this transfer. For standard LVT, a 1/16" x 1/16" x 1/16" square-notch trowel is typical. For engineered hardwood, a 3/16" x 5/32" V-notch or a 1/4" x 1/4" square-notch trowel is used with a moisture-cured urethane adhesive (such as Bona K850 or STAUF PUA-555).
Urethane adhesives have a specific 'open time' (how long it can sit exposed before losing tack) and 'working time' (how long you have to adjust the board). In high-temperature or low-humidity environments, open time decreases significantly. Only spread enough adhesive to cover the area you can install within 30 minutes.
Nail and Staple-Down: Fastener Gauge and Placement
For 3/4-inch solid hardwood, pneumatic floor nailers using 15.5-gauge staples or 16-gauge L-cleats are the standard. Fasteners should be 1.5 to 2 inches in length, driven at a 45-degree angle through the tongue (blind nailing). The first and last rows must be face-nailed or top-nailed using a 15-gauge finish nailer, with holes pre-drilled to prevent splitting. Fastener spacing should be every 6 to 8 inches along the board, and no closer than 2 inches from the end joints to prevent splitting the tongue.
Large-Format Tile: Mortar Coverage and Back-Buttering
Installing large-format porcelain requires Large and Heavy Tile (LHT) mortar, which is formulated with higher polymer content to prevent the heavy tile from sinking into the ridges. Use a 1/2" x 1/2" square-notch trowel applied in straight lines (not swirls) to allow air to escape when the tile is pressed. Per ANSI A108.5 standards, you must achieve 80% mortar coverage in dry areas and 95% in wet areas. For tiles larger than 12x24 inches, back-buttering (applying a flat coat of mortar to the back of the tile with the flat side of the trowel) is mandatory to ensure proper bond.
Critical Edge Cases: Radiant Heat and Subfloor Transitions
Installing hard flooring options over radiant heating systems introduces severe thermal stress. The surface temperature of the floor must never exceed 85°F (29°C). Solid hardwood is generally prohibited over radiant heat due to extreme dimensional instability. Instead, use quarter-sawn engineered hardwood or specific LVP products explicitly rated for radiant heat (e.g., CoreTec Pro Plus). When gluing over radiant heat, the system must be turned off 48 hours prior to installation and remain off for 48 hours post-installation to allow the adhesive to cure without baking.
Subfloor transitions (e.g., plywood meeting concrete) require an isolation membrane or a specialized transition flashing to prevent differential movement from telegraphing through the flooring or cracking tile grout lines.
2026 Installation Cost & Labor Breakdown
Budgeting for hard flooring options requires factoring in the hidden costs of subfloor preparation and specialized labor. Below are current national averages for professional installation prep and labor.
- Subfloor Leveling (SLU & Prep): $1.75 - $3.50 per sq. ft. (Highly dependent on the severity of deflection)
- Moisture Mitigation (Epoxy Sealer): $2.50 - $4.00 per sq. ft. (Required if concrete RH exceeds adhesive limits)
- Floating Floor Labor (LVP/Laminate): $1.50 - $2.75 per sq. ft.
- Glue-Down Labor (Engineered/LVT): $2.50 - $4.50 per sq. ft. (Includes adhesive troweling and rolling)
- Nail-Down Labor (Solid Hardwood): $3.00 - $5.00 per sq. ft. (Excludes sanding and finishing if unfinished wood is used)
- Large-Format Tile Labor: $6.00 - $10.00+ per sq. ft. (Requires extensive layout, leveling systems, and back-buttering)
For comprehensive technical guidelines on wood and resilient flooring, always consult the National Wood Flooring Association (NWFA) and the Resilient Floor Covering Institute (RFCI) before finalizing your installation protocol. Proper technique and rigorous subfloor preparation are the only guarantees that your chosen hard flooring options will perform flawlessly for decades.
Written by
Priya KapoorPriya Kapoor is a real estate market analyst and construction economics researcher with expertise in housing affordability, development feasibility, and infrastructure investment. She holds a Master of Regional Planning from Cornell University and previously worked as a senior analyst at CBRE's Investment Properties group, where she modeled returns for $4B in mixed-use development pipelines. Priya now runs an independent research practice advising developers, municipalities, and REITs on construction cost forecasting and market timing. She publishes the quarterly "BuildMat Market Pulse" report tracking material price indices across 12 commodity categories. Based in Austin, TX, Priya serves on the board of Habitat for Humanity Austin and is a marathon runner.
More from Priya Kapoor
View all
Construction Cost
Cost to Build a 1600 Sq Ft Home in 2026: Full Breakdown
Accurate 2026 cost to build a 1600 sq ft home—material, labor, and regional pricing breakdowns included. Plan your budget with real-time estimates.
Aug 11, 2026

Wood & Lumber
Name the Types of Wood for Pressure Treatment and Preservation
Learn how to name the types of wood best suited for pressure treatment. Compare species treatability, chemical retention levels, and 2026 preservation costs.
Aug 4, 2026

Stone & Masonry
Stone Veneer Suppliers Lindenhurst: 2026 Cost Analysis
Analyze 2026 stone veneer costs in Lindenhurst, NY. Compare local supplier pricing, delivery fees, and Suffolk County installation labor rates.
Aug 4, 2026