Material Taxonomy Guide: Choosing the Right Subway Tile Backsplash
Explore the material taxonomy of subway tile backsplashes. Compare ceramic, porcelain, glass, and stone options with pricing, PEI ratings, and selection tips.
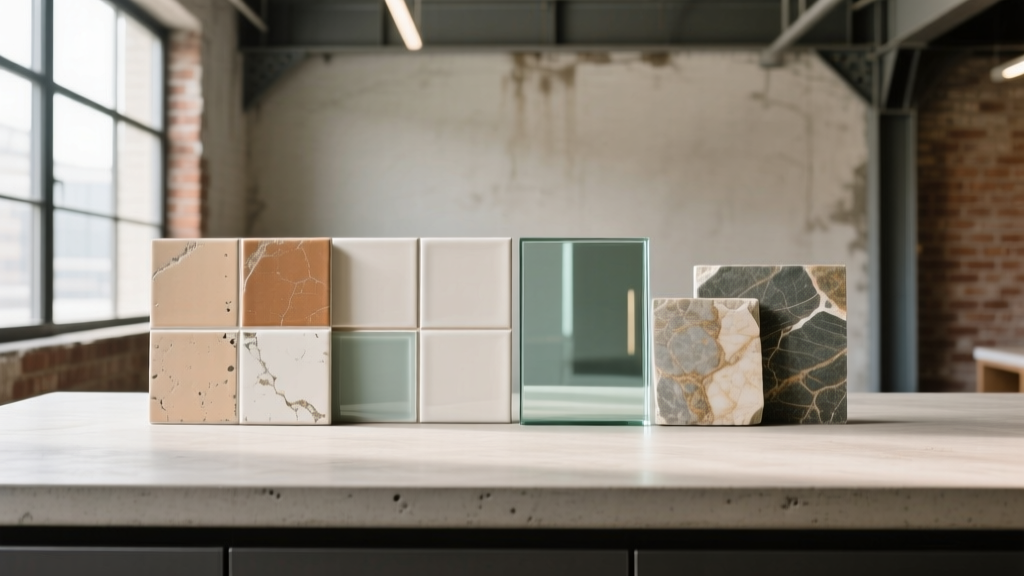
The Core Material Taxonomy of Subway Tiles
The term "subway tile" refers to a specific dimensional ratio—traditionally 3x6 inches with a 1:2 aspect ratio—rather than a single material composition. When selecting a subway tile backsplash, understanding the underlying material taxonomy is critical for predicting longevity, maintenance requirements, and installation complexity. While the category often overlaps with flooring options, backsplash applications prioritize different material properties, specifically focusing on surface hardness, thermal shock resistance, and chemical stability against kitchen acids.
Ceramic vs. Porcelain: The Clay and Firing Distinction
Both ceramic and porcelain subway tiles originate from clay mixtures, but their manufacturing divergence dictates their performance. Standard glazed ceramic subway tiles are fired at lower temperatures (typically between 900°C and 1,000°C), resulting in a more porous bisque body. Porcelain tiles, conversely, incorporate finely ground silica and feldspar, and are dust-pressed and fired at temperatures exceeding 1,200°C.
According to Tile Council of North America (TCNA) standards, true porcelain must exhibit a water absorption rate of 0.5% or less (tested via ASTM C373). For a kitchen backsplash, water absorption is less critical than it is for shower floors, but the higher density of porcelain provides superior resistance to mechanical impact from heavy cookware. If you are repurposing a floor-rated porcelain subway tile for a backsplash, expect a significantly harder surface that requires a diamond-tipped wet saw blade to prevent chipping the glaze during cuts.
Glass Subway Tiles: Light, Reflectivity, and Backing
Glass subway tiles introduce high reflectivity and zero water absorption. The taxonomy of glass tile splits into two primary manufacturing methods: solid-colored glass and clear glass with a painted rear backing. Clear-backed glass relies on the thinset mortar color to influence the final hue. If installing clear-backed glass subway tiles, you must use a bright white, polymer-modified thinset (such as Laticrete 254 Platinum or Mapei Ultraflex). Using a gray unmodified mortar will result in a muddy, desaturated final appearance.
Natural Stone: Marble, Slate, and Travertine
Natural stone subway tiles offer organic veining but introduce significant chemical vulnerabilities. Carrara and Calacatta marble are calcium carbonate-based, meaning they will actively etch when exposed to acidic kitchen splashes like lemon juice, vinegar, or tomato sauce. For a marble subway tile backsplash, specifying a honed finish rather than a polished finish masks minor etching. Furthermore, the Natural Stone Institute mandates that all porous stone tiles be treated with an impregnating sealer prior to grouting to prevent permanent grout haze absorption.
Decoding Tile Ratings for Backsplash Applications
Tiles are rigorously tested for surface wear and slip resistance. While flooring applications demand high ratings in both categories, a subway tile backsplash operates under a different set of physical stresses.
| Rating System | Scale / Metric | Backsplash Requirement | Flooring Comparison |
|---|---|---|---|
| PEI (Porcelain Enamel Institute) | I to V (Wear Resistance) | PEI I or II is sufficient | Requires PEI III or higher |
| DCOF (Dynamic Coefficient of Friction) | 0.0 to 1.0 (Slip Resistance) | Irrelevant (Vertical surface) | Requires ≥ 0.42 (ANSI A137.1) |
| Water Absorption (ASTM C373) | Percentage (%) | Non-vitreous (>3%) acceptable | Impervious (<0.5%) preferred |
| MOHS Hardness Scale | 1 to 10 (Scratch Resistance) | 3-4 acceptable (Marble) | 6-7 required (High traffic) |
You can safely install any floor-rated subway tile on a vertical backsplash, provided the substrate (drywall or cement board) can support the increased weight. However, you must never install a wall-rated (PEI I, high-absorption) ceramic subway tile on a kitchen floor, as the glaze will rapidly scratch and the bisque will crack under point loads.
Cost Breakdown and Installation Variables (2026 Pricing)
The total investment for a subway tile backsplash extends far beyond the per-square-foot cost of the tile itself. Labor, substrate preparation, and specialized setting materials heavily influence the final budget. The following matrix reflects current 2026 market rates for a standard 30-square-foot kitchen backsplash project.
| Material Classification | Material Cost (per sq. ft.) | Labor & Setting Materials (per sq. ft.) | Total Estimated Project Cost (30 sq. ft.) |
|---|---|---|---|
| Glazed Ceramic (Standard 3x6) | $2.50 - $5.00 | $12.00 - $16.00 | $435 - $630 |
| Color-Body Porcelain | $5.00 - $9.50 | $14.00 - $18.00 | $570 - $825 |
| Recycled / Artisan Glass | $10.00 - $22.00 | $18.00 - $24.00 | $840 - $1,380 |
| Honed Carrara Marble | $14.00 - $28.00 | $20.00 - $28.00 | $1,020 - $1,680 |
Grout and Sealer Selection: The Hidden Variables
The material taxonomy of the tile dictates the required grout chemistry. Selecting the wrong grout for a specific subway tile material is the leading cause of backsplash degradation and aesthetic failure.
- Cementitious Grout (Sanded/Unsanded): The traditional choice. Unsanded is required for joints 1/8-inch or smaller (standard for subway tile). It is highly porous and must be sealed with a penetrating silane/siloxane sealer to resist grease and tomato stains. Prone to efflorescence if mixed with hard water.
- Epoxy Grout (e.g., Spectralock PRO, CEG-IG): A two-part resin system that cures into a dense, stain-proof plastic. It is mandatory for high-use cooking zones. Epoxy requires a specialized haze remover during installation; if left to cure on the surface of porous stone or textured ceramic, it will permanently ruin the tile finish.
- Single-Component Urethane Grout: Pre-mixed and flexible, offering excellent stain resistance without the difficult application of epoxy. Ideal for DIY installations of ceramic or porcelain subway tiles, but should not be used in areas subjected to continuous high heat (directly behind commercial gas ranges).
Common Failure Modes and How to Avoid Them
Even premium materials fail when installation protocols are ignored. The National Tile Contractors Association (NTCA) identifies several recurring failure modes specific to vertical tile installations.
1. Thermal Crazing Behind Ranges
Crazing manifests as a spiderweb of micro-cracks in the tile glaze. This occurs when standard ceramic subway tiles are installed directly behind high-BTU gas ranges without a thermal break. The rapid temperature fluctuations cause the clay body and the glaze to expand and contract at different rates. Solution: Install a stainless steel backguard behind the range, or specify high-fired porcelain tiles which possess superior thermal shock resistance.
2. Lippage on Beveled Edge Tiles
Beveled (or "pencil") edge subway tiles feature a sloped perimeter. If installed on an uneven drywall substrate, the sloped edges exaggerate height differences between adjacent tiles, creating severe lippage that catches grease and cleaning cloths. Solution: Skim-coat the drywall with a setting-type joint compound and sand it perfectly flat before applying thinset. Do not rely on the thinset to correct substrate undulations.
3. Glass Tile Backing Delamination
Cheaper glass subway tiles utilize a mesh backing adhered with water-soluble glues. When exposed to the moisture in thinset mortar, the glue dissolves, causing the mesh to detach and the tile to slide down the wall before the mortar cures. Solution: Perform a "water drop test" on a sample tile before installation. If the mesh loosens within 10 minutes, scrape off the factory mesh and install the tiles using a high-tack, non-sag acrylic mortar.
"The substrate is the foundation of the installation. A subway tile backsplash applied over painted drywall without proper mechanical abrasion or a primer coat will inevitably delaminate as the paint film separates from the gypsum core."
— NTCA Reference Manual, Substrate Preparation Guidelines
Frequently Asked Questions
Can I install a subway tile backsplash directly over existing laminate or tile?
Yes, but it requires specific preparation. For existing laminate, you must degrease the surface, sand it with 60-grit sandpaper to remove the glossy finish, and apply a bonding primer like Mapei Eco Prim Grip. For existing tile, verify that the original installation is fully bonded (no hollow sounds when tapped). Scuff the existing glaze and use a modified thinset designed for tile-over-tile applications. This adds approximately 3/8-inch of thickness, which may require adjusting outlet cover plates and trim.
What is the standard offset pattern for a 3x6 subway tile?
The traditional "brick joint" or running bond pattern utilizes a 50% offset. However, for modern, large-format subway tiles (such as 4x12 or 4x16 inches), a 50% offset can cause severe lippage due to minor warping inherent in the firing process. For tiles longer than 8 inches, the TCNA recommends a maximum 33% (1/3) offset to align the highest point of one tile with the lowest point of the adjacent tile, ensuring a visually flat plane.
Do I need to use a trim piece (bullnose) at the exposed edges?
While traditional installations utilize a matching bullnose or surface trim piece (like a Schluter Rondec profile) to protect the raw edge of the tile, contemporary designs frequently omit trim. If skipping trim, the raw edge must be meticulously finished. The installer should apply painter's tape to the wall, fill the gap between the tile edge and the drywall with a color-matched, flexible silicone caulk (not grout), and tool it smooth to create a clean, shadow-line termination.