How Proper Vinyl Flooring Installation Maximizes Lifespan
Discover how proper vinyl flooring installation dictates long-term durability. Learn subfloor tolerances, moisture mitigation, and failure prevention.
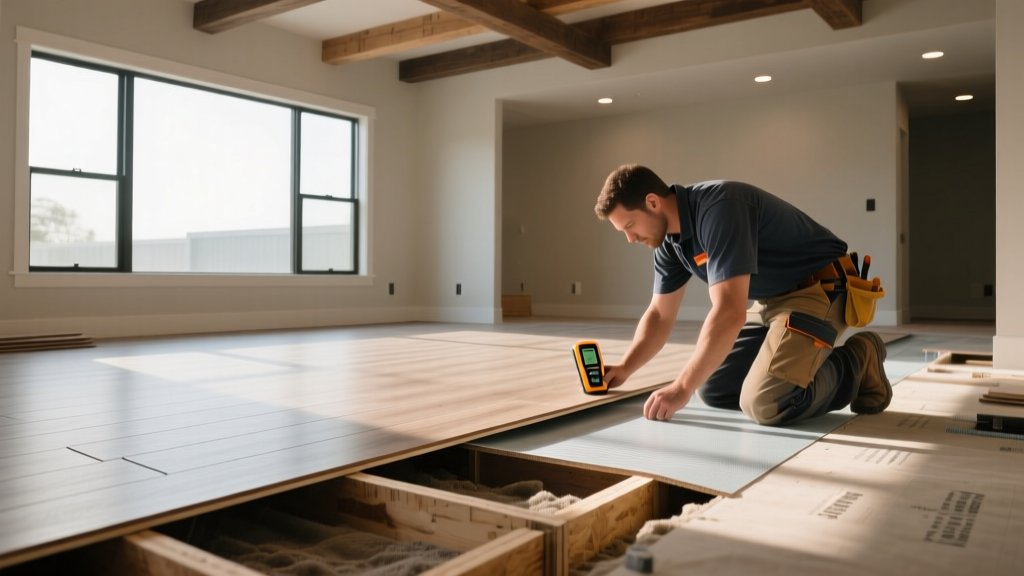
The Hidden Link Between Installation and Vinyl Lifespan
When evaluating luxury vinyl plank (LVP) or sheet vinyl, consumers typically focus on the wear layer thickness or the visual fidelity of the printed decor. However, industry data reveals a stark reality: a premium 28-mil wear layer vinyl plank will fail in under five years if the vinyl flooring installation ignores subfloor tolerances, while a budget-friendly 12-mil product can easily last two decades when installed over a perfectly prepped, moisture-mitigated substrate. The lifespan of resilient flooring is dictated not just by the material's inherent properties, but by the mechanical and chemical environment created during installation.
According to the Resilient Floor Covering Institute (RFCI), over 75% of premature vinyl flooring failures are traced directly to improper subfloor preparation, inadequate moisture mitigation, or incorrect expansion gap allowances. Understanding these installation variables is the only way to guarantee your flooring reaches its engineered 15-to-25-year lifecycle.
Wear Layer vs. Subfloor: Where Failures Actually Begin
It is a common misconception that the wear layer (the clear polyurethane or aluminum oxide topcoat) dictates the structural lifespan of the floor. The wear layer only protects against surface abrasion, scuffing, and UV fading. The true lifespan of vinyl flooring is determined by the integrity of its core—whether Stone Plastic Composite (SPC), Wood Plastic Composite (WPC), or flexible PVC—and how that core interacts with the subfloor.
Installation Methods and Their Expected Lifespans
The installation methodology fundamentally alters the mechanical stress distribution across the floor. Below is a durability matrix comparing the three primary vinyl flooring installation methods.
| Installation Method | Expected Lifespan | Primary Failure Mode | Best Application |
|---|---|---|---|
| Glue-Down (Direct Adhered) | 20–30 Years | Adhesive breakdown due to moisture or plasticizer migration | High-traffic commercial, heavy rolling loads, kitchens |
| Click-Lock (Floating) | 15–25 Years | Joint separation, edge chipping from subfloor deflection | Residential living areas, DIY installations, over radiant heat |
| Loose Lay | 5–10 Years | Dimensional shifting, edge curling, telegraphing | Temporary commercial spaces, raised access floors |
Critical Subfloor Tolerances for Maximum Durability
To maximize the lifespan of a floating click-lock vinyl floor, the subfloor must meet strict flatness tolerances. The industry standard mandates a maximum deviation of 3/16 inch over a 10-foot radius, and no more than 1/16 inch over a 3-foot radius.
Correcting Subfloor Deviations
Ignoring these tolerances guarantees mechanical failure. To correct concrete or wood subfloors, professionals use specific patching and leveling compounds:
- For Concrete: Use a cement-based self-leveling underlayment (SLU) like Ardex K 10 or Mapei Novoplan 710. These provide high compressive strength (over 4,000 psi) to prevent crushing under point loads (e.g., refrigerator wheels or heavy kitchen islands).
- For Plywood/OSB: Never use standard gypsum-based levelers over wood, as the moisture in the gypsum will cause the wood to swell. Instead, use a Portland cement-based patch mixed with a latex additive, or install a 1/4-inch underlayment-grade plywood overlay secured with ring-shank nails every 4 inches.
Never install vinyl flooring directly over existing asphalt-based tiles (VAT) or rubber underlayments without an isolating barrier. The plasticizers in the new vinyl will react with the old materials, causing a chemical migration that results in permanent yellow staining and embrittlement of the vinyl core within 24 months.
Moisture Mitigation: The #1 Lifespan Killer
While vinyl itself is waterproof, the installation system is highly vulnerable to moisture. In glue-down installations, excess moisture vapor emission from a concrete slab will emulsify the adhesive, causing the floor to bubble and delaminate. In floating installations, trapped moisture can lead to mold growth beneath the planks or cause the HDF (High-Density Fiberboard) core in hybrid WPC products to swell and disintegrate.
Before any vinyl flooring installation begins on a concrete slab, two critical tests must be performed according to ASTM F1869 and ASTM F2170 standards:
- Calcium Chloride Test (ASTM F1869): Measures the moisture vapor emission rate (MVER). Most vinyl adhesives require an MVER of less than 3 to 5 lbs per 1,000 square feet per 24 hours.
- Relative Humidity Probe Test (ASTM F2170): Measures the internal RH of the concrete slab at 40% depth. The threshold for most standard adhesives is 75% to 80% RH.
If your concrete slab fails these tests, you must apply a moisture mitigation system. Products like Bostik GreenForce or Mapei Primer E act as a two-part epoxy or urethane vapor barrier, effectively sealing the slab and allowing installation to proceed without risking adhesive failure or core rot.
Acclimation and Expansion Gaps: Avoiding the 'Peaking' Effect
Despite marketing claims that SPC and WPC vinyl are 'dimensionally stable,' all vinyl products expand and contract with temperature fluctuations. In 2026, with the rise of highly insulated, climate-controlled homes featuring large southern-facing windows, solar gain can cause surface temperatures on vinyl floors to exceed 110°F (43°C).
The Expansion Gap Rule
To prevent 'peaking' (where the edges of adjacent planks push upward due to compressive stress) or 'gapping' (where joints pull apart), you must maintain a strict 1/4-inch to 3/8-inch expansion gap around the entire perimeter of the room, including around door jambs, pipes, and kitchen islands.
Underlayment Selection and Acoustic Durability
For click-lock vinyl, the underlayment serves as a shock absorber. Using an underlayment that is too thick or too soft will cause the floor to deflect underfoot, placing extreme stress on the locking joints.
- Maximum Thickness: Never use an underlayment thicker than 1.5mm to 2mm for standard LVP.
- Compression Set: Look for high-density underlayments (like cork or specialized rubber) with a high compressive strength. Standard foam underlayments will permanently compress over 3 to 5 years in high-traffic pathways, leading to a hollow sound and eventual joint failure.
- Attached Pads: If your vinyl plank features a factory-attached cork or IXPE pad, do not add a secondary underlayment. Double-padding creates excessive vertical deflection and will void the manufacturer's warranty.
Post-Installation: The Critical First 48 Hours
The durability of a glue-down vinyl floor is entirely dependent on the adhesive transfer and bond strength achieved in the first 48 hours.
The 100-Pound Roller Requirement
Immediately after laying glue-down vinyl tile or plank, the floor must be rolled with a minimum 100-pound, three-section floor roller. This is not a suggestion; it is a strict manufacturer requirement. The roller forces the vinyl backing into the microscopic pores of the adhesive, ensuring a 100% transfer rate. Failure to roll the floor results in a weak mechanical bond, allowing the edges of the planks to curl upward when subjected to the shear force of foot traffic or rolling chairs.
For floating floors, the first 48 hours require strict climate control. Maintain the ambient room temperature between 65°F and 85°F (18°C–29°C) and keep relative humidity between 40% and 60%. This allows the click-lock mechanisms to settle and the core materials to stabilize to the room's baseline environment before heavy furniture is introduced.
Summary: Investing in Preparation Pays Dividends
Skimping on subfloor prep or moisture testing to save $1.50 to $3.00 per square foot during a vinyl flooring installation is a false economy. A floor that fails due to telegraphing, joint separation, or adhesive emulsification will cost thousands in tear-out, replacement materials, and labor. By adhering to strict ASTM testing, respecting mechanical tolerances, and utilizing the correct chemical barriers, you ensure your vinyl flooring delivers the full 20-year durability it was engineered to provide.