How Tile Floor Underlayment Options Impact Long-Term Maintenance
Discover how choosing the right tile floor underlayment options prevents cracking, hollow spots, and moisture damage, reducing long-term maintenance.

The Physics of Tile Failure: Why Underlayment Dictates Upkeep
When homeowners think about tile maintenance, they typically focus on surface-level tasks: sealing grout lines, cleaning porous natural stone, or replacing a single chipped ceramic piece. However, industry data reveals that nearly 80% of catastrophic tile failures—such as widespread cracking, tenting, and hollow-sounding floors—originate entirely out of sight. The root cause is almost always an inadequate or failing sub-assembly. Evaluating your tile floor underlayment options from a long-term maintenance perspective is the most critical decision you will make during installation or renovation.
Tile and grout are rigid, brittle materials. Wood framing and concrete slabs, conversely, are dynamic. They expand, contract, deflect, and shift with changes in temperature, humidity, and structural loads. According to the Tile Council of North America (TCNA), floor joist deflection must not exceed L/360 for ceramic tile and L/720 for natural stone. If your underlayment cannot manage the differential movement between the dynamic subfloor and the rigid tile surface, the stress will transfer directly into your grout joints and tile bodies, guaranteeing high-maintenance repairs.
Expert Insight: Cement backer board does not uncouple. A common misconception is that adding a 1/4-inch cement board over a plywood subfloor will prevent cracking. In reality, cement board is rigidly bonded to the wood. If the wood deflects beyond the L/360 threshold, the cement board will bend and snap the tile above it just as easily as if the tile were installed directly on the plywood.
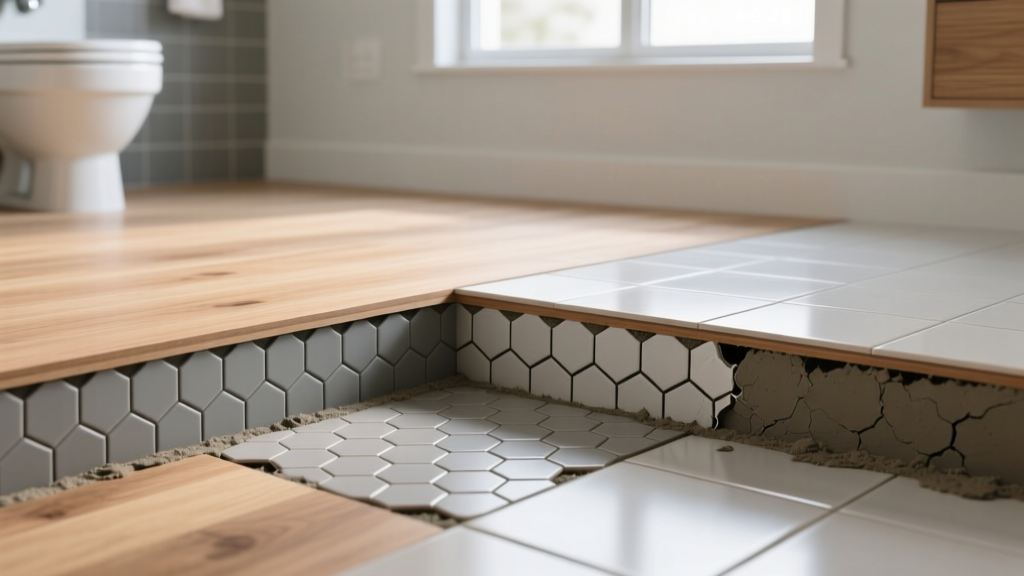
Comparing Tile Floor Underlayment Options for Maintenance Reduction
To minimize decades of future upkeep, you must match the underlayment to the specific stressors of the room. Below is a technical comparison of the primary underlayment systems available, analyzed strictly through the lens of long-term durability and maintenance prevention.
| Underlayment Type | Material Cost (per sq. ft.) | Thickness Added | Primary Maintenance Benefit | Best Application Scenario |
|---|---|---|---|---|
| Uncoupling Membranes (e.g., Schluter-Ditra) | $1.50 - $2.20 | 1/8' (3mm) | Absorbs lateral shear stress, preventing crack transfer from subfloor to tile. | Over wood subfloors, radiant heating systems, and mixed-material substrates. |
| Crack Isolation Membranes (Liquid-applied like RedGard or Mapelastic) | $0.80 - $1.20 | Negligible (approx. 1/32') | Bridges existing minor hairline cracks in concrete slabs up to 1/8' wide. | Interior concrete slabs with a history of minor shrinkage cracking. |
| Cement Backer Board (e.g., HardieBacker, Durock) | $0.50 - $0.90 | 1/4' or 1/2' | Provides a dimensionally stable, moisture-impervious bonding surface. | Wet areas (showers) where waterproofing is layered on top, and highly deflected floors needing structural stiffening. |
| Acoustic Foam/Cork (e.g., Schluter-Ditra-Sound, CorkUnderlayment) | $1.80 - $3.00 | 3/16' to 3/8' | Reduces impact noise transmission (IIC ratings) while offering minor uncoupling. | Multi-story residential buildings, condos, and commercial spaces with strict sound codes. |
Diagnostic Guide: Spotting Underlayment Failure Before It Ruins Your Tile
If you are maintaining an existing tile floor, understanding the symptoms of underlayment failure allows you to intervene before a full tear-out becomes necessary. Use this diagnostic framework to identify what is happening beneath your tiles.
Symptom 1: Hollow-Sounding Tiles (Delamination)
The Cause: This occurs when the thinset mortar loses its bond to either the tile or the underlayment. Over uncoupling membranes like Schluter-Ditra, this is frequently caused by 'thinset starvation'—using a trowel notch that is too small to fully collapse into the membrane's dovetail cavities, or failing to wipe the membrane with a damp sponge before application to remove dust.
The Fix: Injecting epoxy resin through drilled micro-holes in the grout lines can sometimes re-bond the tile. However, if the hollow spot is accompanied by vertical movement (the tile rocks when stepped on), the mechanical bond is entirely broken, and the tile must be removed and re-set.
Symptom 2: Tenting (Tiles Popping Up in a Ridge)
The Cause: Tenting is a severe compressive failure. When tile absorbs moisture or experiences thermal expansion, it needs room to grow. If the installer grouted tightly against the walls or cabinets without leaving a perimeter expansion joint, the expanding tile field has nowhere to go but up. A rigid underlayment that transfers all lateral expansion forces directly to the tile exacerbates this.
The Fix: Remove the perimeter row of tiles. Cut away the rigid grout and replace it with a flexible, color-matched 100% silicone caulk that meets ASTM C920 standards. This relieves the compressive pressure and allows the floor to lay flat again.
Symptom 3: Recurring, Linear Grout Cracks
The Cause: If grout cracks consistently reappear in a straight line across multiple tiles, you are witnessing subfloor deflection or a substrate seam shifting. The underlayment is failing to isolate the movement. This is incredibly common when cement board was installed over plywood without staggering the seams, or when liquid crack-isolation membranes were applied too thinly (failing to meet the required 30 wet mils / 20 dry mils thickness).
The Fix: Surface-level grout repair will fail again within months. The only permanent solution is removing the affected tiles, installing a proper high-density polyethylene uncoupling membrane over the suspect subfloor seam, and reinstalling the tile.
Proactive Maintenance: Protecting the Sub-Assembly
While you cannot physically maintain the underlayment once the tile is laid, your surface-level maintenance habits directly impact the lifespan of the sub-assembly. The National Tile Contractors Association (NTCA) emphasizes that moisture management is the primary defense against underlayment degradation.
- Seal Grout Annually in Wet Areas: Even with a waterproof membrane like Ditra or a liquid-applied barrier beneath the tile, allowing water to freely saturate the grout and thinset bed creates a perpetual damp environment. This can lead to efflorescence (mineral deposits) and, in freezing climates, freeze-thaw damage that breaks the thinset bond from the top down.
- Control Indoor Relative Humidity (RH): If your tile is installed over a wood subfloor, extreme seasonal humidity swings cause the joists and plywood to expand and contract drastically. Maintain indoor RH between 35% and 55% to minimize the dimensional shifting that tests your underlayment's uncoupling capabilities.
- Address Plumbing Leaks Immediately: While premium underlayments are impervious to water, the wood subfloor beneath them is not. A slow leak from a toilet wax ring will rot the plywood subfloor. Even if the membrane holds the tile perfectly, the structural integrity of the floor joists will eventually fail, leading to massive deflection and tile cracking.
The Perimeter Expansion Joint Rule
The most overlooked maintenance task for tiled floors is inspecting the perimeter joints. Over time, homeowners or cleaners often scrub away the flexible silicone caulk at the edges of the room, replacing it with rigid grout for aesthetic uniformity. This single action voids the expansion capabilities of the entire floor system. Always inspect the transition zones—where tile meets cabinetry, walls, and adjacent flooring—and ensure a flexible sealant is intact. If it has hardened, cracked, or been replaced with cementitious grout, scrape it out and reapply a high-quality, mold-resistant silicone.
Summary: The True Cost of 'Cheap' Underlayment
Opting for a $0.60/sq. ft. cement board instead of a $1.80/sq. ft. uncoupling membrane on a second-story wood-framed bathroom saves roughly $120 on a 100-square-foot job. However, if the floor deflects and cracks the natural stone tile, the cost to demolish, dispose of, and reinstall the stone—plus the cost of the ruined materials—will easily exceed $3,500. When evaluating tile floor underlayment options, always price the underlayment against the cost of the tile it is protecting, not against the cost of alternative underlayments.
Written by
James ThorntonJames Thornton is a construction industry veteran with 25 years of hands-on experience in wood framing, lumber grading, and residential building codes. He started as a framing carpenter in rural Oregon, earned his ICC Residential Building Inspector certification, and eventually became a senior plan reviewer for the City of Portland Bureau of Development Services. James holds a B.S. in Wood Science & Technology from Oregon State University and is a certified lumber grader through the West Coast Lumber Inspection Bureau (WCLIB). He has inspected over 3,000 residential construction sites and authored the city's internal guide on advanced framing techniques (2x6 at 24" O.C.). James lives in Bend, OR, where he builds custom timber-frame cabins and competes in lumberjack sports.
More from James Thornton
View all
Insulation
Best Home Insulation Materials: Complete 2026 Guide
Compare top home insulation materials for 2026. Find R-values, installed costs per square foot, and best uses for fiberglass, spray foam, and mineral wool.
Aug 4, 2026

Sustainable Building
Certify Your Green Building Material for LEED and WELL
Step-by-step guide to certifying a green building material for LEED v5 and WELL v2. Master EPDs, HPDs, and VOC limits for 2026 project specifications.
Aug 4, 2026

Stone & Masonry
Veneer Stacked Stone Panels: Interior Design & Style Showcase
Discover how veneer stacked stone panels transform interiors. Explore modern design profiles, material pairings, and technical installation specs.
Aug 4, 2026