Crawl Space Ventilation Maintenance & Airflow Cleaning Playbook
Master crawl space ventilation maintenance with our cleaning playbook. Learn to service exhaust fans, clear passive vents, and optimize airflow.
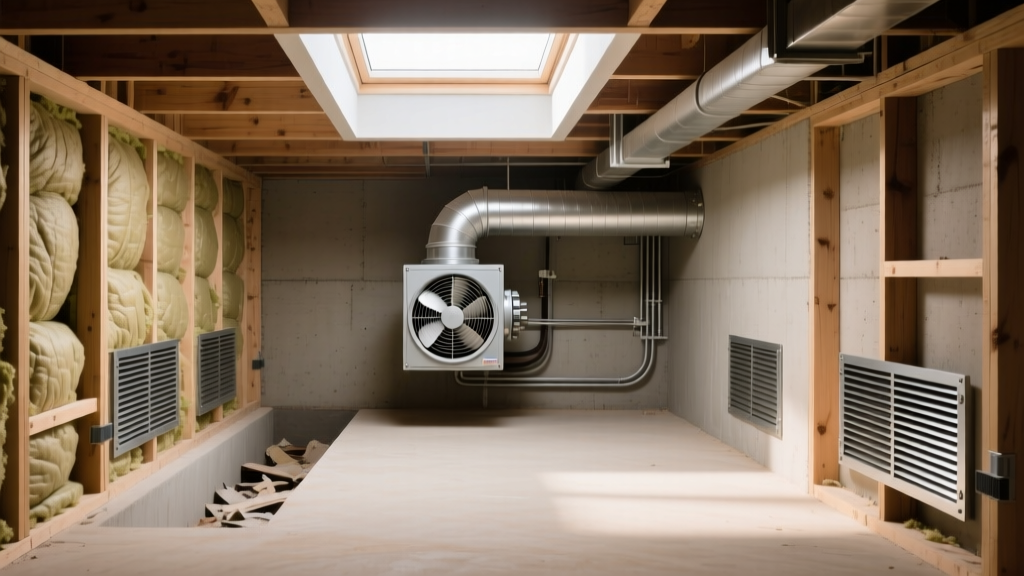
System Identification: Passive vs. Active Ventilation Matrix
Before executing any maintenance protocol, identify your ventilation architecture. The cleaning frequency, required tools, and failure modes differ drastically between passive foundation vents and active mechanical exhaust systems. Proper maintenance prevents the moisture accumulation that leads to structural rot and mold proliferation, a critical concern highlighted in the EPA's Brief Guide to Mold, Moisture, and Your Home.
| System Type | Core Components | Maintenance Frequency | Primary Failure Mode |
|---|---|---|---|
| Passive Cross-Ventilation | 16x8" louvered foundation vents, mesh screens, vapor retarders | Bi-annual (Spring/Fall) | Debris blockage, spider nesting, screen corrosion |
| Active Mechanical Exhaust | Powered exhaust fans, rigid ducting, humidistats, makeup air inlets | Quarterly (Every 3 Months) | Impeller dust loading, humidistat sensor drift, motor burnout |
| Conditioned (Encapsulated) | HVAC supply registers, return air pathways, continuous vapor barriers | Annual | Register blockage, damper failure, barrier detachment |
Protocol 1: Clearing and Servicing Passive Foundation Vents
Passive vents rely on natural pressure differentials and thermal buoyancy. Building codes typically require 1 square foot of net free area (NFA) for every 150 square feet of crawl space floor area. When louvers clog, this ratio plummets, trapping humid air against wooden floor joists.
Step-by-Step Cleaning Procedure
- Exterior Debris Removal: Use a stiff-bristle nylon brush to clear soil, mulch, and leaf litter from the exterior vent flange. Ensure the ground slopes away from the vent at a minimum 5% grade to prevent water intrusion during cleaning.
- Louver Extraction: Most modern 16x8" vents (such as those by AW Ventilators) feature snap-in or screw-mounted louvers. Remove the louver assembly to access the interior screen.
- Screen Degreasing and Descaling: Submerge the metal or fiberglass screen in a solution of warm water and Trisodium Phosphate (TSP) substitute. Scrub with a wire brush to remove oxidized mineral deposits and spider webs, which severely restrict airflow.
- Interior Vacuuming: Using a wet/dry shop vacuum equipped with a HEPA filter (e.g., Ridgid 14-Gallon NXT), vacuum the interior sill plate and rim joist area immediately behind the vent to remove accumulated insulation fibers and pest debris.
- Re-sealing the Flange: Inspect the exterior caulk. If cracked, scrape it away and apply a polyurethane sealant (like OSI QUAD Max) to prevent bulk water infiltration.
Protocol 2: Active Exhaust Fan & Humidistat Servicing
Active systems, such as the Tjernlund V2D or AlorAir Storm series, forcefully depressurize the crawl space, drawing conditioned air from the living space above. Because they run continuously or cycle via humidistats, their mechanical components degrade faster than passive vents.
Motor and Impeller Maintenance
Dust accumulation on the fan impeller alters its aerodynamic profile, reducing cubic feet per minute (CFM) output by up to 30% while increasing motor amperage draw. Disconnect power at the breaker. Remove the exterior grille and use a compressed air duster to blow out the permanently split capacitor (PSC) motor housing. Wipe the impeller blades with a microfiber cloth dampened with isopropyl alcohol to remove sticky biological films. Inspect the motor shaft for lateral play; any wobble indicates worn bearings requiring immediate motor replacement ($120–$250 for standard 1/15 HP replacements).
Humidistat Calibration
A drifted humidistat will either short-cycle the fan (causing humidity spikes) or run it continuously (wasting energy and pulling in unconditioned outdoor air). Test your wall-mounted humidistat using a Boveda salt calibration kit or a digital hygrometer with NIST-traceable accuracy. If the mechanical humidistat reads more than 5% relative humidity (RH) off from your calibrated digital meter, adjust the internal set-screw or replace the unit entirely. Target setting: 50% RH.
Airflow Diagnostics: Measuring CFM and Static Pressure
Visual inspection is insufficient for active systems. You must quantify airflow to ensure the system meets the Department of Energy's Crawl Space Insulation Guidelines and local mechanical codes, which generally mandate 1 CFM of exhaust per square foot of crawl space area.
Field Testing Framework
Tool Required: Vane anemometer (e.g., HoldPeak HP-866B) with a telescoping probe.
Calculation: Measure the air velocity in Feet Per Minute (FPM) at the exhaust grille. Multiply the FPM by the free area of the grille in square feet to determine actual CFM.
- 4-inch Exhaust Pipe Target: 1,100 FPM (Yields ~95 CFM)
- 6-inch Exhaust Pipe Target: 800 FPM (Yields ~155 CFM)
- 8-inch Exhaust Pipe Target: 600 FPM (Yields ~210 CFM)
Note: If measured FPM is below 70% of these targets, inspect the duct run for crushed flex-tubing, disconnected joints, or severe impeller fouling.
Troubleshooting Framework: When Ventilation Fails
When moisture levels remain elevated despite a clean and functioning ventilation system, the issue usually lies in the building envelope or system sizing. Use this decision tree to isolate the failure point.
- Symptom: High RH (>65%) but exhaust fan runs continuously.
- Check: Make-up air pathways. If the crawl space is sealed too tightly without a dedicated passive make-up air inlet, the fan will cavitate and fail to move air. Install a 4-inch passive inlet vent on the opposite diagonal corner.
- Symptom: Condensation forming on HVAC ducts and water lines in the crawl space.
- Check: Vapor barrier integrity. Ventilation cannot compensate for ground moisture evaporation. Ensure a minimum 6-mil (preferably 20-mil reinforced) polyethylene barrier covers 100% of the dirt floor, with seams overlapped by 6 inches and sealed with butyl tape.
- Symptom: Musty odor in the living space above.
- Check: The stack effect and bypass leaks. If the crawl space is negatively pressurized by the active exhaust fan, it will pull soil gases and odors through unsealed plumbing penetrations and electrical chases in the subfloor. Seal all subfloor penetrations with expanding polyurethane foam.
Sealing the Perimeter: Mastic and Foam Applications
The final step in the ventilation maintenance playbook is ensuring the vent assemblies are hermetically sealed to the foundation wall. Air leaking around the exterior flange of a vent bypasses the screen and defeats the purpose of the system, while allowing pest entry.
For masonry foundations (CMU block or poured concrete), standard acrylic caulking will fail within two seasons due to thermal expansion and alkalinity. Instead, use a fiber-reinforced mastic sealant like Hardcast 1402. Apply a 1/4-inch bead around the entire perimeter of the vent flange, pressing it firmly into the masonry pores. For larger gaps between the vent sleeve and the rough opening, inject a closed-cell, pest-block expanding foam (such as Great Stuff Pro Gaps & Cracks with bitterant). Trim the cured foam flush with the foundation wall and coat it with a UV-resistant elastomeric masonry paint to prevent solar degradation.
By adhering to this strict cleaning, diagnostic, and sealing protocol, you ensure your crawl space ventilation system operates at peak aerodynamic efficiency, protecting the structural integrity of the foundation and the indoor air quality of the home above.