Installing Subfloors and Framing for Top Basement Renovation Ideas
Discover the exact installation procedures, subfloor systems, and framing techniques required to safely execute popular basement renovation ideas.
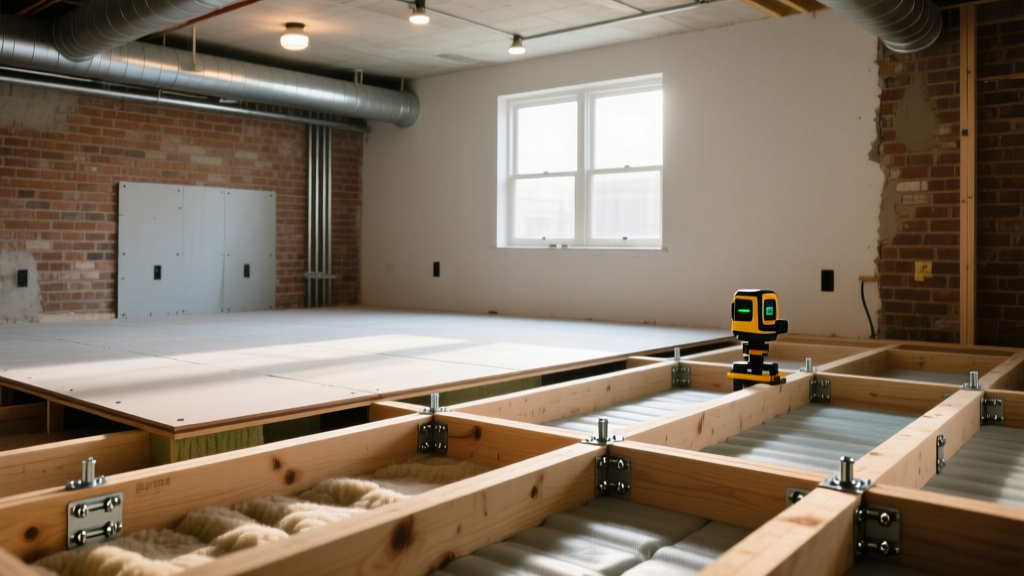
The Structural Reality Behind Basement Renovation Ideas
Most online lists of basement renovation ideas focus entirely on aesthetics—home theaters, fitness rooms, or in-law suites. However, executing these ideas in a below-grade environment requires rigorous foundational and structural preparation. A finished basement built directly on a concrete slab without a proper capillary break and thermal envelope will typically fail within 36 months due to mold proliferation, wood rot, and efflorescence. To turn conceptual basement renovation ideas into durable living spaces, contractors and DIYers must master the installation procedures for moisture mitigation, modular subfloors, and insulated framing systems.
Step 1: Slab Preparation and Vapor Mitigation
Before any subfloor or framing is installed, the concrete slab must be sealed against hydrostatic pressure and soil gases. According to the EPA Radon Protection Guidelines, below-grade spaces are highly susceptible to radon infiltration, which must be mitigated before enclosing the space.
Critical Prep Step: Perform a calcium chloride moisture emission test (ASTM F1869) on the slab. If the emission rate exceeds 3 lbs per 1,000 square feet per 24 hours, you must apply a penetrating silicate concrete sealer (such as RadonSeal Plus) or install an active sub-slab depressurization system before proceeding.
- Cleaning: Shot-blast or grind the slab to remove paint, drywall mud, and laitance. Vacuum with a HEPA-filtered shop vac.
- Sealing: Apply a deep-penetrating sodium silicate sealer at a rate of 150-200 sq. ft. per gallon. Allow 7 days of curing time to ensure the pores are permanently crystallized and blocked against capillary water.
- Joint Treatment: Fill all control joints and perimeter cracks with a high-modulus polyurethane sealant (e.g., SikaFlex-1a) to prevent soil gas entry.
Step 2: Subfloor Installation Procedures
The subfloor is the physical foundation of your interior renovation. Traditional pressure-treated (PT) sleepers laid directly on the slab trap moisture and create a breeding ground for mold. Modern basement renovation ideas require raised, breathable subfloor systems that provide a thermal break and drainage plane.
Subfloor System Comparison Matrix (2026 Pricing)
| System Type | Product Example | R-Value | Cost per Sq. Ft. | Moisture Gap | Best Application |
|---|---|---|---|---|---|
| Plastic Membrane | Delta-FL | R-1.5 (Air gap) | $1.80 - $2.10 | 5/16 inch | Budget-friendly flooring over flat slabs |
| OSB + EPS Foam | DRICORE Subfloor R5 | R-5.0 | $2.80 - $3.20 | 1/4 inch | Standard living spaces, home gyms |
| High-Density XPS | Barricade Insulated | R-10.0 | $3.90 - $4.50 | 1/4 inch | Home theaters, cold-climate bedrooms |
| PT Sleepers + Plywood | Custom Site-Built | R-0 (unless batt added) | $2.50 - $3.00 | None (Direct contact) | Not recommended for modern builds |
Installation Procedure for Modular Subfloor Panels
- Perimeter Gap: Maintain a strict 1/4-inch expansion gap between the subfloor panels and all foundation walls. Do not fill this gap with spray foam; it must remain open to allow the drainage plane to breathe and equalize pressure.
- Staggering Joints: Stagger panel seams by at least 24 inches to prevent continuous weak lines. Use a tapping block and a 3-lb dead blow mallet to lock the tongue-and-groove edges together tightly.
- Shimming: If the concrete slab has depressions deeper than 1/4 inch over a 10-foot span, use composite shims under the panel dimples to prevent sponginess. Do not use wood shims, as they will wick moisture and rot.
Step 3: Wall Framing and Thermal Break Installation
Framing basement walls against concrete requires a continuous thermal break to meet modern energy codes. The Department of Energy Basement Insulation Standards mandate continuous rigid insulation for below-grade walls to prevent condensation on the cold concrete surface during summer months when warm, humid interior air meets the cool foundation wall.
Never use fiberglass batt insulation in direct contact with a below-grade concrete wall. Even with a polyethylene vapor barrier, fiberglass will eventually sag, trap moisture, and harbor mold. Use rigid XPS/EPS foam or closed-cell spray foam exclusively for foundation wall assemblies.
Installing InSoFast EX 2.5 Insulated Panels
For a high-performance assembly that combines insulation and framing in one step, InSoFast EX 2.5 panels (2.5 inches of EPS with embedded 16-gauge galvanized steel studs) are the industry standard for premium basement renovation ideas.
- Adhesive Application: Apply Loctite PL 300 Foamboard Adhesive to the back of the panels in a continuous 3/8-inch bead around the perimeter and three vertical beads in the field. This creates an airtight seal against the concrete, preventing convective moisture loops.
- Mechanical Fastening: While the adhesive cures, secure the panels using 3/16-inch x 2-1/4-inch Tapcon concrete screws driven through the embedded steel studs into the foundation wall at 24-inch intervals.
- Plumb Checks: Use a 78-inch digital level to ensure the embedded studs are perfectly plumb. If the concrete wall bows inward, shim behind the InSoFast panel with rigid XPS scraps before driving the Tapcons.
Step 4: Egress Window Cutting for Bedroom Conversions
Many basement renovation ideas involve adding a bedroom or rental suite. Under the 2024/2026 International Residential Code (IRC Section R310), any habitable below-grade sleeping space requires an emergency escape and rescue opening (egress window) with a minimum net clear opening of 5.7 sq. ft. Cutting into a structural foundation wall requires precise load-management procedures.
- Structural Shoring: Before cutting, install Acrow adjustable steel props with 4x6 timber needle beams directly above the proposed window opening to transfer the floor joist loads away from the masonry.
- Wet Cutting: Use a GFCI-protected gas or electric wet saw (e.g., Hilti DS TS 325-E) equipped with a 14-inch segmented diamond blade. Cutting from the interior outwards prevents spalling the exterior waterproofing membrane.
- Lintel Installation: Once the concrete block or poured wall is removed, install a galvanized steel angle lintel (minimum 4x4x1/4 inch) over the opening. The lintel must bear on solid concrete or structural masonry for at least 4 inches on each side of the rough opening. Secure with 1/2-inch wedge anchors.
- Window Well Drainage: Excavate the exterior window well down to the foundation footer. Tie a 4-inch perforated PVC drain pipe into the existing foundation footing drain system, surrounded by 3/4-inch washed gravel, to prevent the well from flooding during heavy precipitation.
Common Installation Failures to Avoid
Even the best basement renovation ideas will fail if the following installation errors occur:
- Fastening the Vapor Barrier to the Sill Plate: If you use a poly vapor barrier over the rigid foam, do not staple it to the wood sill plate. This creates a capillary bridge. Instead, terminate the barrier at the top of the foam and seal it with acoustical sealant.
- Blocking the Subfloor Perimeter: Baseboards and quarter-round molding must be installed to the wall studs, not nailed through the subfloor into the concrete. Pinning the floating subfloor restricts its natural expansion and contraction, leading to buckled hardwood or LVP flooring above.
- Ignoring the Rim Joist: The rim joist (where the foundation meets the wood framing) is the largest source of air infiltration and pest entry. Seal this cavity with 2 inches of closed-cell spray foam (R-14) before installing any interior wall finishes.
By prioritizing these foundational installation procedures over superficial design choices, you ensure that your basement renovation remains structurally sound, thermally efficient, and free of moisture damage for decades.