Encapsulated Crawl Space Installation: Step-by-Step Contractor Guide
Master encapsulated crawl space installation with this step-by-step guide. Learn vapor barrier specs, seam taping, and dehumidifier sizing for moisture control.
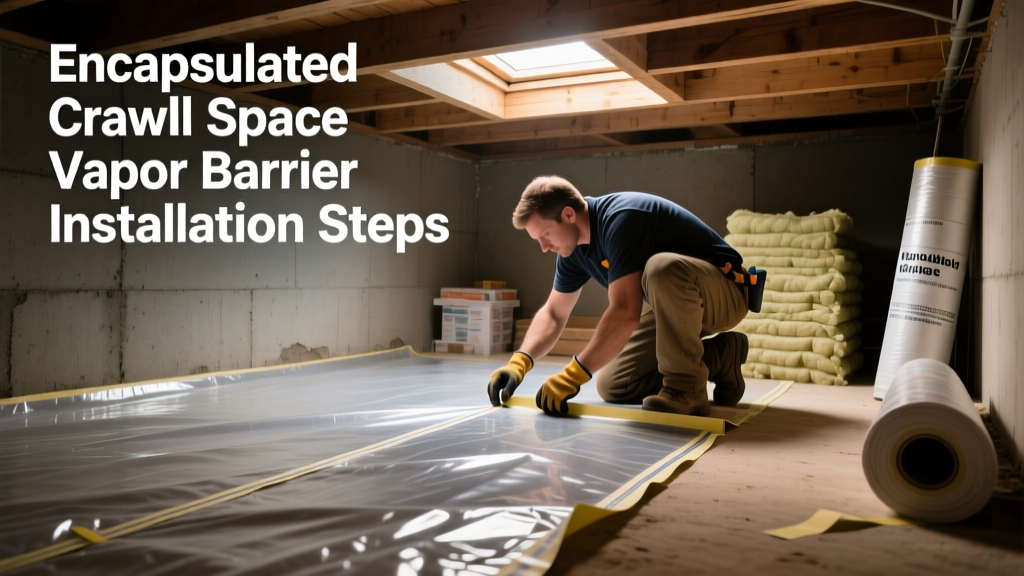
The Anatomy of a Properly Encapsulated Crawl Space
An encapsulated crawl space transforms a damp, vented under-floor area into a sealed, conditioned environment. According to the U.S. Department of Energy, sealing the crawl space and insulating the foundation walls (rather than the subfloor) can reduce heating and cooling costs by up to 18% in mixed-humid climates. A true encapsulation is not just laying down plastic; it is a multi-layered system comprising a reinforced polyethylene vapor barrier, sealed perimeter flashing, closed foundation vents, and active mechanical dehumidification.
Pre-Installation: Site Prep and Wood Treatment
Encapsulating over active mold or standing water traps moisture against wooden joists, accelerating structural rot. Proper preparation is non-negotiable before any poly sheeting is unrolled.
Step 1: Debris Removal and Grading
Extract all construction debris, rocks, and organic matter. Sharp stones will puncture the vapor barrier under the weight of a technician. Grade the soil so it slopes away from the foundation piers toward the perimeter walls to prevent localized pooling. If the water table is high or seasonal seepage occurs, install a perimeter French drain and a sump pump basin before laying the liner.
Step 2: Mold Remediation and Borate Application
Scrub affected joists and subflooring with a fungicidal encapsulant. Follow this with a disodium octaborate tetrahydrate (DOT) treatment, such as Bora-Care, which penetrates raw wood to prevent future fungal growth and deter subterranean termites. The Environmental Protection Agency (EPA) emphasizes that moisture control is the primary mechanism for mold prevention; chemical treatments are secondary to physical moisture barriers and must only be applied to dry, clean wood surfaces.
Material Selection Matrix: Vapor Barriers and Tapes
Selecting the right materials dictates the lifespan of your encapsulated crawl space. Do not substitute HVAC foil tape or standard duct tape for poly-to-poly seams; the adhesives degrade in high-humidity environments within 6 to 12 months, leading to silent vapor leaks.
| Material Type | Thickness / Reinforcement | Cost per Sq. Ft. | Best Application |
|---|---|---|---|
| Standard Poly | 6-mil to 10-mil (Unreinforced) | $0.15 - $0.30 | Temporary construction cover; NOT for permanent encapsulation. |
| String-Reinforced | 12-mil (Scrim layer) | $0.60 - $0.90 | Budget encapsulations; low-traffic access areas only. |
| Woven/Scrim Poly | 20-mil (ASTM E1745 Class A) | $1.20 - $1.80 | Professional grade; high-traffic, storage, and HVAC routing. |
| Specialized Poly Tape | 4-inch Butyl or Acrylic Poly Tape | $35 - $50 per 180ft roll | Seaming overlapping floor sheets and wall terminations. |
Core Installation Procedures
Step 3: Laying and Seaming the Floor Liner
Roll out the 20-mil vapor barrier across the dirt floor. Overlap adjacent sheets by a minimum of 6 inches (12 inches is preferred for high-moisture zones). Apply a continuous bead of butyl mastic sealant between the overlapping layers before pressing them together. Use a heavy-duty linoleum seam roller to ensure the mastic fully bonds to the textured poly surface, then secure the seam with 4-inch specialized poly tape. This creates a double-blind water and vapor seal that will not delaminate under thermal expansion.
Step 4: Wall and Pier Wrapping
The floor liner must extend up the foundation walls and wrap around all structural piers. Cut the material to run 6 to 12 inches up the vertical surfaces. Secure the top edge using mechanical fasteners (concrete screws with plastic batten strips) or closed-cell spray foam. For piers, cut a collar of poly, wrap it tightly around the concrete block, and seal it with poly tape and mastic.
In regions with high termite pressure (e.g., the US Southeast), local building codes require a 3-inch to 4-inch visual inspection gap between the top of the vapor barrier and the wooden sill plate. Do not run the poly all the way to the subfloor in these zones, or you will fail your municipal inspection and void your termite bond. Use a termination bar to hold the liner exactly 4 inches below the sill plate.
Step 5: Sealing the Foundation Vents and Rim Joists
Once the liner is sealed, the exterior foundation vents must be permanently closed to prevent outside humid air from entering the cool, encapsulated space. Cut rigid XPS (extruded polystyrene) foam board to fit each vent opening. Seal the perimeter of the foam with canned polyurethane foam, then cover the exterior vent well with a PVC or metal vent cover to keep out rodents and UV degradation. Additionally, use acoustical sealant to plug irregular gaps around plumbing and electrical penetrations through the rim joist to stop exterior air infiltration.
Climate Control: Sizing the Dehumidifier
A sealed crawl space still requires active moisture management to handle internal moisture loads from the surrounding soil and minor air leaks. Relying on the home's main HVAC system via a single supply register is often insufficient and can cause dangerous pressure imbalances that draw soil gases indoors.
- Capacity Sizing: Allocate 1 pint of dehumidification capacity per 50 square feet of crawl space area. For a 1,500 sq. ft. crawl space, a 30-pint to 35-pint commercial unit (like the Santa Fe Advance2 or AlorAir Sentinel HDi35) is required.
- Placement: Mount the unit on a wall bracket or suspend it from the floor joists using threaded rods to protect it from potential minor water intrusion. Never place it directly on the floor liner.
- Drainage: Route the condensate drain line via gravity to a daylight exit, or install a dedicated condensate pump if the exterior grade is higher than the unit. Ensure the pump includes a check valve to prevent back-siphoning during power outages.
Post-Installation Testing and Edge Cases
After installation, run the dehumidifier for 72 hours. Use a digital hygrometer to verify that the relative humidity (RH) has dropped below 50%. If the RH remains above 55%, inspect the seams with a thermal leak detector or perform a smoke pencil test around the sill plate and plumbing penetrations to identify air leaks pulling in exterior humidity.
Common Failure Mode: Plumbers or HVAC technicians entering the space years later may cut the vapor barrier to access pipes and fail to re-tape it. Always leave a roll of poly tape and a utility knife near the crawl space access door with a laminated instruction card requiring tradespeople to re-seal any cuts they make.
Frequently Asked Questions
Do I need to insulate the walls of an encapsulated crawl space?
Yes. Once the space is sealed and conditioned, the foundation walls become part of your home's thermal envelope. Apply 2 inches of closed-cell spray foam or 1.5-inch rigid XPS foam boards (sealed at the edges with mastic) directly to the interior of the concrete or block walls. Do not use fiberglass batts, as they trap moisture, sag over time, and hide mold growth against the foundation.
Can I use a standard residential dehumidifier?
No. Standard big-box dehumidifiers are not rated for the low-temperature, high-dust environments of a crawl space. Their coils will freeze or clog, and their internal humidistats are highly inaccurate in unconditioned spaces. Always use a commercial-grade, crawl-space-specific unit with an auto-defrost feature, a built-in condensate pump, and a MERV-13 filter to protect the coil from insulation dust.
How does encapsulation affect radon mitigation?
If your home requires radon mitigation, the encapsulation liner must act as the air-seal for a sub-membrane depressurization system. This means the vapor barrier cannot just be taped to the wall; it must be mechanically locked to the foundation wall using a specialized aluminum termination bar and polyurethane caulk to withstand the negative pressure pulled by the radon fan without tearing away from the concrete.