How Much Does It Cost to Repair a Foundation Crack? Diagnostic Guide
Discover exactly how much it costs to repair a foundation crack. Learn diagnostic warning signs, repair methods, and exact pricing breakdowns.

The Diagnostic Framework: Matching Crack Morphology to Repair Costs
Diagnosing a foundation crack requires understanding that the visible fissure is merely a symptom of underlying soil mechanics, hydrostatic pressure, or concrete curing anomalies. When homeowners ask how much does it cost to repair a foundation crack, the answer ranges from $150 for a simple shrinkage crack seal to over $10,000 for structural stabilization of a bowing wall. The cost is entirely dictated by the crack's morphology and the root cause of the failure.
Before requesting quotes, you must classify the crack. Structural engineers categorize foundation fissures into three primary types, each demanding a vastly different repair protocol and budget.
| Crack Morphology | Primary Cause | Structural Threat Level | Average Repair Cost (2026) |
|---|---|---|---|
| Vertical / Shrinkage | Concrete curing, minor thermal expansion | Low (Water/Radon ingress only) | $250 - $600 |
| Diagonal / Stair-Step | Differential settlement, soil subsidence | Moderate to High | $800 - $3,500 |
| Horizontal | Lateral earth pressure, hydrostatic load | Critical (Wall failure imminent) | $2,500 - $8,000+ |
Breakdown: How Much Does It Cost to Repair a Foundation Crack by Method?
Once the crack is diagnosed, the repair method determines the final invoice. Below is a technical breakdown of the standard industry repair methods, including specific material applications and current labor rates.
1. Polyurethane Foam Injection (Active Leaks)
For vertical cracks that are actively weeping water, hydrophilic or hydrophobic polyurethane resin is the industry standard. Unlike surface seals, injection ports are drilled at a 45-degree angle to intersect the crack mid-wall. The resin expands up to 20 times its liquid volume, filling the entire void from the interior drywall to the exterior soil face.
- Material Cost: Professional-grade resins like SikaFix PU-1000 or Alchemy-Spetec Deep Lift cost $40 to $80 per cartridge.
- Installed Cost: $25 to $40 per linear foot. Most contractors enforce a minimum service fee of $400 to $500.
- Best Application: Non-structural vertical cracks where water infiltration is the primary concern.
2. Epoxy Injection (Structural Welding)
If a vertical or diagonal crack is dry but represents a structural weakness, epoxy is required. Epoxy resins (meeting ASTM C881 standards) possess a tensile strength greater than the concrete itself, effectively welding the monolith back together. This method does not stop active water leaks; the crack must be completely dry, requiring surface routing and sealing with an epoxy paste cap before injection.
- Material Cost: High-modulus epoxies like RadonSeal CrackWeld or Simpson Strong-Tie Epoxy cost $30 to $60 per kit.
- Installed Cost: $20 to $35 per linear foot.
- Best Application: Restoring structural integrity to dry, settled vertical or diagonal cracks in poured concrete.
3. Carbon Fiber & Steel Reinforcement (Bowing/Horizontal Cracks)
Horizontal cracks in block or poured walls indicate that lateral soil pressure is exceeding the wall's shear strength. Injecting these cracks is a temporary bandage; the wall must be reinforced to prevent catastrophic inward bowing. Contractors use either carbon fiber/Kevlar straps (like Fortress Stabilization systems) or structural steel I-beams.
- Carbon Fiber Straps: $450 to $750 per strap, installed every 4 feet.
- Steel I-Beams: $800 to $1,200 per beam, required for walls that have already deflected more than 2 inches inward.
- Best Application: Horizontal cracking, stair-step cracking with shear displacement, and bowing basement walls.
If you see a white, powdery residue (efflorescence) lining a crack, it indicates prolonged water migration leaching calcium hydroxide from the concrete. Do not attempt to seal this with surface-level hydraulic cement or DIY caulk. The hydrostatic pressure will simply blow the patch out or force water to find a new entry point, potentially undermining the footing. According to Penn State Extension, managing exterior surface water and subsurface drainage is a mandatory prerequisite before any interior crack injection will hold long-term.
Hidden Cost Variables That Inflate Your Repair Bill
The per-linear-foot pricing cited above assumes a bare, accessible concrete wall. In reality, the final invoice is heavily influenced by site-specific variables that contractors factor into their estimates.
- Interior Finishing Demolition: If your basement is finished, contractors must cut away drywall, remove insulation, and pull back flooring to expose the crack. Expect to add $300 to $800 for demo and disposal.
- Exterior Excavation & Membrane Application: For severe leaks where interior injection fails, contractors must excavate down to the footing exterior, apply a rubberized asphalt membrane (like Tremco Paraseal), and install a dimple board. This costs $100 to $150 per linear foot of exterior wall depth.
- Sump Pump & French Drain Integration: Repairing a crack without addressing the water table is futile. If your home lacks a perimeter drain tile system, installing an interior French drain and a high-capacity sump pump (e.g., Zoeller M53 or Liberty Pumps 257) will add $3,500 to $6,500 to the total project cost.
- Radon Mitigation Prep: The U.S. Environmental Protection Agency (EPA) identifies foundation cracks as the primary entry point for radon gas. Sealing cracks is a mandatory first step before installing an active soil depressurization system, which costs an additional $1,200 to $2,500.
DIY vs. Professional Repair: A Cost-Benefit Matrix
The market is saturated with $50 to $150 DIY foundation crack repair kits. While these kits utilize similar chemistry to professional-grade materials, they lack the high-pressure injection pumps required to force resin completely through a 10-inch thick foundation wall. Use the matrix below to determine when DIY is financially sound and when it poses a structural risk.
| Scenario | DIY Viability | Pro Repair Cost | Risk Factor of DIY Failure |
|---|---|---|---|
| Hairline vertical crack (< 1/16"), dry | High (Use epoxy paste) | $250 - $400 | Low (Cosmetic only) |
| Vertical crack (1/8" to 1/4"), weeping water | Moderate (Low-pressure PU kits) | $400 - $650 | Medium (Resin may not reach exterior soil) |
| Diagonal stair-step crack in CMU block | None (Requires structural assessment) | $1,500 - $3,500 | High (Masks differential settlement) |
| Horizontal crack with inward bowing | None (Imminent structural failure) | $3,000 - $8,000+ | Critical (Risk of wall collapse) |
Step-by-Step Triage: What to Do Right Now
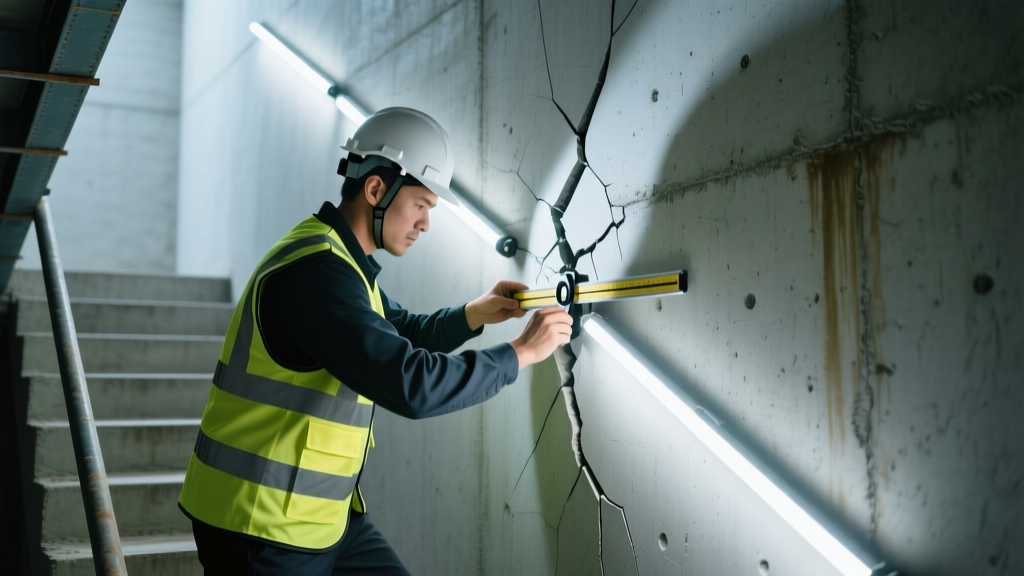
If you have discovered a new or expanding foundation crack, follow this diagnostic triage protocol before authorizing any repair work.
- Map and Measure: Use a crack width gauge or feeler gauge to measure the widest point. Mark the ends of the crack with a pencil and date it. Take high-resolution photographs in consistent lighting.
- Monitor for Shear Displacement: Place a brittle glass crack monitor (available for $10 at hardware stores) across the fissure. If the glass snaps over a 30-day period, the foundation is actively moving, and cosmetic sealing is a waste of capital.
- Audit Exterior Grading: Walk the exterior perimeter. Ensure the soil slopes away from the foundation at a minimum grade of 6 inches of fall over the first 10 feet. Verify that downspouts discharge at least 10 feet away from the foundation wall via solid PVC extensions, not corrugated flexible tubing which easily crushes and clogs.
- Hire an Independent Structural Engineer: Do not rely solely on the diagnostic report of a foundation repair contractor, as they have a financial incentive to recommend the most expensive stabilization method. Hire an independent licensed structural engineer (typically $400 to $600 for a site visit and written report) to prescribe the exact repair specification. You can then bid that engineer's specification out to three different contractors for competitive pricing.
Expert Insight: Always request that the contractor's proposal specifies the exact resin model number, the number of injection ports per linear foot, and the maximum injection pressure (PSI). Vague proposals that simply state "seal crack with polyurethane" leave you vulnerable to substandard materials and shallow injections that fail within the first freeze-thaw cycle.
Written by
Priya KapoorPriya Kapoor is a real estate market analyst and construction economics researcher with expertise in housing affordability, development feasibility, and infrastructure investment. She holds a Master of Regional Planning from Cornell University and previously worked as a senior analyst at CBRE's Investment Properties group, where she modeled returns for $4B in mixed-use development pipelines. Priya now runs an independent research practice advising developers, municipalities, and REITs on construction cost forecasting and market timing. She publishes the quarterly "BuildMat Market Pulse" report tracking material price indices across 12 commodity categories. Based in Austin, TX, Priya serves on the board of Habitat for Humanity Austin and is a marathon runner.
More from Priya Kapoor
View all
Construction Cost
Cost to Build a 1600 Sq Ft Home in 2026: Full Breakdown
Accurate 2026 cost to build a 1600 sq ft home—material, labor, and regional pricing breakdowns included. Plan your budget with real-time estimates.
Aug 11, 2026

Wood & Lumber
Name the Types of Wood for Pressure Treatment and Preservation
Learn how to name the types of wood best suited for pressure treatment. Compare species treatability, chemical retention levels, and 2026 preservation costs.
Aug 4, 2026

Stone & Masonry
Stone Veneer Suppliers Lindenhurst: 2026 Cost Analysis
Analyze 2026 stone veneer costs in Lindenhurst, NY. Compare local supplier pricing, delivery fees, and Suffolk County installation labor rates.
Aug 4, 2026