Asphalt Shingle Repair Guide: Fixing Cracks, Curls, and Missing Tabs
Learn precise asphalt shingle repair techniques for cracked, curled, and missing tabs. Includes step-by-step application, material costs, and sealing tips.
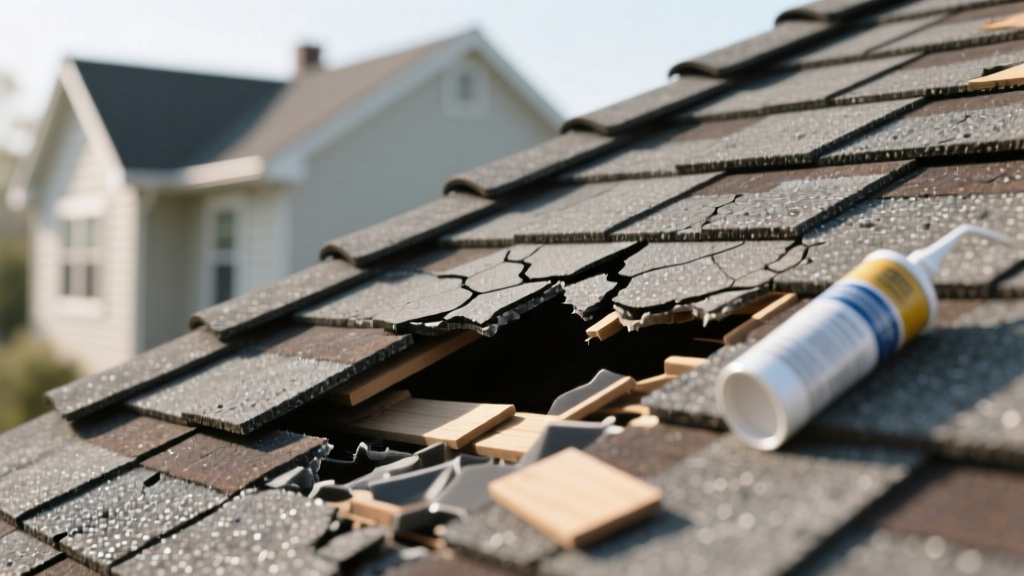
Diagnosing Shingle Damage: The 3-Point Inspection Matrix
Before purchasing sealants or replacement shingles, you must accurately classify the shingle failure. Asphalt shingle repair is only viable when the underlying fiberglass mat retains structural integrity. Surface-level anomalies can often be remediated, while deep structural failures require full shingle extraction. According to the Asphalt Roofing Manufacturers Association (ARMA), attempting to seal a shingle with a compromised mat will inevitably lead to water intrusion within one to two freeze-thaw cycles.
The Inspection Checklist
- Granule Loss vs. Mat Exposure: Bald spots exposing the black asphalt coating are repairable with liquid roof coatings. If the white or yellow fiberglass mat is visible, the shingle must be replaced.
- Crease vs. Clean Break: Wind-damaged shingles often exhibit a horizontal crease just above the sealant strip. If the crease has not fractured entirely through the mat, it can be resealed. A clean snap requires replacement.
- Nail Pop Evaluation: If a shingle is lifting due to a protruding nail head, the repair involves resetting the fastener and sealing the penetration, rather than addressing the shingle itself.
Essential Tools and 2026 Material Specifications
Standard hardware store acrylic caulk is entirely unsuitable for roofing applications. It lacks the elastomeric properties required to withstand the thermal expansion and contraction of an asphalt roof deck, which can fluctuate by over 100°F between day and night. You must use SBS (Styrene-Butadiene-Styrene) modified asphalt cement or high-grade polyurethane roofing sealants.
| Material / Tool | Specification / Model | Est. 2026 Cost | Purpose |
|---|---|---|---|
| Roofing Cement | SBS-Modified (e.g., Henry 208R or Karnak 19) | $18 - $24 / 10oz tube | Adheres tabs, seals nail heads, waterproofs cracks |
| Roofing Nails | 11-Gauge, 1.5-inch Galvanized (Ring Shank) | $0.06 / nail | Secures replacement shingles; resists wind uplift |
| Flat Pry Bar | 4-inch to 6-inch flat blade (No fulcrum) | $15 - $25 | Breaks factory sealant strips without tearing the mat |
| Utility Knife | Heavy-duty with hook blades | $12 / kit | Chamfers replacement shingles and trims damaged edges |
Step-by-Step Application: Fixing Cracked and Torn Shingles
Cracks typically occur along the cutouts of 3-tab shingles or the exposed weather-face of architectural shingles due to UV degradation and thermal shock. If the crack is less than 6 inches and the mat is intact, follow this remediation protocol:
- Clean the Substrate: Use a wire brush to remove loose granules, dirt, and oxidized asphalt from the crack. Wipe the area with a rag dampened with mineral spirits to ensure a pristine bonding surface.
- Apply the Base Bead: Slide the flat pry bar gently under the cracked shingle. Apply a continuous 1-inch wide bead of SBS-modified roofing cement directly beneath the crack onto the roof deck or underlying shingle.
- Press and Secure: Remove the pry bar and press the shingle firmly into the cement. For cracks wider than 1/8 inch, apply a secondary 1-inch bead over the top of the crack, smoothing it with a putty knife to feather the edges and prevent water damming.
- Embed Granules: Immediately broadcast loose matching granules (saved from gutter cleanouts or purchased) over the wet cement to restore UV protection and aesthetic continuity.
Resolving Curled Shingle Tabs and Wind Creases
Shingle curling (often called "clawing" or "winter curling") happens when the top surface of the shingle shrinks at a different rate than the underside, or when attic moisture causes the deck to swell. If the curl is minor and the shingle is not brittle, it can be flattened and re-adhered.
The Heat-and-Seal Method
Do not forcefully bend a cold, brittle shingle, as it will snap. Instead, use a heat gun set to a maximum of 200°F. Wave the heat gun 6 inches above the curled tab until the asphalt becomes slightly pliable (usually 15 to 20 seconds). Lift the tab, apply a 2-inch diameter dab of roofing cement to the deck, and press the tab down. Place a standard clay brick on the tab for 24 hours to hold it flat while the solvent evaporates and the bond sets. The National Roofing Contractors Association (NRCA) explicitly advises against using open-flame torches for this procedure, as localized overheating will instantly boil the asphalt and destroy the shingle.
Replacing a Single Missing or Destroyed Shingle
When a shingle is entirely missing or structurally compromised, a localized replacement is required. The most critical error DIYers make is failing to address the overlapping shingles in the course above.
- Break the Upper Seal: Insert the flat pry bar under the shingles in the course directly above the damaged one. Gently push upward to break the factory adhesive sealant strip. Do this for the damaged shingle and the two adjacent shingles on either side.
- Extract the Fasteners: Locate the nails securing the damaged shingle (typically 4 to 6 nails, positioned 1 inch above the sealant line). Use the pry bar to lever them out. You must also extract the nails in the overlapping course above that penetrate the top edge of your target shingle.
- Chamfer the Replacement Shingle: Cut the top two corners off your new replacement shingle at a 45-degree angle (about 1/2 inch deep). This "chamfering" prevents the corners from catching on the nails or edges of the upper course when you slide it into place.
- Slide and Nail: Slide the new shingle up into the gap. Secure it using 11-gauge, 1.5-inch galvanized ring-shank nails. Drive the nails in the exact same pattern as the surrounding shingles, ensuring the nail heads sit flush but do not cut into the asphalt mat.
- Reseal the Overlaps: Apply a 1-inch dab of roofing cement under the bottom edge of the overlapping shingles in the course above to re-establish the wind-uplift seal. Press down firmly.
"Never leave an exposed nail head on a roof repair. Every nail driven during a shingle replacement must be covered by the overlapping shingle course, or individually capped with a 1-inch dollop of SBS roofing cement. Unsealed nails are the primary entry point for moisture in otherwise sound roof systems."
Common Shingle Repair Mistakes and Failure Modes
Even with premium materials, improper application techniques will void manufacturer warranties and accelerate roof degradation. Avoid these documented failure modes:
- Over-application of Cement: Using excessive roofing cement creates a thick, inflexible dam. When the shingle expands in the summer heat, the rigid cement mass restricts movement, causing the shingle to tear adjacent to the repair site.
- Using Smooth-Shank Nails: Standard smooth-shank roofing nails lack withdrawal resistance. In high-wind events (exceeding 90 mph), they will back out of the OSB or plywood decking. Always use ring-shank or screw-shank galvanized nails for repairs.
- Ignoring the Underlayment: If you pull up a damaged shingle and discover the underlying roofing felt or synthetic underlayment is torn or rotted, applying a new shingle is a temporary bandage. The deck must be inspected, and the underlayment patched with a self-adhering ice and water shield membrane before the new shingle is installed.
- Mismatched Aesthetics: Asphalt shingles fade significantly over 5 to 10 years due to UV exposure. Installing a brand-new, deeply pigmented architectural shingle in the middle of a faded roof plane will create a glaring visual defect. Always source replacement shingles from the original leftover bundle, or pull a replacement from a hidden roof plane (like a rear dormer) and use a new shingle in the hidden spot.
Proper asphalt shingle repair requires an understanding of both the material's chemical limitations and the mechanical forces exerted by wind and thermal cycling. By utilizing SBS-modified sealants, ring-shank fasteners, and precise extraction techniques, you can extend the service life of a localized roof section by 5 to 8 years, delaying the massive capital expenditure of a full tear-off and replacement.