Carlisle Construction Materials Roof Garden Repair and Maintenance
Expert guide to repairing Carlisle Construction Materials roof garden membranes. Covers EPDM and TPO leak detection, patching, and 2026 costs.
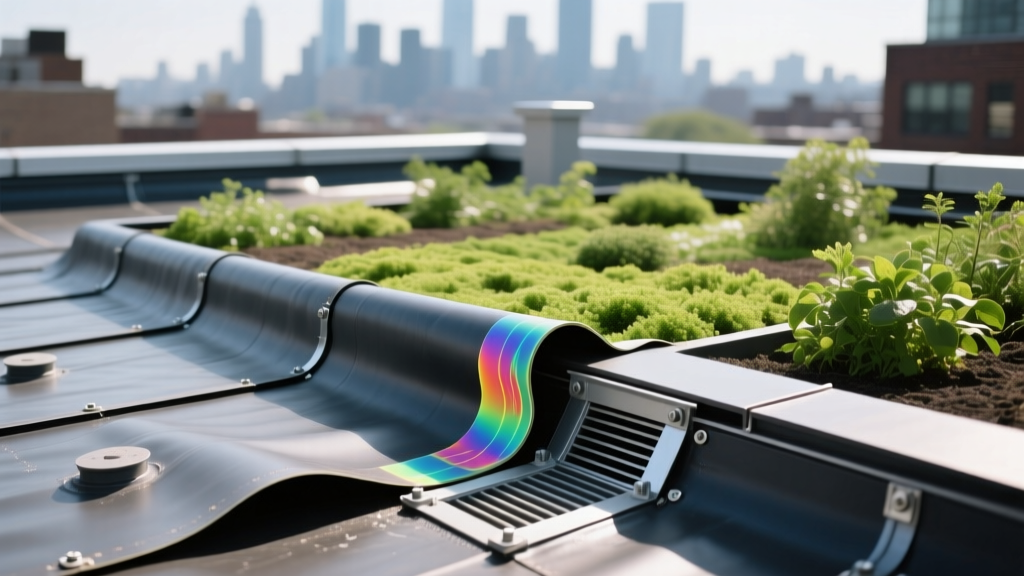
Vegetative roof systems built over Carlisle Construction Materials (now Carlisle Weatherproofing Technologies) membranes represent some of the most durable commercial roofing assemblies available. However, when a leak occurs in a Carlisle Construction Materials roof garden, maintenance shifts from a simple visual inspection to a complex archaeological excavation. Technicians must navigate engineered soil, filter fabrics, drainage mats, and root barriers to reach the underlying Sure-Seal EPDM or Sure-Weld TPO membrane. This guide details the exact diagnostic, extraction, and repair protocols required to restore the watertight integrity of a vegetative Carlisle roof system in 2026.
Diagnostic Mapping: Finding Leaks Under the Soil
Before removing any overburden, you must pinpoint the breach. Guessing the leak location based on interior water stains is highly inaccurate in vegetative systems because water travels laterally along the Carlisle Drainage Mat before finding a deck penetration. Professional roofing contractors rely on Electronic Leak Detection (ELD).
Low-Voltage Vector Mapping
For roof gardens with moist or saturated engineered soil, low-voltage vector mapping is the industry standard. This method uses the damp soil and the conductive roof deck as a circuit. A technician lays a copper wire grid over the vegetation and applies a low-voltage current. Using a specialized voltmeter with two grounding probes, the technician maps the directional flow of the current. The current will always flow toward the exact point of the membrane breach. This non-destructive method is endorsed by the Green Roofs for Healthy Cities organization as the safest first step for vegetative roof diagnostics.
High-Voltage ELD (Dry Conditions)
If the roof garden substrate is completely dry, high-voltage ELD (often called holiday testing) is required. A brush carrying up to 30,000 volts is swept over the exposed membrane (after localized soil removal). When the brush crosses a pinhole or puncture, the circuit grounds out, creating a visible spark and an audible alarm.

Safe Overburden Extraction and Root Barrier Assessment
Once the leak is triangulated, the overburden must be removed without causing secondary damage to the Carlisle membrane.
- Tool Selection: Never use steel spades or metal rakes. Use high-density polyethylene (HDPE) trowels and plastic shovels to excavate the engineered soil and lightweight aggregate.
- Soil Staging: Stage the removed engineered soil in heavy-duty contractor bags. Do not pile soil on adjacent roof areas, as the localized dead load can exceed the deck's structural capacity. The EPA's green infrastructure guidelines emphasize strict adherence to structural load limits during maintenance operations.
- Root Barrier Inspection: Carlisle vegetative assemblies utilize a dedicated root barrier (often a 20-mil to 30-mil puncture-resistant polyethylene sheet) placed above the membrane. If you find aggressive roots (like those from volunteer shrubs or deep-rooted sedums) that have penetrated this barrier, the entire localized barrier section must be replaced, not just patched.
Wind-blown seeds often introduce deep-rooted volunteer plants to shallow extensive roof gardens. If a volunteer tree sapling is found, do not simply pull it out. The taproot may have pierced the Carlisle root barrier and membrane. Excavate around the root ball, cut the root cleanly above the membrane, and immediately inspect the underlying TPO or EPDM for punctures.
Repair Protocols: Carlisle EPDM vs. TPO Membranes
The repair methodology depends entirely on the specific Carlisle membrane installed beneath the garden. Mixing repair protocols will result in catastrophic adhesion failure.
| Feature | Carlisle Sure-Seal EPDM | Carlisle Sure-Weld TPO |
|---|---|---|
| Primary Patch Method | Vulcanized EPDM Splice Tape | Hot-Air Welded TPO Patch |
| Preparation | Clean with Carlisle Splice Wash; apply Splice Primer | Clean with TPO Cleaner; no primer required |
| Minimum Overlap | 3 inches on all sides of the breach | 2 inches on all sides of the breach |
| Penetration Detail | Carlisle FlexFlash UN (Liquid Polyether) | Pre-fabricated TPO Pipe Boots + Weld |
Executing the Membrane Patch in Confined Excavations
Repairing a membrane inside a 3-foot by 3-foot excavated soil pit requires specialized techniques, as standard large-roller applications are impossible.
Carlisle Sure-Weld TPO Hot-Air Welding
- Clean the Substrate: Wipe the exposed TPO membrane with Carlisle TPO Cleaner to remove soil residue and biological growth. The surface must be completely dry.
- Cut the Patch: Cut a piece of matching 45-mil or 60-mil Sure-Weld TPO with rounded corners. Sharp corners are prone to peeling under the shifting weight of saturated soil.
- Weld Parameters: Using a handheld Leister Triac welder with a 2-inch nozzle, set the temperature between 950°F and 1,050°F. (Adjust upward if ambient roof temperatures are below 50°F).
- Pressure Application: Immediately follow the heat nozzle with a 2-inch silicone pressure roller. Apply firm, continuous pressure to ensure the polymer chains cross-link. Probe the edge with a blunt awl; any catch indicates a cold weld that must be re-heated and rolled.
Carlisle Sure-Seal EPDM Splicing
- Prime the Area: Apply Carlisle Splice Primer to both the roof membrane and the back of the EPDM patch using a scrub brush. Allow it to flash off until it is tacky but does not transfer to a dry knuckle (typically 10-15 minutes).
- Apply the Tape/Patch: Carefully lay the vulcanized EPDM patch over the breach, avoiding wrinkles.
- Stitch Rolling: Use a 1.5-inch silicone stitch roller, applying heavy downward pressure. Roll from the center outward to expel trapped air. The physical pressure activates the chemical vulcanization process.
- Edge Sealing: For added security against constant soil moisture, brush a layer of Carlisle FlexFlash UN liquid flashing over the perimeter edges of the patch.
Post-Repair: Rebuilding the Carlisle Vegetative Assembly
Once the membrane repair passes a localized flood test or secondary ELD sweep, the vegetative assembly must be rebuilt in the exact reverse order of its extraction. According to Carlisle Weatherproofing Technologies specifications, the assembly relies on distinct layers to manage hydrostatic pressure.
- Protection/Root Barrier Mat: Re-lay the heavy-duty polyethylene root barrier, overlapping existing barrier seams by a minimum of 6 inches and sealing with approved root-resistant tape.
- Drainage Mat: Install the Carlisle Drainage Mat (typically a dimpled high-density polyethylene core bonded to a filter fabric). Ensure the fabric side faces UP to prevent engineered soil from washing into the drainage channels.
- Engineered Soil Replacement: Never replace the excavated medium with standard topsoil. Topsoil retains too much water and compacts, suffocating plant roots and overloading the roof deck. Use a lightweight expanded shale or slate aggregate mix with a bulk density of 75-90 lbs/cu ft (dry) and 110-130 lbs/cu ft (saturated).
- Replanting: If the original sedum mats were destroyed during excavation, install new pre-vegetated mats or apply a hydroseeding slurry of mixed sedum cuttings, ensuring immediate coverage to prevent wind erosion of the engineered soil.
2026 Cost Breakdown for Vegetative Roof Repairs
Repairing a Carlisle Construction Materials roof garden is inherently labor-intensive due to the overburden manipulation. Below is the current 2026 national average pricing for a standard 100-square-foot localized repair zone (including excavation, membrane patching, and reassembly).
| Line Item | Estimated Cost Range |
|---|---|
| ELD Diagnostic Mapping (Flat fee) | $800 - $1,500 |
| Overburden Excavation & Staging (100 sq ft) | $600 - $950 |
| Membrane Repair (Materials + Specialized Labor) | $450 - $800 |
| Replacement Engineered Soil & Sedum Mats | $700 - $1,200 |
| Total Projected Cost (per localized leak) | $2,550 - $4,450 |
Proactive maintenance is vastly more economical. Conducting annual vegetative roof inspections, clearing Carlisle drainage outlets of organic debris, and aggressively removing volunteer deep-rooted plants will prevent the vast majority of membrane breaches, preserving the 20-to-30-year lifespan of the Carlisle roofing assembly beneath the garden.
Written by
James ThorntonJames Thornton is a construction industry veteran with 25 years of hands-on experience in wood framing, lumber grading, and residential building codes. He started as a framing carpenter in rural Oregon, earned his ICC Residential Building Inspector certification, and eventually became a senior plan reviewer for the City of Portland Bureau of Development Services. James holds a B.S. in Wood Science & Technology from Oregon State University and is a certified lumber grader through the West Coast Lumber Inspection Bureau (WCLIB). He has inspected over 3,000 residential construction sites and authored the city's internal guide on advanced framing techniques (2x6 at 24" O.C.). James lives in Bend, OR, where he builds custom timber-frame cabins and competes in lumberjack sports.
More from James Thornton
View all
Insulation
Best Home Insulation Materials: Complete 2026 Guide
Compare top home insulation materials for 2026. Find R-values, installed costs per square foot, and best uses for fiberglass, spray foam, and mineral wool.
Aug 4, 2026

Sustainable Building
Certify Your Green Building Material for LEED and WELL
Step-by-step guide to certifying a green building material for LEED v5 and WELL v2. Master EPDs, HPDs, and VOC limits for 2026 project specifications.
Aug 4, 2026

Stone & Masonry
Veneer Stacked Stone Panels: Interior Design & Style Showcase
Discover how veneer stacked stone panels transform interiors. Explore modern design profiles, material pairings, and technical installation specs.
Aug 4, 2026