Maintaining the Drip Edge on Roof Eaves: A Cleaning Playbook
Learn how to inspect, clean, and repair the drip edge on roof eaves. This maintenance playbook covers rust removal, debris clearing, and realignment.
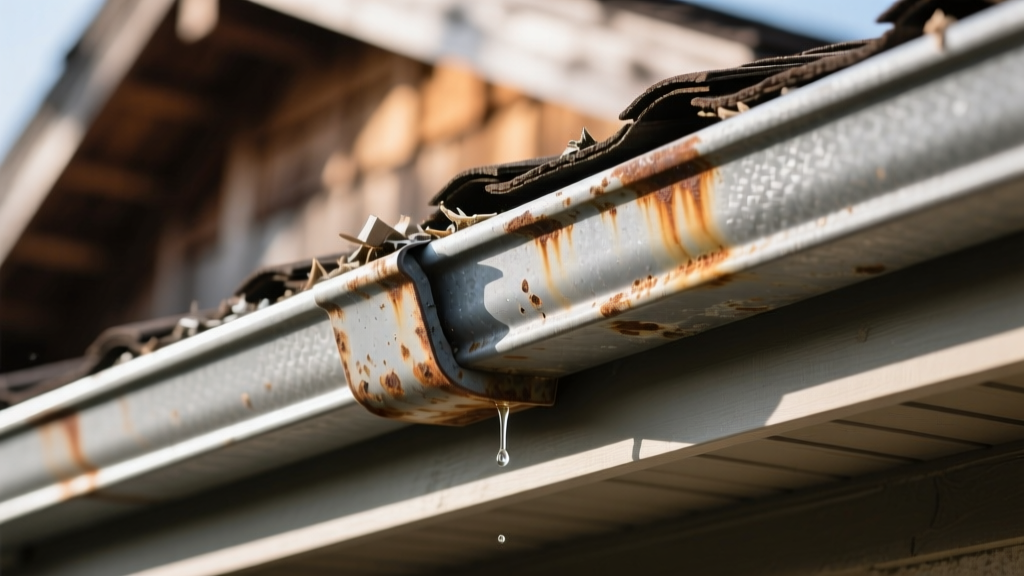
The Anatomy and Function of Roof Drip Edge Flashing
The drip edge on roof eaves and rakes is a critical, yet frequently overlooked, component of the building envelope. Typically formed from 0.019-inch aluminum, 26-gauge galvanized steel, or occasionally copper, this L-shaped metal flashing serves a distinct hydrological purpose: it directs water away from the underlying fascia and into the gutter system while breaking capillary action. When the lower flange is properly extended, it prevents wind-driven rain and melting ice from wicking back under the shingles and rotting the roof deck. According to the International Residential Code (IRC Section R905.2.8.5), drip edges are mandatory at both eaves and gable edges for asphalt shingle roofs, requiring the underlayment to overlap the drip edge at the eaves, but the drip edge to overlap the underlayment at the rakes. Despite this code requirement, maintenance playbooks often skip this flashing until it fails, leading to fascia rot, gutter detachment, and ice dam exacerbation.
Phase 1: Visual Inspection and Failure Diagnostics
Before applying any cleaning agents or mechanical force, conduct a systematic diagnostic sweep. The drip edge is subjected to extreme thermal expansion, UV degradation, and physical loading from snow and gutters. Use the following matrix to identify specific failure modes during your inspection.
| Observed Symptom | Root Cause Analysis | Severity & Action Required |
|---|---|---|
| Lower flange bent inward toward fascia | Gutter weight pulling the hem; improper initial nailing; ice dam pressure. | High: Capillary action will draw water behind the gutter. Requires mechanical realignment. |
| White, chalky powder on metal surface | "White rust" (zinc oxide/aluminum oxide) caused by trapped moisture and lack of airflow. | Low: Cosmetic and superficial. Requires gentle chemical cleaning and sealing. |
| Red/brown flaking and pitting | Galvanized zinc coating has failed; underlying steel is oxidizing (red rust). | Critical: Structural compromise. Requires rust conversion and cold-galvanizing spray, or full replacement. |
| Nail heads protruding or missing | Thermal cycling causing fastener back-out; wood fascia shrinkage. | Medium: Creates wind-uplift vulnerability. Requires resetting with ring-shank nails. |
| Debris packed behind the upper flange | Pine needles and granules washing down the roof slope and trapping against the vertical leg. | Medium: Holds moisture against the underlayment. Requires manual extraction and flushing. |
Phase 2: Material-Specific Deep Cleaning Protocols
Cleaning the drip edge on roof perimeters requires chemical compatibility with the specific metal alloy. Using the wrong abrasive or acidic cleaner will strip protective mill finishes and accelerate corrosion. The National Roofing Contractors Association (NRCA) emphasizes that preserving the factory-applied coatings on metal flashings is paramount for long-term weather resistance.
Protocol A: Aluminum Flashing (0.019" to 0.024")
Aluminum relies on a microscopically thin layer of aluminum oxide to prevent further corrosion. Never use a wire wheel, steel wool, or harsh alkaline cleaners (like undiluted bleach or strong degreasers) on aluminum, as these will strip the oxide layer and cause severe pitting.
- Dry Extraction: Use a plastic putty knife or a stiff nylon brush to dislodge impacted pine needles and asphalt granules from behind the upper vertical flange.
- Chemical Wash: Mix a solution of oxygen bleach (sodium percarbonate) and warm water. Apply using a low-pressure pump sprayer. Let it dwell for 10 minutes to break down organic algae and dirt.
- Agitation: Scrub the lower hem and face with a medium-bristle nylon brush. Do not scrub upward under the shingles to avoid breaking the fiberglass mat or tearing the underlayment.
- Rinse: Flush with a standard garden hose. Never use a pressure washer above 800 PSI, as the concentrated stream will easily bend the 0.019-inch aluminum and force water under the starter shingles.
Protocol B: Galvanized Steel Flashing (26-Gauge)
Galvanized steel is coated in zinc to provide sacrificial anode protection. Over time, this zinc layer degrades. Cleaning must focus on removing organic matter without stripping the remaining zinc.
- Debris Clearing: Remove all leaf litter and mud dams that are holding moisture against the metal.
- Mild Detergent Wash: Use a pH-neutral car wash soap or a dedicated metal roof cleaner (such as Simple Green Oxy Dog or a similar non-acidic formula). Avoid vinegar or muriatic acid, which will instantly dissolve the zinc coating.
- Targeted Scrubbing: Use a soft-bristle brush to remove localized dirt bands. If white rust (zinc oxide) is present, it can be gently buffed with a Scotch-Brite pad, but do not sand down to bare steel.
Applying a pressure washer directly to the drip edge hem is a leading cause of premature flashing failure. The high-velocity water can invert the lower flange, destroying the capillary break and forcing water directly into the fascia board. Always rely on chemical dwell time and manual agitation rather than brute water pressure.
Phase 3: Mechanical Realignment and Fastener Resetting
If your Phase 1 inspection revealed a lower flange bent inward toward the fascia, cleaning alone will not solve the moisture issue. The hem must be mechanically restored to a 90-degree or slightly outward angle to ensure water drops clear of the gutter's back edge.
Tools Required for Realignment
- Flat pry bar (12-inch to 15-inch)
- Dead-blow mallet (rubber or polyurethane face to prevent marring the metal)
- Aviation snips (for trimming severely crushed corners)
- 1.5-inch electro-galvanized or stainless steel ring-shank roofing nails
Step-by-Step Realignment Process
- Release the Gutter: If the gutter is spiked directly through the drip edge, you may need to loosen the top gutter brackets to relieve tension on the flashing hem.
- Leverage the Flange: Slide the flat pry bar behind the lower flange, resting the fulcrum against the fascia (use a wood block to protect the fascia paint). Gently pull outward until the flange is parallel to the ground or angled slightly downward.
- Tap the Hem: If the metal is kinked, use the dead-blow mallet to gently tap the bend back into a crisp 90-degree angle. Work in 12-inch increments to avoid work-hardening and cracking the metal.
- Reset Fasteners: According to standard InterNACHI inspection guidelines, drip edge fasteners should be spaced no more than 12 inches on center. If existing nails have backed out, do not simply hammer them back in—the wood hole is likely stripped. Instead, drive a new 1.5-inch ring-shank nail 1 inch adjacent to the old hole, and pull the old nail to prevent water channeling.
Phase 4: Rust Conversion and Protective Sealing
For galvanized steel drip edges exhibiting early-stage red rust, immediate intervention is required to halt the oxidation process before the metal perforates. Do not simply paint over red rust; it will continue to oxidize beneath the paint film and blister within months.
For localized rust spots on steel drip edges, apply a tannic acid-based rust converter (such as Ospho or Corroseal). The tannic acid reacts with iron oxide to form iron tannate, a stable, black, inert compound that halts corrosion and provides a primer-ready surface. Allow 24 hours of cure time before top-coating.
Once the rust is converted and the surface is clean and dry, apply a protective topcoat. For galvanized steel, use a cold-galvanizing compound spray (containing 93% pure zinc dust in the dry film) to restore the sacrificial anode protection. For aluminum, a clear acrylic metal sealer or a UV-resistant elastomeric roof coating brushed specifically onto the flashing face will extend the service life by 10 to 15 years. Ensure the coating does not bridge the gap between the drip edge and the gutter, as this will create a new capillary bridge.
Preventative Maintenance Schedule
Integrating the drip edge into your broader roofing maintenance playbook ensures longevity. Follow this seasonal schedule to prevent compounding failures:
- Early Spring (Post-Winter): Inspect for ice dam damage. Check the lower flange for inward bending caused by snow load and ice melt. Clear any granules that have washed down from asphalt shingles during freeze-thaw cycles.
- Late Summer (Pre-Fall): Perform the deep cleaning protocol (Phase 2) to remove summer algae, pollen, and dirt. Apply UV-protective sealants to aluminum or touch-up zinc sprays to galvanized steel before the wet autumn months.
- Late Autumn (Pre-Winter): Extract all leaf litter from behind the upper vertical flange. Ensure the lower hem is clear of debris so that melting snow can flow unimpeded into the gutters. Verify that all fasteners are seated flush and sealed with a dab of polyurethane roofing cement if the heads are exposed.
By treating the drip edge on roof systems as a primary water-management component rather than a passive trim piece, property owners and maintenance professionals can prevent thousands of dollars in secondary fascia and soffit rot, ensuring the roof assembly performs to its engineered lifespan.