Choosing the Best Camper Roof Repair Material for Durability
Compare the most durable camper roof repair material options. Analyze EPDM, TPO tapes, and sealants for UV resistance, elongation, and 20-year lifespans.

The Physics of RV Roof Degradation
Recreational vehicle roofs endure a uniquely hostile environment compared to residential structures. A camper roof experiences extreme thermal shock, shifting from freezing night temperatures to 160°F surface heat under direct midday UV exposure. Furthermore, the chassis flexes and torsions during highway transit, demanding that any camper roof repair material possess high tensile strength and exceptional elongation properties. Standard residential roofing compounds become brittle and crack under these dynamic mechanical stresses. Selecting a repair material based solely on initial adhesion is a critical error; long-term durability requires matching the material's chemical composition and elasticity to the specific RV roof substrate—typically EPDM rubber, TPO (Thermoplastic Polyolefin), or fiberglass.
Top Camper Roof Repair Material Categories Ranked by Lifespan
1. Liquid EPDM Rubber Coatings (15–20 Year Lifespan)
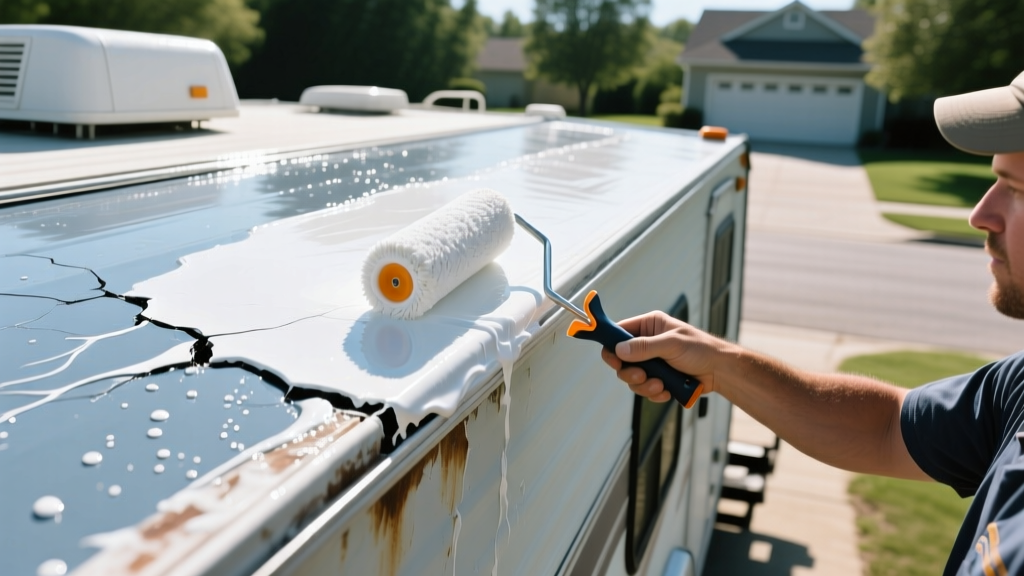
For comprehensive roof restoration and large-scale crack repair, 100% EPDM liquid rubber (such as Proguard Liquid Roof or Liquid Rubber RV Roof Coating) is the industry benchmark. Unlike acrylics that merely sit on the surface, liquid EPDM chemically cross-links and vulcanizes into a solid, seamless rubber membrane. It boasts an elongation at break of over 300%, allowing it to stretch and recover as the camper expands and contracts. At a material cost of $1.50 to $2.50 per square foot, it is a premium investment, but it eliminates the need for repetitive annual seam maintenance. According to membrane performance data from the National Roofing Contractors Association (NRCA), properly applied EPDM systems consistently outlast other single-ply alternatives in high-UV environments.
2. MicroSealant Peel-and-Stick Tapes (10–15 Year Lifespan)
For localized seam repairs, vent flange sealing, and edge termination, butyl-backed microsealant tapes like Eternabond RoofSeal are unmatched. Eternabond utilizes a 45-mil thick backing with a non-curing, aggressive microsealant adhesive that actually creeps into microscopic substrate pores. The Eternabond technical specifications note that the adhesive never fully hardens, maintaining a permanent watertight seal even if the roof panel shifts. Priced at roughly $0.75 per linear foot for the 4-inch width, it is the most cost-effective long-term solution for linear seams. However, it is not designed for large, flat surface restorations or pooling water areas.
3. Self-Leveling Lap Sealants (3–5 Year Lifespan)
Self-leveling sealants, specifically Dicor 501LSW-1, are the standard for horizontal seam sealing around roof vents, air conditioners, and skylights. They flow into gaps and cure to a flexible, rubber-like consistency. While highly effective initially, UV degradation and ozone exposure cause them to chalk, shrink, and eventually pull away from the substrate edges within 3 to 5 years. At $12 to $15 per 10.3 oz tube, they are cheap upfront but incur high lifecycle labor costs due to mandatory reapplication cycles. Always verify you are using the self-leveling formula for horizontal surfaces and the non-sag formula (Dicor 502LSW-1) for vertical joints.
Never use 100% silicone roof coatings or sealants on an RV roof. While silicone sheds water exceptionally well, it leaves a microscopic residue that prevents any future camper roof repair material—including EPDM, urethanes, or acrylics—from adhering. Once silicone is applied, the only way to achieve future adhesion is through aggressive mechanical abrasion or complete roof replacement.
Durability & Elongation Matrix
Understanding the mechanical limits of your repair material prevents catastrophic failures during extreme temperature swings. The table below contrasts the physical properties of the primary repair materials.
| Material Type | Elongation at Break | UV Resistance | Expected Lifespan | Best Application |
|---|---|---|---|---|
| Liquid EPDM Rubber | > 300% | Excellent | 15–20 Years | Full roof coatings, large tears |
| MicroSealant Tape (45-mil) | 150% - 200% | Very Good | 10–15 Years | Seams, vent flanges, edges |
| Self-Leveling Lap Sealant | 100% - 150% | Moderate (Chalks) | 3–5 Years | Horizontal penetrations |
| Acrylic Elastomeric | 200% - 250% | Good (Degrades in puddles) | 5–8 Years | Sloped roofs, temporary fixes |
Critical Substrate Preparation for Maximum Adhesion
The most expensive camper roof repair material will fail in months if applied over an improperly prepared substrate. Oxidation, silicone residue, and road oils act as bond-breakers. Follow this exact preparation protocol to ensure a permanent chemical bond:
- Identify the Substrate: Perform the 'water drop' test. If water beads up, it is likely TPO or fiberglass. If it absorbs slightly or leaves a dark wet spot, it is EPDM. You can also check the underside of the membrane; EPDM is usually black on the back, while TPO is white or gray on both sides.
- Deep Clean: Wash the area with a dedicated RV roof cleaner or a mixture of trisodium phosphate (TSP) and water to remove biological growth and dirt. Rinse thoroughly and allow to dry completely.
- Solvent Wipe (The Crucial Step): Wipe the repair area with Methyl Ethyl Ketone (MEK) or Acetone. MEK is preferred for EPDM as it slightly softens the top layer of rubber, allowing the new repair material to chemically weld into the substrate. Note: Use MEK in a well-ventilated area with proper PPE.
- Apply Primer (TPO Only): If repairing a TPO roof, you must apply a chlorinated polyolefin primer (such as Eternabond TPO Primer) before applying tape or liquid coatings. TPO is inherently non-porous and will reject adhesives without this chemical bridge.
"Adhesion is not just about stickiness; it is about surface energy. Wiping an EPDM roof with MEK raises the surface energy and removes the oxidized chalk layer, increasing the peel strength of microsealant tapes by up to 400% compared to soap-and-water cleaning alone." — Dicor Products Application Guidelines
Real-World Troubleshooting: Why Repairs Fail Prematurely
Symptom: Tape edges peeling and lifting
Cause: Applied over oxidized EPDM chalk or failed to use a primer on TPO. Alternatively, the tape was stretched during application, creating residual tension that pulls the edges up over time.
Fix: Peel back the lifted edge, clean with MEK, and apply a 1-inch overlap strip of new tape without stretching it. Use a steel seam roller to apply 50+ lbs of pressure.
Symptom: Self-leveling sealant cracking in the center
Cause: Applied too thick in a single pass, causing the surface to skin over while the underlying material remained uncured, leading to shrinkage cracks as solvents tried to escape.
Fix: Remove the cracked sealant entirely. Reapply in multiple thin layers, allowing 24 hours of cure time between passes, or switch to a high-solids polyurethane sealant.
Final Selection Framework
When selecting your camper roof repair material, map the damage type to the material's mechanical strengths. Use Liquid EPDM for broad surface degradation, micro-cracking, and restoring UV reflectivity. Deploy MicroSealant Tape for structural seams, roof-to-sidewall transitions, and vent flanges where physical abrasion from branches or debris is a risk. Reserve Self-Leveling Sealants strictly for small, horizontal penetration bases where regular inspection and 3-year maintenance cycles are acceptable. By aligning the material's elongation properties and chemical makeup with the specific stress points of your RV, you secure a watertight envelope that withstands the rigors of the road for decades.
Written by
David NakamuraDavid Nakamura is a licensed architect (AIA) and construction technology writer focused on sustainable building methods, mass timber engineering, and high-performance building envelopes. He holds a Master of Architecture from the University of Washington and is a certified Passive House Consultant (CPHC). David spent eight years at the Seattle firm Mithun, where he led the design of three LEED Platinum projects, before founding his own practice specializing in net-zero residential design. He serves on the editorial advisory board of GreenBuilder Magazine and has authored peer-reviewed papers on cross-laminated timber (CLT) connections for the Journal of Structural Engineering. In his spare time, David teaches woodworking at Pratt Fine Arts Center and kayaks the Puget Sound.
More from David Nakamura
View all
Construction Cost
Labor Cost to Build a Deck Per Sq Ft: 2026 Installation Guide
Discover the exact labor cost to build a deck per sq ft in 2026. This installation guide breaks down contractor rates, complexity factors, and hidden fees.
Aug 4, 2026

Construction Cost
How Much Does It Cost to Build a 3 Bedroom House? Financing Guide
Learn exactly how much it costs to build a 3 bedroom house and explore 2026 financing options, construction loan types, and budget frameworks for your build.
Aug 4, 2026

Construction Cost
Cost to Build a Tennis Court: 2026 Guide
How much does it cost to build a tennis court in 2026? Breakdowns for asphalt, concrete, and synthetic surfaces plus fencing and lighting.
Jul 30, 2026