Step-by-Step EPDM Rubber Roof Installation for Flat Decks
Master EPDM rubber roof installation on flat decks. Learn substrate prep, fully adhered bonding, and seam splicing techniques for leak-proof results.
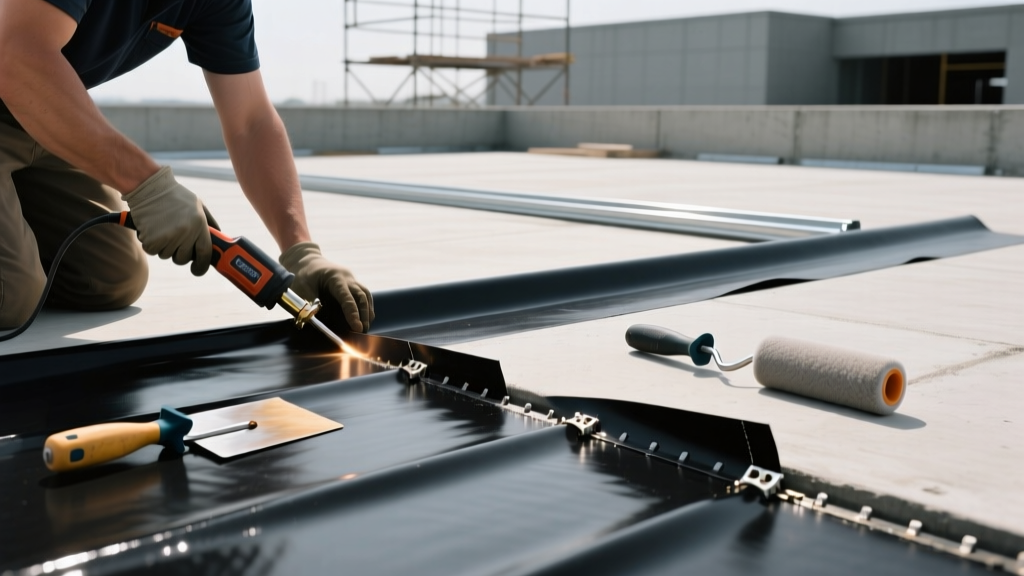
Substrate Preparation and Decking Tolerances
The longevity of an EPDM (Ethylene Propylene Diene Terpolymer) rubber roof relies entirely on the structural integrity and moisture content of the substrate. For fully adhered systems on flat or low-slope residential garages and commercial decks, the industry standard requires a minimum 5/8-inch tongue-and-groove CDX plywood or OSB Exposure 1 decking.
Secure the decking using 1-1/4-inch galvanized ring-shank nails or structural decking screws. Fastener spacing must be 6 inches on-center (o.c.) at the panel edges and 12 inches o.c. in the field. Countersink all fastener heads slightly below the wood surface to prevent telegraphing through the insulation and membrane.
Insulation and Cover Board Mechanics
Directly adhering a rubber roof to wood decking is a critical failure point due to wood expansion and joint telegraphing. A two-tier insulation approach is mandatory for professional-grade installations.
Primary Insulation Layer
Install polyisocyanurate (polyiso) insulation boards to achieve the required R-value (typically R-5.6 per inch). Mechanically attach the polyiso using corrosion-resistant roofing screws and 3-inch diameter stress plates. Follow the National Roofing Contractors Association (NRCA) guidelines for wind-uplift resistance, typically requiring 5 to 8 fasteners per 4x8 foot board depending on your local wind zone.
High-Density Cover Board
Over the primary insulation, install a 1/4-inch or 1/2-inch high-density (HD) polyiso cover board or glass-mat gypsum board (e.g., DensDeck). The cover board provides a dense, uniform surface for the water-based or solvent-based adhesives to grip, while protecting the softer primary insulation from foot traffic during installation and maintenance. Stagger the cover board joints relative to the primary insulation joints by at least 12 inches to eliminate continuous thermal bridges.
Membrane Acclimation and Layout Strategy
EPDM membranes are manufactured under tension and rolled tightly. If installed immediately upon unrolling, the material will attempt to shrink back to its rolled state, putting immense shear stress on the perimeter flashings and seam tapes.
- Resting Time: Unroll the EPDM membrane and allow it to acclimate and relax on the roof deck for a minimum of 30 to 45 minutes before applying any adhesive.
- Temperature Parameters: Installation should only occur when ambient temperatures are between 40°F and 100°F. Below 40°F, the membrane becomes rigid and seam tapes will not achieve proper chemical cross-linking.
- Overlap Planning: Position the sheets to ensure a minimum 3-inch overlap at all side and end laps. Avoid placing end laps in high-traffic areas or near drain scuppers where water pooling is likely.
Fully Adhered Application: Bonding the Field
For a fully adhered rubber roof system, the membrane is glued directly to the cover board. According to the EPDM Roofing Manufacturers Association (ERMA), water-based bonding adhesives are preferred for their low VOC emissions and extended open times, though solvent-based adhesives are used in high-humidity or near-freezing conditions.
- Adhesive Application: Roll the bonding adhesive onto both the substrate (cover board) and the back of the EPDM membrane using a 3/8-inch nap paint roller. Apply at a rate of 150 to 250 square feet per gallon.
- Flash-Off Time: Allow the adhesive to flash off (dry to the touch) for 10 to 20 minutes. It should feel tacky but not transfer to your knuckle when touched.
- Setting the Membrane: Fold the membrane back onto itself (glue side to glue side) to prevent premature sticking. Slowly roll the membrane forward, using a heavy push broom to press it into the substrate and expel trapped air pockets.
Seam Splicing: The Critical Failure Point
The field of an EPDM roof rarely fails; the seams are where 95% of leaks originate. Modern installations utilize butyl-backed seam tapes rather than liquid contact adhesives, providing a uniform, factory-controlled thickness of sealant.
The 4-Step Splicing Protocol
- Priming: Apply a uniform coat of EPDM seam primer (e.g., QuickPrime Plus) to both the top of the bottom sheet and the bottom of the overlapping sheet using a dedicated scrubbing pad. Allow it to flash off until it is dry to the touch (usually 3-5 minutes).
- Tape Placement: Peel the release film from the 3-inch butyl-backed seam tape and lay it flat across the overlap, ensuring a 1.5-inch coverage on both membrane sheets.
- Initial Pressure: Use a soft rubber hand roller to press the tape down initially, ensuring no air bubbles are trapped beneath the butyl.
- Final Compression: This is the most skipped step. You must use a 2-inch wide, silicone-coated steel seam roller weighing at least 40 to 50 pounds. Roll the entire length of the seam with heavy, overlapping passes. This immense pressure activates the butyl adhesive and forces it into the microscopic pores of the EPDM, creating a permanent, vulcanized bond.
Troubleshooting Common EPDM Installation Failures
Even experienced crews encounter issues when environmental variables shift. Use this diagnostic matrix to identify and correct application errors.
| Symptom | Root Cause | Corrective Action |
|---|---|---|
| Membrane blistering in the field | Substrate moisture >19% or adhesive applied too thickly without proper flash-off time. | Cut an 'X' in the blister, allow moisture to escape, inject EPDM lap sealant, and patch with a 6-inch piece of uncured EPDM flashing. |
| Seam tape peeling at the edges | Insufficient roller pressure or failure to clean manufacturing bloom off the membrane. | Clean the edge with splice wash, apply liquid EPDM lap sealant over the edge, and embed a 2-inch strip of uncured flashing. |
| Wrinkling near perimeter flashing | Membrane was not allowed to acclimate/relax before gluing; thermal shrinkage pulled it tight. | Cut the wrinkle, relieve the tension, and patch with a vulcanized EPDM flashing piece using primer and seam tape. |
Essential Tool and Material Checklist
Before mobilizing to the job site, verify you have the specialized tooling required for a commercial-grade rubber roof installation. Standard carpentry tools are insufficient for single-ply membrane work.
- Membrane: 45-mil or 60-mil reinforced or non-reinforced EPDM (60-mil is highly recommended for areas with high hail risk or heavy foot traffic).
- Adhesives: Water-based field bonding adhesive and solvent-based lap sealant for pipe penetrations.
- Seam Tape: 3-inch butyl-backed EPDM splice tape.
- Primer: EPDM-specific seam primer and scrubbing pads (do not use paint brushes, which leave streaks).
- Rollers: 2-inch silicone-coated steel seam roller (40+ lbs) and a soft rubber hand roller.
- Cutting: Hook blades and heavy-duty shears (avoid standard utility knives as they can snag and stretch the rubber).
- Detailing: Uncured EPDM flashing rolls for inside/outside corners and pipe boots.
For comprehensive engineering details regarding wind uplift calculations and specific fastener pull-out values, always consult the Whole Building Design Guide (WBDG) roofing systems specifications. Proper execution of these procedures ensures an EPDM rubber roof will easily exceed its 30-year warranted lifespan, providing a watertight, UV-resistant barrier for flat and low-slope structures.