Roofing Tar Maintenance: How to Clean and Repair Flat Roofs
Master roofing tar maintenance with our expert playbook. Learn how to safely clean, inspect for blisters, and repair flat bitumen roofs to extend lifespan.
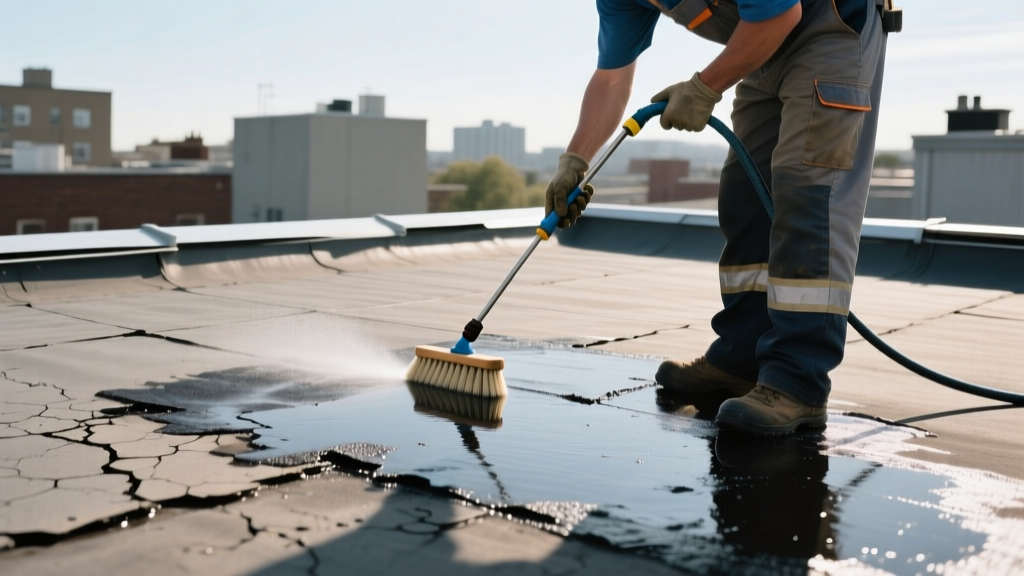
The Bi-Annual Roofing Tar Inspection Protocol
Roofing tar, encompassing asphalt-based built-up roofing (BUR) and modified bitumen systems, remains a staple for low-slope and flat commercial roofs. While inherently durable and compliant with ASTM D312 standards for asphalt cements, these surfaces are highly susceptible to UV degradation, thermal shock, and ponding water. A proactive maintenance playbook requires two comprehensive inspections annually: one in early spring to assess winter freeze-thaw damage, and one in late autumn to prepare for snow loads.
During your inspection, focus on high-stress transition zones. Flashing details around parapet walls, HVAC curbs, and pipe penetrations are where 80% of roofing tar failures originate. Look for separation at the metal-to-tar interface, which indicates the flashing cement has lost its plasticity. Additionally, map out any areas where water ponds for more than 48 hours after a rain event, as prolonged moisture exposure accelerates the breakdown of the bitumen matrix.
Safe Cleaning Procedures: What to Use and What to Avoid
Cleaning a roofing tar surface requires strict chemical discipline. The most common mistake facility managers make is using petroleum-based solvents to remove grease, sap, or old adhesive residues. Because roofing tar is itself a petroleum derivative, solvents like mineral spirits, gasoline, or harsh industrial degreasers will instantly dissolve the bitumen, creating soft, spongy depressions that lead directly to leaks.
For routine debris removal, never use a pressure washer. High-pressure water can easily penetrate microscopic fissures in the tar, forcing moisture into the roof deck. Instead, rely on mechanical sweeping and low-pressure rinsing.
Step-by-Step Cleaning Playbook
- Dry Sweep: Use a heavy-duty, soft-bristle push broom to remove leaves, branches, and loose gravel. Avoid stiff wire brushes, which will scar the tar surface and remove protective mineral granules on modified bitumen caps.
- Low-Pressure Rinse: Use a standard garden hose with a wide-angle spray nozzle to flush remaining dust toward the scupper drains. Ensure drain strainers are cleared of all debris to prevent ponding.
- Targeted Stain Removal: For HVAC oil drips or biological growth (moss/algae), apply a solution of Trisodium Phosphate (TSP) or a commercial citrus-based roof cleaner. Apply with a sponge mop, let it dwell for 10 minutes, and scrub gently.
- Final Flush: Rinse the cleaning agents thoroughly. Residual TSP left on the roof can interfere with the adhesion of future elastomeric coatings.
Troubleshooting Matrix: Blisters, Alligatoring, and Ponding
Identifying the specific failure mode of your roofing tar dictates the repair strategy. Misdiagnosing a blister as a simple surface defect can lead to catastrophic membrane failure during the next freeze-thaw cycle. Consult the matrix below to match symptoms with verified repair protocols.
| Symptom | Root Cause | Actionable Fix |
|---|---|---|
| Unbroken Blisters (< 2 inches) | Trapped moisture or air between plies expanding under solar heat. | Monitor. Do not puncture. Puncturing introduces a direct path for water ingress. |
| Ruptured Blisters (> 2 inches) | UV degradation of the blister cap leading to mechanical rupture. | X-cut the blister, dry the cavity, fill with plastic roofing cement, and patch with mesh. |
| Alligatoring | Loss of volatiles in the asphalt due to prolonged UV exposure and aging. | Clean, prime, and apply a fibered aluminum or acrylic elastomeric roof coating. |
| Ponding Water (> 48 hrs) | Deck deflection or crushed taper-edge insulation beneath the tar. | Build up the low area using tapered EPS insulation boards adhered with cold-process tar adhesive. |
Step-by-Step Patching and Re-Coating Playbook
When executing repairs on roofing tar, material compatibility is non-negotiable. For emergency wet-weather repairs, utilize a rubberized wet-patch compound like Henry 208R Rubberized Wet Patch, which bonds to damp surfaces and cures underwater. For standard dry-condition flashing repairs, Karnak 19 Ultra Flashing Cement provides superior tensile strength and fiber reinforcement.
The X-Cut Blister Repair Method
- Using a sharp utility hook blade, cut an 'X' through the center of the ruptured blister, extending 1 inch past the damaged perimeter.
- Peel back the four triangular flaps. Use a wire brush to remove all loose gravel, dirt, and degraded tar from the exposed substrate.
- Allow the cavity to dry completely. If moisture is trapped, use a heat gun on a low setting to evaporate residual dampness.
- Trowel a 1/8-inch layer of flashing cement into the cavity. Press a piece of fiberglass roofing mesh into the wet cement, ensuring it lays flat without wrinkles.
- Fold the original tar flaps back down over the mesh. Trowel a second 1/8-inch layer of cement over the entire patch, feathering the edges 2 inches beyond the X-cut to prevent water damming.
- Immediately embed ceramic roof granules into the wet top layer to restore UV protection.
Professional patching typically costs between $3.50 and $5.50 per square foot, while full membrane re-coating ranges from $2.50 to $4.50 per square foot, depending on the coating chemistry and roof accessibility.
Upgrading to Reflective Coatings
Leaving black roofing tar exposed to direct sunlight guarantees a shortened lifespan. The surface temperature of uncoated black tar can exceed 160°F (71°C) during peak summer months, accelerating the oxidation process. Applying a reflective coating not only extends the roof's service life by 10 to 15 years but also drastically reduces building cooling loads.
According to the Department of Energy's Cool Roofs initiative, reflective roof coatings can lower roof surface temperatures by up to 50°F, translating to a 10% to 15% reduction in peak cooling demand. When selecting a coating over existing tar, you have three primary options:
- Fibered Aluminum Coatings: The most cost-effective option ($2.00 - $3.00 per sq ft). These contain aluminum flakes suspended in an asphalt-based solvent. They reflect UV rays but do not significantly lower ambient building temperatures. Note: The solvent base means they cannot be applied over certain single-ply membranes, but they bond exceptionally well to existing tar.
- Acrylic Elastomeric Coatings: Water-based and highly reflective (white). They cost $3.00 - $4.50 per sq ft. Acrylics require a strict 48-hour dry weather window for curing and should not be used in areas prone to ponding water, as they will re-emulsify.
- Silicone Coatings: The premium choice ($5.00 - $8.00 per sq ft). Silicone is moisture-cured and impervious to ponding water. It maintains its flexibility in extreme cold and offers the highest solar reflectance index (SRI).
Before applying any acrylic or silicone coating over roofing tar, you must apply a water-based asphalt emulsion primer or a bleed-blocking base coat. Without this barrier, the yellow tannins and oils from the underlying tar will bleed through the white coating, ruining its reflectivity and aesthetic finish. The Asphalt Roofing Manufacturers Association (ARMA) strictly mandates this separation layer in their technical bulletins.
By adhering to this maintenance and cleaning playbook, facility managers can reliably extend the functional lifespan of their roofing tar systems, deferring costly full-tear-off replacements and maintaining optimal building envelope integrity. For complex structural deflections or widespread membrane saturation, always consult a licensed professional verified by the National Roofing Contractors Association (NRCA) to conduct infrared moisture surveys before committing to a re-coating project.