Mastering Fully Adhered EPDM Roof Installation Procedures
Learn the exact procedures for fully adhered EPDM roof installation, including substrate prep, adhesive application, and seam sealing techniques.
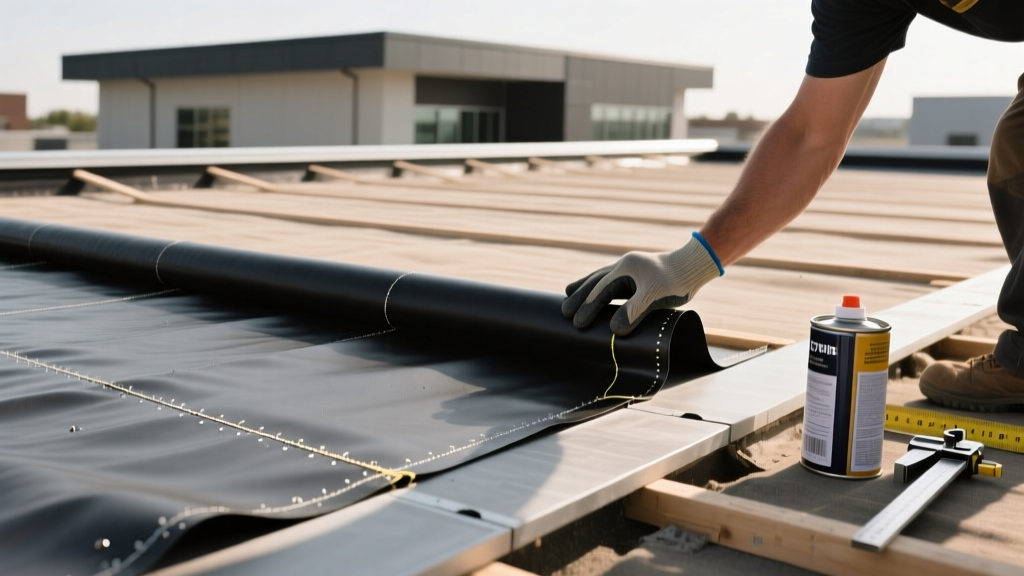
Why Choose the Fully Adhered EPDM Method?
Ethylene Propylene Diene Monomer (EPDM) is a highly durable synthetic rubber membrane dominating the low-slope and flat roofing market. While EPDM can be installed via three primary methods (ballasted, mechanically attached, and fully adhered), the fully adhered system provides the highest wind uplift resistance, eliminates the structural load of ballast, and prevents the membrane from billowing or wrinkling under thermal expansion. According to the Whole Building Design Guide (WBDG), fully adhered single-ply systems are the preferred specification for commercial facilities in high-wind zones and buildings with complex roof geometries.
Material Specifications and 2026 Cost Baselines
Selecting the correct membrane thickness is dictated by the roof's traffic expectations, hail risk, and warranty requirements. Below is the current material breakdown and pricing as of early 2026.
| Membrane Thickness | Primary Application | Material Cost (per sq. ft.) | Installed Cost (per sq. ft.) |
|---|---|---|---|
| 45-Mil | Residential, light commercial, non-accessible roofs | $0.65 - $0.85 | $3.50 - $4.50 |
| 60-Mil | Standard commercial, moderate foot traffic, 20-year warranties | $0.90 - $1.15 | $4.25 - $5.50 |
| 90-Mil | Heavy traffic, severe hail zones, premium 30-year warranties | $1.30 - $1.65 | $5.50 - $7.00 |
Note: Installed costs include ISO insulation, cover board, adhesive, flashing, and labor. The National Roofing Contractors Association (NRCA) strongly recommends 60-mil as the minimum baseline for commercial applications to withstand modern weather extremes.
Phase 1: Substrate Preparation and Insulation
A fully adhered EPDM system relies entirely on the integrity of the substrate. The membrane will telegraph any imperfections, dips, or debris left beneath it.
- Deck Inspection: Ensure the structural deck (concrete, steel, or wood) is clean, dry, and free of protruding fasteners. Moisture content in wood decks must not exceed 19%.
- Vapor Retarder: If interior humidity is high (e.g., kitchens, laundries), install a self-adhering vapor retarder directly over the deck.
- Insulation Boarding: Mechanically attach polyisocyanurate (ISO) insulation boards to the deck. Stagger the joints of the insulation boards by at least 6 inches between layers to prevent thermal bridging and continuous hinge points.
- Cover Board Installation: This is a non-negotiable step for high-performance roofs. Mechanically attach a 1/4-inch high-density cover board (such as DensDeck or HD ISO) over the insulation. The cover board protects the fragile ISO foam from adhesive solvents, distributes foot traffic loads, and provides a smooth, uniform surface for the EPDM adhesive.
Phase 2: Membrane Positioning and Acclimation
EPDM is manufactured under tension and rolled tightly. Unrolling and installing it immediately will result in severe shrinkage, fishmouths, and seam stress as the rubber attempts to return to its manufactured state.
- Drop and Roll: Position the EPDM rolls across the roof. Unroll the membrane and allow it to relax and acclimate to the ambient temperature.
- Relaxation Time: Allow a minimum of 30 to 45 minutes in warm weather, and up to 2 hours in cooler weather (40°F - 60°F). The membrane is ready when it lays completely flat without ripples.
- Alignment: Overlap adjacent sheets by exactly 3 inches. Use a chalk line to mark the 3-inch overlap boundary on the underlying sheet to guide your adhesive application later.
Phase 3: Adhesive Application and Bonding
The bonding process requires precision to prevent trapped air and ensure 100% substrate contact.
- Fold the Membrane: Fold back one half of the relaxed EPDM sheet onto the other half, exposing the substrate. Do not crease the rubber; fold it loosely.
- Apply Bonding Adhesive: Using a 3/8-inch nap roller, apply a uniform, even coat of water-based EPDM bonding adhesive to the exposed substrate. Avoid puddles. Puddles trap solvents, which will later off-gas and cause blisters under the membrane.
- Flash-Off Time: Allow the adhesive to flash off until it is tacky but does not transfer to a dry knuckle. This typically takes 15 to 30 minutes, depending on humidity and temperature.
- Roll the Membrane: Carefully roll the folded EPDM back into the wet adhesive. Use a heavy push-broom or a 100-lb weighted steel roller to press the membrane into the adhesive, working from the center outward to push out trapped air.
- Repeat: Fold back the second half of the sheet and repeat the adhesive and rolling process.
Phase 4: Seam Splicing and Flashing
Seams are the most vulnerable point of any single-ply roof. The Department of Energy notes that improper seam detailing accounts for over 80% of flat roof leaks.
- Clean the Lap Area: Wipe the 3-inch overlap area with a clean rag and EPDM seam cleaner to remove dirt, dust, and talc.
- Apply Seam Primer: Apply a coat of EPDM seam primer (e.g., QuickPrime Plus) using a specialized primer pad. Scrub vigorously until the surface is clean and slightly tacky. Allow it to flash off until it doesn't string when touched.
- Apply Seam Tape: Peel the backing off the 3-inch or 6-inch butyl-based EPDM seam tape. Center it over the chalk line and press it down firmly.
- Roll the Seam: Use a 2-inch silicone seam roller, applying heavy downward pressure (approx. 50 lbs of force). Roll in one direction only to avoid pushing air under the tape. Check for 'fishmouths' (small wrinkles) and cut them out with a razor knife, then patch with a 4-inch piece of flashing tape.
- Lap Sealant: Apply a continuous 1/8-inch bead of EPDM lap sealant over the leading edge of all seam tapes and T-joints. Tool the sealant smooth with a putty knife to ensure a watertight fillet.
Troubleshooting Common EPDM Installation Failures
- Blistering (Adhered Systems)
- Cause: Applying adhesive in puddles, or bonding over a damp substrate. The trapped moisture/solvent vaporizes in the sun, creating blisters.
Fix: Cut an 'X' in the blister, allow it to dry, inject EPDM lap sealant, and patch with a 6-inch piece of uncured EPDM flashing tape. - Seam Delamination
- Cause: Inadequate cleaning of the lap area, failure to use seam primer, or rolling the seam before the primer flashed off.
Fix: Peel back the failed tape, clean aggressively, re-prime, apply new 6-inch tape, and seal edges with lap sealant. - Membrane Shrinkage at Parapets
- Cause: Failing to allow the membrane to relax before installation, or not providing a 1-inch expansion loop at the base of parapet walls.
Fix: Remove the termination bar, splice in a new section of EPDM using a 6-inch overlap, and ensure a proper expansion loop is formed before re-terminating.
Method Comparison: Adhered vs. Mechanically Attached vs. Ballasted
While this guide focuses on fully adhered systems, understanding when to pivot to alternative methods is crucial for project scoping.
| Feature | Fully Adhered | Mechanically Attached | Ballasted |
|---|---|---|---|
| Wind Uplift Rating | Excellent (Highest FM/UL ratings) | Good (Depends on fastener density) | Moderate (Relies on stone/paver weight) |
| Installation Speed | Slow (Labor intensive) | Fast (Fewer steps) | Fastest (Loose laid, seamed only) |
| Roof Slope Limit | Up to 3:12 or steeper | Up to 2:12 | Max 2:12 (Prevents ballast slide) |
| Structural Load | Minimal (0.5 - 1.0 lbs/sq ft) | Minimal (0.5 - 1.0 lbs/sq ft) | Heavy (10 - 25 lbs/sq ft for stone) |
| Aesthetic Finish | Smooth, tight, no wrinkles | Visible fastener lines/wrinkles | Covered by stone/pavers |
Mastering the fully adhered EPDM installation procedure requires strict adherence to substrate preparation, environmental limits, and meticulous seam detailing. By utilizing 60-mil membranes, incorporating a rigid cover board, and executing precise adhesive flash-off times, contractors can deliver a low-slope roof system capable of exceeding 30 years of watertight performance.