How to Seal Penetrations Through the Roof: A Scenario Matching Guide
Discover how to match the right flashing and sealant for every pipe, vent, and curb passing through the roof to prevent leaks and extend roof life.
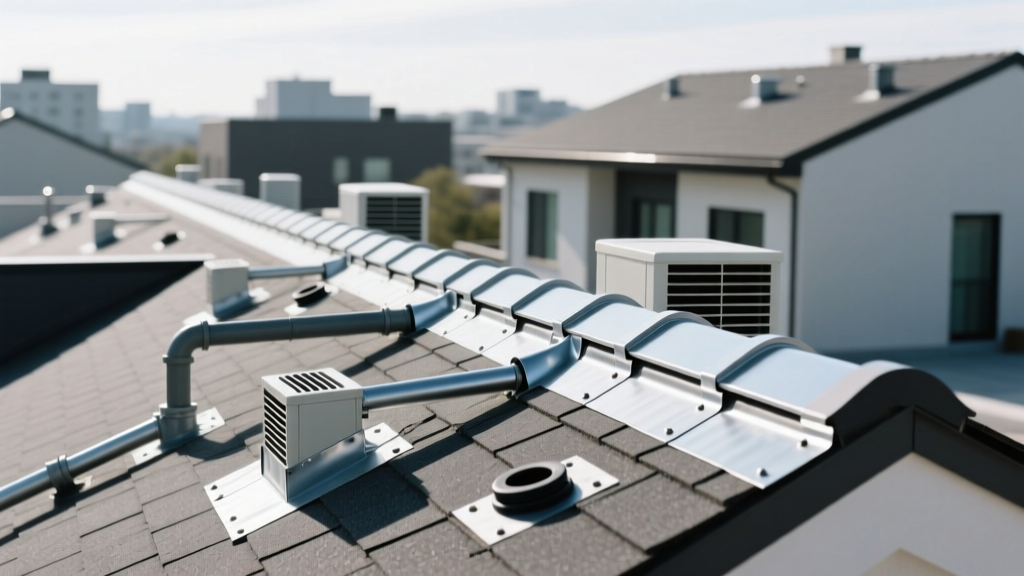
The Anatomy of a Roof Penetration Failure
When water enters a building envelope, it rarely does so through the field of the roof. According to forensic roofing data, up to 90% of all roof leaks originate at penetrations—anywhere a pipe, vent, skylight, or HVAC curb breaks the membrane. The phrase 'through the roof' represents the most critical vulnerability in modern construction.
The root cause of penetration failure is differential thermal movement. A 3-inch PVC plumbing vent expands and contracts at a vastly different rate than the surrounding asphalt shingles, metal panels, or TPO membrane. When rigid flashings or incompatible sealants are used to bridge these materials, the seasonal temperature swings (from -10°F to 140°F surface temperatures) literally tear the seal apart. Matching the correct flashing profile and elastomeric sealant to the specific penetration scenario is not optional; it is the primary determinant of a roof's watertight lifespan.
Scenario Matrix: Matching Flashing to the Penetration
Selecting the right material requires analyzing the roof type, the penetration material, and the expected thermal movement. The following matrix outlines the optimal application-fit for common 2026 roofing scenarios.
| Penetration Type | Roof System | Recommended Flashing / Method | Expected Lifespan | 2026 Cost Range |
|---|---|---|---|---|
| Plumbing Vent (PVC/ABS) | Asphalt Shingle | Lead Flashing or EPDM Pipe Boot | 20-30 yrs (Lead) / 10-15 yrs (EPDM) | $18 - $45 |
| HVAC Exhaust (Metal) | Standing Seam Metal | High-Temp Silicone Master Flash | 15-20 yrs | $55 - $95 |
| Large RTU Curb | TPO / EPDM Flat | Welded Membrane Curb with Pitch Pan | 20+ yrs | $180 - $350+ |
| Electrical Mast | Modified Bitumen | Pourable Sealer Pitch Pan | 10-15 yrs | $90 - $140 |
Deep Dive: Plumbing Vents and HVAC Exhausts
Asphalt Shingle Roofs: Lead vs. EPDM
For standard 1.5-inch to 3-inch plumbing vents on shingle roofs, contractors typically choose between traditional lead flashings and modern EPDM rubber boots (such as the Oatey Master Flash series).
- Lead Flashings: Lead is malleable and can be dressed tightly around the pipe and contoured to the shingle surface. It is highly resistant to UV degradation and animal damage (squirrels frequently chew through rubber boots, but avoid lead). However, lead requires skilled hand-forming and costs roughly $35 to $45 per unit.
- EPDM Rubber Boots: These feature an aluminum ring molded into the base for rigidity and a flexible rubber cone that grips the pipe. They install in minutes and cost between $18 and $25. The critical failure point is UV degradation; standard black EPDM will begin to crack at the collar after 10 to 12 years of direct sun exposure. To extend this, apply a UV-resistant silicone coating to the collar annually.
Metal Roofs: Managing Extreme Thermal Shock
Metal roofs experience severe thermal expansion. A 20-foot standing seam panel can expand up to 1/4 inch in direct summer sun. If a rigid flashing is attached to both the panel and the pipe, it will rip the fasteners out of the metal. For metal roofs passing HVAC exhausts, use a high-temperature silicone 'Master Flash' (rated for up to 500°F continuous). The base must be sealed with a high-modulus polyurethane sealant and stitched with 1/4-inch lap screws equipped with neoprene washers, allowing the metal panel to slide slightly beneath the flashing base without breaking the watertight seal.
Flat Roof Systems: The Pitch Pan Paradigm
On commercial flat roofs (TPO, EPDM, Modified Bitumen), large or irregular penetrations like structural I-beams, electrical conduits, or clustered gas lines cannot be easily wrapped in standard pipe boots. The industry standard is the pitch pan—an open-bottomed metal box placed around the penetration and filled with a pourable sealant.
⚠️ Warning: The Pitch Pan Overflow Trap
The most common mistake in commercial roofing is overfilling a pitch pan with hot asphalt or pourable sealer (like Geocel 2300 or Karnak 19). As the sealant heats up in the summer, it expands. If the pan is filled to the brim, the expanding sealer spills over the edges, breaking the membrane lap and causing leaks. Best Practice: Fill the pan to within 1 inch of the top, allow it to cure, and install a metal 'sponge' (an inverted V-shaped metal cap) over the penetration to shed water and conceal the sealant from UV rays.
For new construction in 2026, the National Roofing Contractors Association (NRCA) strongly recommends moving away from pitch pans where possible, favoring pre-manufactured, factory-welded TPO or EPDM curbs that are heat-welded directly to the field membrane, eliminating the need for pourable sealants entirely.
Sealant Chemistry: Polyurethane vs. Silicone vs. Butyl
Choosing the wrong sealant chemistry is a primary cause of 'through the roof' failures. Each chemical family has distinct adhesion and UV properties that dictate its application-fit.
Polyurethane (e.g., Loctite PL Roof and Flashing)
Polyurethanes offer exceptional adhesion to almost any substrate (wood, metal, masonry, PVC) and remain highly flexible. They are paintable and can be coated with acrylic roof coatings. However, they degrade under constant UV exposure and will fail if submerged in ponding water. Use case: Vertical flashing laps, shingle-to-pipe transitions, and areas that will be painted or coated.
Silicone (e.g., GE Silicone II Roof and Flash)
Silicone is completely impervious to UV degradation and can withstand indefinite submersion in ponding water, making it the undisputed king of flat roof repairs and metal roof flashing. The trade-off is adhesion: nothing sticks to cured silicone. You cannot paint over it, and you cannot apply a second coat of silicone over dirty, old silicone without rigorous mechanical abrasion. Use case: Flat roof membrane patches, metal roof stitch screws, and ponding water zones.
Butyl Tape and Caulk
Butyl remains permanently tacky and never fully cures, allowing it to absorb massive amounts of structural movement. It is primarily used as a hidden sealant beneath metal flashing bases or inside standing seam clips. It should never be used as an exposed surface sealant, as it attracts dirt and degrades quickly in direct sunlight. Use case: Concealed lap joints and under-flashing bedding.
Step-by-Step: Installing an EPDM Pipe Boot on a Shingle Roof
Proper installation of a standard EPDM pipe boot requires integrating the flashing with the shingle water-shedding planes. According to guidelines from the Oatey manufacturing specifications, follow this sequence for a watertight seal:
- Prep the Pipe: Clean the PVC or ABS pipe with a rag and mineral spirits to remove dirt and pipe dope. Ensure the pipe extends at least 6 inches above the roof surface.
- Lubricate the Boot: Spray the inside of the EPDM cone and the outside of the pipe with soapy water or a dedicated rubber lubricant. This prevents the rubber from binding and tearing as you slide it down.
- Seat the Base: Slide the boot down until the aluminum base rests flat against the roof deck. Do not force it; let the rubber relax.
- Integrate the Top Flange: For new roofs, the top edge of the flashing base must slide under the shingle course directly above it. For retrofits, apply a generous bead of polyurethane roofing cement under the top edge before nailing.
- Fasten the Perimeter: Nail the base using 1-inch galvanized roofing nails every 2 inches around the perimeter. Ensure the bottom nails are placed high enough on the base so they do not pierce the shingle below the flashing.
- Seal the Fasteners: Cover every exposed nail head with a dab of polyurethane sealant. This prevents water from wicking down the nail shank into the roof deck.
Frequently Asked Questions
Can I use standard bathroom silicone caulk for roof flashing?
No. Standard interior silicone (like acetoxy-cure bathroom caulk) releases acetic acid as it cures, which will corrode metal flashings, copper pipes, and masonry. You must use a neutral-cure silicone specifically formulated for roofing and construction materials.
How do I flash a pipe that is too close to the roof ridge?
If a plumbing vent is within 12 inches of the ridge, a standard pipe boot will not fit beneath the ridge cap shingles. In this scenario, use a 'ridge boot' or a specialized lead flashing designed to be integrated directly into the ridge cap, ensuring the water flow from the ridge is directed over the flashing rather than under it. Building science principles detailed by the Building Science Corporation emphasize that water management at the ridge requires overlapping flashings that respect the primary shingle shedding planes.
What is the best way to seal a cracked EPDM pipe boot collar?
If the collar (the part gripping the pipe) is cracked but the base is intact, do not attempt to smear caulk over the crack—it will fail within months. Instead, use a 'boot collar repair kit' (often called a rain collar). These are split EPDM rings that snap over the existing pipe and slide down over the old boot's collar, sealing with a bead of UV-stable silicone. This provides a 5-to-10-year extension without requiring a full tear-off of the base flashing.