How to Install Roof Jacks for Steep-Slope Scaffold Safety
Learn the exact OSHA-compliant procedures to install, space, and remove roof jacks for safe scaffolding on steep-slope residential roofs.
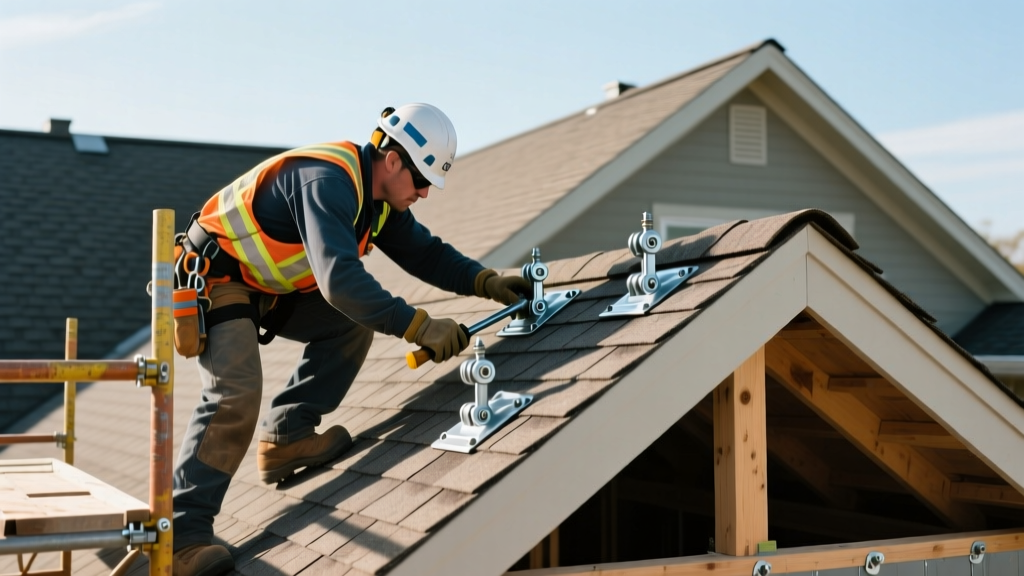
Load Limits and OSHA Scaffold Compliance
Roof jacks (also known as roof brackets) are temporary structural anchors designed to support scaffold planks on roofs with slopes exceeding 4:12. They are not fall arrest anchors. Under OSHA 1926.451 Scaffolding Standards, any scaffold system must support its own weight and at least four times the maximum intended load. For a standard 250-pound worker carrying 50 pounds of materials, the intended load is 300 pounds. Therefore, each roof jack and its fasteners must withstand a minimum of 1,200 pounds of shear and withdrawal force without deflecting or pulling out of the roof deck.
Personal fall arrest systems (PFAS) must be integrated independently of the roof jack scaffolding. According to OSHA 1926.501 Fall Protection guidelines and the CDC NIOSH Fall Prevention Guidelines, workers on steep-slope roofs must be tied off to a properly engineered roof anchor or structural ridge beam, never to the scaffold plank or the roof jacks themselves.
Required Materials and Tool Specifications
Using undersized or incorrect materials is the leading cause of scaffold collapse on residential job sites. The following specifications reflect current 2026 industry standards for heavy-duty roof jack systems.
| Component | Specification / Model Example | Estimated Cost (2026) | Critical Requirement |
|---|---|---|---|
| Roof Jacks | Qualcraft 2200 or Marshalltown MJ-1 | $18 - $24 each | Must feature a multi-slot design for varying shingle thicknesses. |
| Fasteners | 16d Common Galvanized Nails (3.5" long) | $15 per 5-lb box | Must be 0.162" shank diameter. Do NOT use sinker, box, or screw fasteners. |
| Scaffold Planks | OSHA-Grade DI-65 Southern Yellow Pine (2x10) | $85 - $115 each | Must bear the Scaffold Grade stamp. Reject standard #2 framing lumber. |
| Patching Cement | Asphalt Plastic Roofing Cement (e.g., Henry 208R) | $12 per gallon | Must be asphalt-based to bond with shingle granules; silicone will fail. |
Step-by-Step Installation Procedure
Proper installation requires precise rafter location and careful shingle manipulation to maintain the roof's weather envelope while achieving structural hold.
Step 1: Locate the Rafters or Trusses
Roof jacks must be nailed directly into the structural rafters or trusses, never just into the OSB or plywood decking. On an existing roof where the attic is inaccessible, locate the rafters by examining the shingle courses. Architectural shingles are typically nailed with 4 to 6 nails per shingle, driven directly into the trusses. Look for slight vertical dimples or exposed nail heads in the weather courses that align every 16 or 24 inches. Alternatively, use a deep-scanning stud finder calibrated for thick asphalt and wood decking.
Step 2: Slide the Jack Under the Shingle
Do not use a flat bar to pry up the shingle tab, as this will crack the fiberglass mat and break the factory sealant strip. Instead, slide the flat nailing flange of the roof jack directly up under the weather course of the shingle above your installation line. The flange should rest flat against the roof deck, hidden beneath the overlapping shingle.
Step 3: Secure with 16d Common Nails
Drive a minimum of three 16d common galvanized nails through the designated holes in the jack flange. The 0.162-inch shank of a common nail provides the necessary shear strength to resist the lateral outward force exerted by workers leaning against the scaffold. Drive the nails flush with the flange; do not overdrive them, as crushing the metal bracket into the wood can weaken the holding power of the nail head.
Many contractors attempt to use structural lag screws (e.g., Simpson Strong-Tie SDWS) because they are easier to remove with an impact driver. This is a severe safety violation. Screws are heat-treated for tensile strength but are highly brittle under shear load. The lateral bouncing of a scaffold plank can snap a screw flush with the roof deck, resulting in immediate bracket failure. Always use ductile 16d common nails.
Scaffold Plank Placement and Spacing Rules
Once the roof jacks are secured, the scaffold planks must be installed according to strict spacing parameters to prevent bowing and slip-outs.
- Maximum Jack Spacing: OSHA mandates that roof jacks be spaced no more than 8 feet apart. However, for standard 2x10 OSHA-grade planks, industry best practice dictates spacing jacks 4 to 6 feet apart to minimize plank deflection under dynamic loads.
- Plank Overlap: If using multiple planks in a continuous run, they must overlap by a minimum of 12 inches, and the overlap must occur directly over a roof jack, not in the mid-span between brackets.
- Cleating and End-Stops: On slopes exceeding 6:12, the scaffold planks must be secured to the roof jacks using mechanical cleats or end-stops to prevent the wood from sliding laterally off the brackets due to gravity and vibration.
Safe Removal and Shingle Preservation Techniques
Removing roof jacks without destroying the architectural shingles requires a specific sequence of leverage and patching.
- Clear the Scaffold: Remove all planks, tools, and debris from the brackets before attempting removal.
- Break the Seal: Slide a flat pry bar under the shingle tab above the roof jack. Gently tap the pry bar against the top edge of the roof jack bracket to drive the bracket upward slightly. This breaks the asphalt sealant bond and lifts the nail heads slightly above the flange.
- Extract the Nails: Use a cat's paw or the claw of a framing hammer to pull the 16d nails straight out. Place a thin block of wood under the hammer head to prevent denting the surrounding shingles.
- Seal the Penetrations: Once the jack is removed, slide the shingle back into place. Lift the tab and apply a 1-inch diameter dollop of asphalt plastic roofing cement directly over each nail hole. Press the shingle tab down firmly into the cement to re-establish the weather barrier.
Common Installation Failures and Edge Cases
Even experienced crews encounter edge cases that compromise roof jack integrity. Recognizing these failure modes prevents catastrophic accidents.
Decking Blowout on Rotted Eaves
If the roof decking near the eaves suffers from ice dam water intrusion or dry rot, the OSB or plywood will not hold the withdrawal force of a 16d nail. Before installing jacks on the lower courses, probe the decking with an awl. If the wood is spongy, you must install the jacks higher up the roof slope where the decking is structurally sound, or sister additional blocking from the attic side.
Tile and Metal Roof Incompatibility
Standard asphalt shingle roof jacks cannot be used on clay/concrete tile or standing seam metal roofs. The thick profile of barrel tiles prevents the jack flange from sitting flush against the deck, creating a dangerous pivot point. For tile roofs, specialized tile hooks that hang from the tile course above and rest on the batten system must be used. For standing seam metal, clamp-on scaffold brackets that grip the vertical seam without penetrating the metal panels are required.
Extreme Cold Shingle Cracking
When installing roof jacks in temperatures below 40°F (4°C), asphalt shingles become highly brittle. Sliding the jack flange under the weather course can easily snap the fiberglass mat. In cold-weather applications, use a heat gun to gently warm the shingle sealant strip and the overlapping tab for 10 to 15 seconds before sliding the bracket into place. This restores the shingle's flexibility and prevents micro-fractures that lead to future roof leaks.