Repair and Maintenance Guide for Common Flat Roof Material Types
Learn how to identify, maintain, and repair common flat roof material types. Expert diagnostic steps, cost data, and material-specific patching methods.

Diagnostic Matrix: Identifying Flat Roof Material Types and Failures
Flat roofs fail not because of inherent material defects, but due to mismatched repair techniques. Applying asphalt-based mastics to single-ply membranes or heat-welding incompatible polymers will accelerate degradation. Before initiating any repair, you must accurately identify the existing flat roof material types and their specific failure modes.
| Visual Symptom | Likely Material | Root Cause | Immediate Triage |
|---|---|---|---|
| Membrane pulling away from parapet walls; seam tape peeling | EPDM (Rubber) | Thermal shrinkage; UV degradation of seam adhesive | Apply uncured EPDM flashing tape and primer |
| Seam separation; brittle surface; plasticizer weeping | TPO or PVC | Heat-weld failure; plasticizer migration (PVC) | Clean with TPO/PVC cleaner; hot-air weld patch |
| Large raised blisters; granule loss in localized areas | Modified Bitumen (Mod-Bit) | Trapped moisture vaporizing under solar heat | Star-cut blister; dry out; mop with hot asphalt |
| Alligatoring (interconnected cracks); bare spots | Built-Up Roofing (BUR) | Asphalt oxidation; loss of gravel surfacing | Apply fibered aluminum coating or re-mop asphalt |
EPDM (Rubber) Membrane Repairs: Addressing Shrinkage and Seam Failure
EPDM (Ethylene Propylene Diene Monomer) is highly resistant to UV radiation and extreme temperature fluctuations. However, its primary vulnerability lies in the seams and perimeter flashings. Over time, the membrane shrinks, pulling away from edge metal and causing 'fishmouth' (tenting) failures at the seams.
Step-by-Step Fishmouth Seam Repair
- Clean the Area: Scrub the seam with a dedicated EPDM membrane cleaner (e.g., Firestone Splice Wash). Do not use mineral spirits or gasoline, which leave oily residues that prevent adhesion.
- Apply Primer: Brush a thin, even coat of EPDM primer (e.g., Firestone QuickPrime Plus) over the seam. Wait until the primer is 'tacky' to the touch—typically 10 to 15 minutes depending on ambient humidity. If it transfers to your knuckle when touched, it is not ready.
- Install Seam Tape: Apply a 3-inch or 6-inch wide butyl-backed EPDM seam tape. Use a silicone seam roller to apply firm, overlapping pressure, pushing out any trapped air bubbles toward the edges.
- Seal the Edges: Run a bead of EPDM lap sealant along the exposed edges of the tape to prevent water wicking.
TPO and PVC Single-Ply Maintenance: Heat-Welding and Chemical Warnings
Thermoplastic Polyolefin (TPO) and Polyvinyl Chloride (PVC) roofs rely on hot-air welded seams rather than adhesives. While highly reflective and energy-efficient—aligning with the cooling strategies outlined by the U.S. Department of Energy—they require specialized equipment for proper repair.
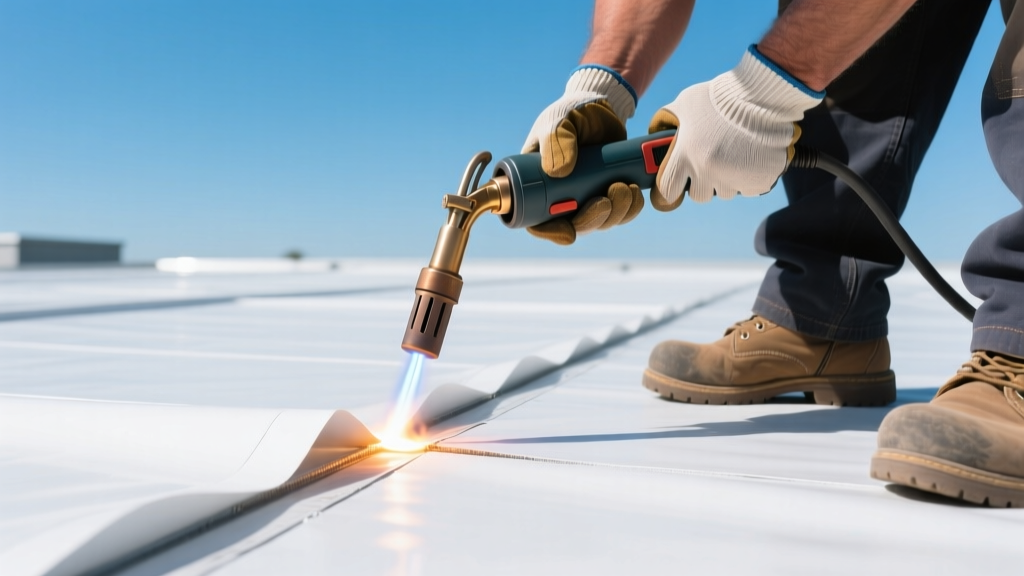
Hot-Air Welding Parameters for TPO Patches
Repairing a puncture or failed seam in TPO requires a hot-air welder (such as the Leister Triac ST or an automatic welder for long runs). The ambient temperature dictates your tool settings:
- Ambient 50°F - 70°F: Set welder to 950°F - 1000°F. Speed: 10-12 feet per minute.
- Ambient 70°F - 90°F: Set welder to 1050°F - 1100°F. Speed: 12-15 feet per minute.
- Preparation: Score the top surface of the existing membrane with a scouring pad or wire brush to remove oxidation and dirt before welding the patch.
- Quality Assurance: After the patch cools, use a blunt-nosed seam probe to test the edge of the weld. If the probe catches or penetrates the seam, the weld is incomplete and must be re-heated and re-pressed.
Modified Bitumen (Mod-Bit): Blister Repair and Torch Safety
Modified Bitumen combines asphalt with polymer modifiers (APP or SBS) for enhanced flexibility. The most common maintenance issue is blistering, caused by moisture trapped between the plies during installation or from subsurface deck condensation.
The 'Star-Cut' Blister Repair Method
Do not simply puncture a blister and inject mastic. The trapped moisture will continue to expand and contract, breaking the patch. Instead, use the star-cut method:
- Cut an 'X' across the center of the blister, extending to the edges of the raised area.
- Peel back the four triangular flaps. Allow the exposed substrate to dry completely (use a heat gun if necessary).
- Apply a cold-process Mod-Bit adhesive (e.g., Karnak 19 or Henry 295) or hot-mop asphalt to the substrate and the underside of the flaps.
- Press the flaps back down flat. Nail the perimeter with roofing nails spaced 3 inches apart.
- Cover the repair with a layer of Mod-Bit cap sheet, torched or adhered, extending at least 4 inches beyond the original blister edges. Embed ceramic granules into the bleed-out if using a torch-applied cap sheet to match the surrounding roof.
For comprehensive installation and repair standards regarding asphalt-based systems, consult the guidelines published by the Asphalt Roofing Manufacturers Association (ARMA).
Built-Up Roofing (BUR): Managing Alligatoring and Gravel Loss
Built-Up Roofs consist of alternating layers of bitumen and reinforcing fabrics, topped with aggregate (gravel or slag). Maintenance focuses on preventing the asphalt from oxidizing and becoming brittle.
Treating Alligatoring
Alligatoring appears as a network of interconnected cracks resembling alligator skin. If the cracks are shallow and have not penetrated the felts:
- Sweep away all loose gravel and debris.
- Apply a heavy coat of fibered aluminum roof coating (e.g., Henry 555 or Gaco Western). The aluminum flakes reflect UV rays, slowing the oxidation process, while the fibers bridge the micro-cracks.
If the cracks are deep and expose the underlying felts, a coating is insufficient. You must re-mop the area with hot asphalt and embed a new layer of gravel while the bitumen is still liquid to restore the UV-protective surface.
Liquid Silicone Overlays: The Ultimate Maintenance Solution for Aging Roofs
When flat roof material types reach the end of their serviceable life but the underlying deck is structurally sound, a liquid-applied silicone roof coating (e.g., GacoRoof 100% Silicone or Henry 887) serves as a highly effective maintenance overlay. Unlike acrylics, high-solids silicone does not degrade under ponding water—a critical advantage for flat roofs with poor drainage.
Silicone Overlay Application Specs
- Preparation: Power wash the roof to remove chalk, dirt, and biological growth. Treat any rusted metal flashings with an acrylic rust-inhibitive primer.
- Detail Work: Reinforce all seams, drains, and penetrations with a polyester reinforcing fabric embedded in a base coat of silicone.
- Field Application: Apply the silicone at a rate of 1.5 to 2.0 gallons per 100 square feet to achieve a minimum 20-mil dry film thickness (DFT). Use a medium-nap roller or airless sprayer.
2026 Repair Cost and Lifecycle Matrix
Budgeting for flat roof maintenance requires an understanding of both the immediate repair costs and the long-term lifecycle expectations. The following data reflects average commercial and residential pricing for 2026.
| Flat Roof Material Type | Average Repair Cost (Per Incident) | Expected Lifespan | Maintenance Frequency |
|---|---|---|---|
| EPDM (Rubber) | $450 - $850 (Seam/Flashing patch) | 25 - 30 years | Bi-annual inspections |
| TPO / PVC | $600 - $1,200 (Seam re-weld/Puncture) | 20 - 25 years | Annual seam probing |
| Modified Bitumen | $350 - $700 (Blister/Torch patch) | 15 - 20 years | Bi-annual granule checks |
| Built-Up Roofing (BUR) | $500 - $1,000 (Re-mop/Coating) | 15 - 25 years | Annual gravel/coating check |
| Silicone Overlay | $3.50 - $6.00 per sq. ft. (Full restore) | 15 - 20 years (Warranty) | Annual wash and inspect |
Bi-Annual Maintenance Protocol
To maximize the lifespan of any flat roof material type, implement this strict bi-annual maintenance schedule:
- Spring (Post-Winter): Inspect all internal drains and scuppers for ice-damage or debris blockages. Check perimeter flashings for winter thermal-shock tearing. Clear all biological growth (moss/algae) which retains moisture against the membrane.
- Fall (Pre-Winter): Verify that all HVAC penetrations, pipe boots, and pitch pans are fully sealed. Ensure pitch pans are filled with a flexible polyurethane sealant, not rigid cement which cracks during freeze-thaw cycles. Confirm that rooftop walkway pads are in place to prevent membrane punctures from winter maintenance crews.
Written by
Sarah WhitfieldSarah Whitfield is a chartered quantity surveyor (MRICS) and construction cost analyst with 15 years of experience in material pricing, procurement strategy, and project budgeting. She earned her degree in Construction Management from the University of Reading (UK) and has worked on projects ranging from $2M custom homes to $180M mixed-use developments across North America and Europe. Sarah currently leads cost estimating for BuildMat Insight, maintaining a proprietary database of 4,000+ material price points updated quarterly. She is a frequent contributor to RSMeans cost data panels and has presented at the International Cost Engineering Council (ICEC) congress. Based in Denver, CO, Sarah is an avid trail runner and volunteer mentor for Women in Construction.
More from Sarah Whitfield
View all
Wood & Lumber
What Are the Different Types of Wood? A Builder's Guide
Compare structural softwoods, finish hardwoods, and engineered lumber. Analyze Janka ratings, MOE values, and 2026 pricing for construction.
Aug 4, 2026

Walls & Panels
Steel Framing vs Wood Framing: Corrosion and Moisture Defense
Compare steel framing vs wood framing for moisture resistance. Learn about galvanized coatings, condensation risks, and corrosion protection strategies.
Jul 21, 2026

Stone & Masonry
How to Cut Stone Veneer: Wet Saw vs Grinder Comparison
Compare the best tools for cutting stone veneer. We review wet saws, angle grinders, and chop saws to help you achieve clean, chip-free cuts.
Jul 21, 2026