Step-by-Step Guide: Installing a Shingle-Over Ridge Roof Vent
Master the installation of a shingle-over ridge roof vent. Learn NFA calculations, precise cutting depths, and nailing patterns for leak-free performance.
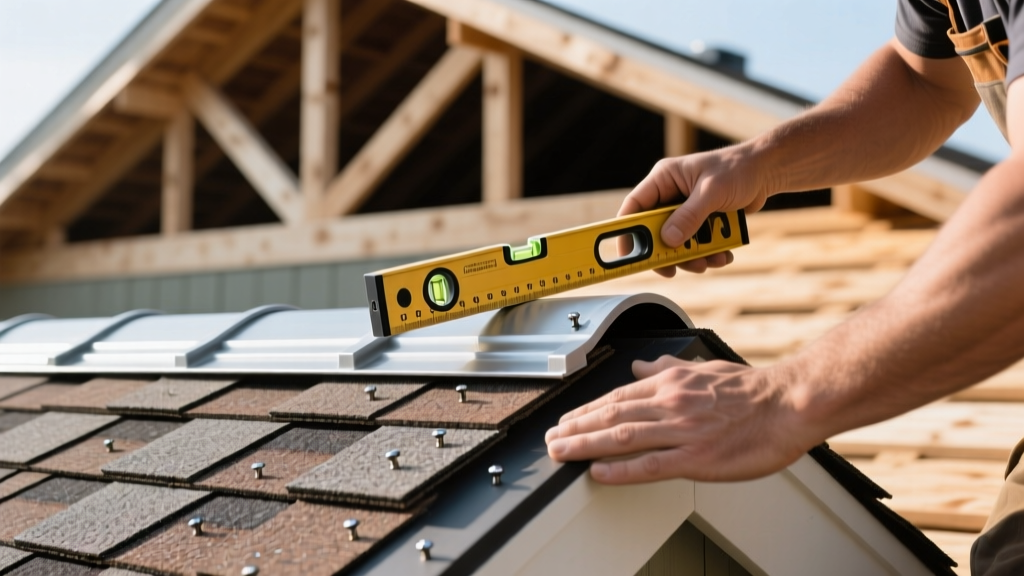
Why Choose a Shingle-Over Ridge Roof Vent?
When designing an exhaust system for an asphalt shingle roof, the shingle-over ridge roof vent is the industry standard for high-performance ventilation. Unlike box vents (which create localized hot spots and require multiple roof penetrations) or wind turbines (which introduce moving parts and high leak risks), a continuous ridge vent provides uniform exhaust along the entire roof peak. This leverages the natural convection effect, drawing hot, moist air evenly from the entire attic space.
| Vent Type | Profile | Exhaust Uniformity | Leak Risk | Maintenance |
|---|---|---|---|---|
| Ridge Vent (Shingle-Over) | Low / Invisible | Continuous & Uniform | Very Low | None |
| Box Vent (Static) | High / Visible | Localized / Spotty | Moderate | Low |
| Turbine (Whirlybird) | Very High | Localized | High | High (Bearings) |
| Power Vent (Electric) | High | High Volume / Localized | Moderate | High (Motor) |
Pre-Installation: Calculating Net Free Area (NFA)
Before cutting into the roof deck, you must verify that the ridge vent can provide adequate Net Free Area (NFA) to meet building codes and balance with your soffit intake. According to the International Residential Code (IRC Section R806), the minimum ventilation requirement is 1/150 of the attic floor space, which can be reduced to 1/300 if a Class I or II vapor retarder is present and at least 40% to 50% of the ventilation is located in the upper portion of the attic (where the ridge vent sits).
For a 1,500 sq. ft. attic with a vapor barrier (1/300 rule):
1,500 / 300 = 5 sq. ft. of total NFA required.
Split 50/50 between intake and exhaust = 2.5 sq. ft. (360 sq. inches) of exhaust NFA.
A premium baffled ridge vent (like the Air Vent ShingleVent II) provides 18 sq. inches of NFA per linear foot.
360 sq. inches / 18 sq. inches = 20 linear feet of ridge vent required.
According to building science guidelines published by the Building America Solution Center, failing to balance this exhaust with an equal or greater amount of soffit intake will cause the ridge vent to act as an intake, pulling wind-driven rain and snow into the attic.
Essential Tools and Material Specifications
Do not use standard smooth-shank nails or improvised cutting tools. The following specifications are required for a wind-resistant, structurally sound installation:
- Ridge Vent Material: Baffled, shingle-over design (e.g., GAF Cobra SnowCountry for snow regions, or Air Vent ShingleVent II for standard applications). Expect to pay $10 to $16 per linear foot for premium baffled systems in 2026.
- Cutting Tool: 7-1/4" circular saw equipped with a siding blade or a carbide-tipped blade with minimal kerf. Do not use a standard framing blade, which increases the risk of kickback and overcutting.
- Fasteners: 1.5" to 2" galvanized or stainless steel ring-shank roofing nails. Ring-shank provides 300% more withdrawal resistance than smooth-shank nails in OSB or plywood decking.
- Layout: Chalk line reel and UV-resistant crayon.
Step-by-Step Installation Procedure
Step 1: Remove Existing Ridge Cap Shingles
Use a flat pry bar to carefully remove the ridge cap shingles and any existing underlying material. Strip the area down to the bare roof deck or ridge board. Preserve the surrounding field shingles, but be prepared to replace the ridge caps with new material, as they will likely tear during removal.
Step 2: Snap the Cut Lines
Measure and snap two parallel chalk lines on either side of the roof peak. The width of the slot depends on the manufacturer's specification. For most standard baffled ridge vents, you must snap a line 1 inch from the center of the ridge on both sides, creating a 2-inch total slot width. If your roof has a structural ridge board, ensure the slot does not exceed the width of the board.
Step 3: Cut the Ventilation Slot
Cut along the chalk lines from the ridge down to the eaves, stopping roughly 12 inches short of the roof edge to maintain structural stability at the gable ends. Use a reciprocating saw or handsaw to finish the corners cleanly.
Step 4: Clear Debris and Inspect
Vacuum or blow out all sawdust, wood chips, and asphalt granules from the slot and the attic floor below. Inspect the attic to ensure no insulation is blocking the newly created slot. If blown-in cellulose or fiberglass is present, install attic baffles (chutes) near the eaves to keep the air channel clear from soffit to ridge.
Step 5: Position and Overlap the Ridge Vent
Unroll or lay the ridge vent sections over the slot. If using multiple sections, overlap them according to the manufacturer's instructions (typically a 1.5" to 2" overlap). Ensure the internal weather filter or baffle is facing the correct direction to deflect wind-driven rain while allowing hot air to escape.
Step 6: Fasten the Vent to the Roof Deck
Nail the ridge vent through the designated nailing flanges. You must nail into the roof deck (plywood/OSB), not just the ridge board. Most manufacturers require nails placed every 12 to 16 inches along both sides. For a standard 4-foot piece of Air Vent ShingleVent II, use 18 ring-shank nails (9 per side). Drive the nails flush—do not overdrive them, which can crush the plastic baffle and restrict airflow.
Step 7: Install Ridge Cap Shingles
Apply a continuous bead of high-grade polyurethane roofing sealant (not standard asphalt mastic, which degrades under UV exposure) under the top edge of each ridge cap shingle. Install 12-inch ridge cap shingles over the vent, nailing them through the vent's flange and into the roof deck. Seal all nail heads with a dab of roofing cement.
Troubleshooting Common Installation Failures
Even high-quality materials will fail if the application procedure is flawed. Review this matrix to identify and correct common field errors:
| Failure Mode | Root Cause | Correction Protocol |
|---|---|---|
| Vent pulls off in high wind | Nails only penetrated the ridge board, missing the structural roof deck. | Remove caps, add 2" ring-shank nails offset from original holes to bite into the plywood/OSB deck. |
| Water infiltration during rain | Internal baffle was crushed by overdriven nails, or slot was cut too wide. | Replace crushed sections. Ensure slot width strictly matches manufacturer specs (usually 2" max). |
| Snow blows into attic in winter | Standard ridge vent used in a snow-load region; lacks weather filter. | Replace with a snow-filtered model (e.g., GAF Cobra SnowCountry) that features an external micromesh filter. |
| Ridge vent acts as air intake | Severe lack of soffit intake ventilation; negative attic pressure pulls air down through the ridge. | Clear soffit vents, add continuous soffit venting, and verify the 1:1 intake-to-exhaust NFA ratio. |
Final Inspection and Maintenance
Once the ridge cap shingles are sealed, conduct a visual inspection from the ground using binoculars. The ridge line should appear straight, with no visible dips, crushed sections, or exposed nail heads. From inside the attic, turn on a bright work light and place it near the soffit vents; you should see a continuous, unobstructed glow of light traveling up the roof deck and exiting through the ridge vent slot. Because shingle-over ridge vents have no moving parts and are protected by the ridge caps, they require zero routine maintenance, providing a permanent, passive exhaust solution for the lifespan of the roof.