Roof Boot Maintenance Playbook: Inspect, Clean, and Fix Leaks
Master roof boot maintenance with this expert playbook. Learn to inspect, clean, and repair plumbing vent flashings to prevent costly interior water damage.
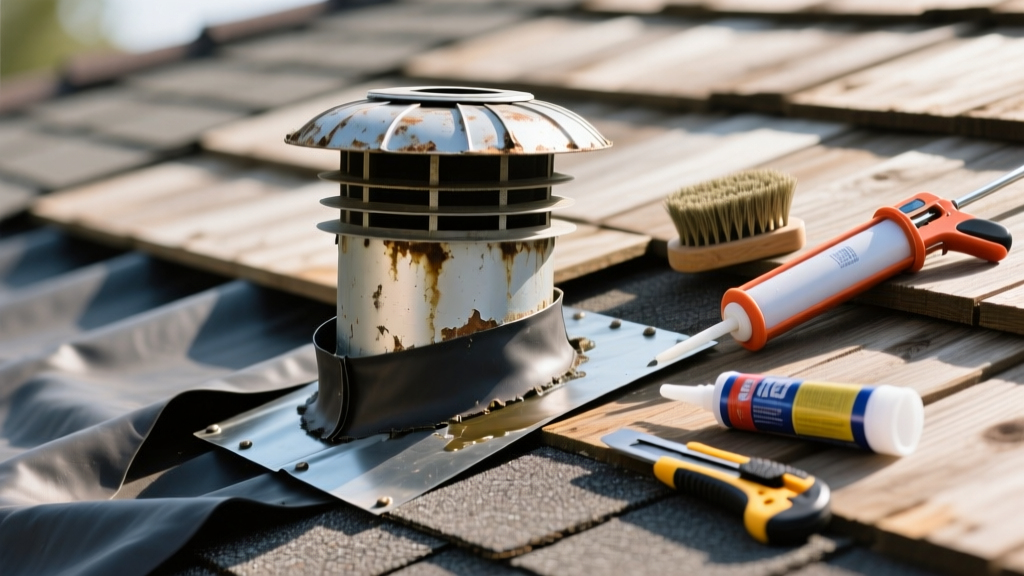
The Critical Role of Roof Boots in Moisture Management
A roof boot, commonly referred to as a pipe boot or plumbing vent flashing, is the primary waterproofing barrier where cylindrical penetrations intersect the roof plane. While asphalt shingles or metal panels handle the bulk of water shedding, the roof boot manages the complex transition around vent pipes. According to technical guidelines published by the National Roofing Contractors Association (NRCA), penetration flashings are among the most vulnerable points on any roofing system, accounting for a disproportionate number of residential leak calls.
Unlike the field of the roof, which experiences uniform thermal expansion, roof boots endure concentrated mechanical stress from pipe movement, extreme UV radiation on their vertical collars, and biological degradation. A failure here does not just damage the roof deck; it routes water directly into interior walls and plumbing chases. This maintenance playbook provides a structured, professional-grade approach to inspecting, cleaning, and repairing roof boots to maximize their service life.
Material Breakdown: Neoprene, Lead, and Silicone
Understanding the specific material of your roof boot dictates your maintenance strategy. The industry relies on three primary materials, each with distinct failure modes and lifespans.
| Material | Standard Lifespan | Primary Failure Mode | Maintenance Requirement |
|---|---|---|---|
| Neoprene (Rubber) | 10–15 Years | UV degradation causing the collar to dry-rot, crack, and split horizontally. | Bi-annual inspection; UV protectant application. |
| Lead | 30+ Years | Physical deformation; chewing damage from squirrels seeking minerals. | Annual visual check; installation of critter guards. |
| Silicone / EPDM | 20–25 Years | Adhesive failure at the base flange; extreme thermal tearing. | Sealant inspection; base flange re-adhesion. |
Standard neoprene boots, such as the widely used Oatey All-Flash series, are the most common on residential asphalt roofs. While cost-effective, the rubber collar inevitably succumbs to photo-oxidation. Silicone and advanced EPDM blends resist UV damage far better but require meticulous installation to ensure the base flange adheres properly to the shingles.
The Bi-Annual Inspection and Cleaning Protocol
Routine maintenance prevents minor flashing gaps from escalating into structural rot. Perform this protocol in early spring and late autumn.
Step 1: Debris Clearance and Biological Cleaning
- Clear the Perimeter: Remove all leaf litter, pine needles, and moss within a 12-inch radius of the boot base. Accumulated debris retains moisture, accelerating the corrosion of the metal base flange and rotting the surrounding shingles.
- Apply Cleaning Solution: Use a mild, non-toxic detergent or a Trisodium Phosphate (TSP) substitute diluted in water. Apply with a soft-bristle nylon brush.
- Scrub Gently: Agitate the base flange and the lower collar to remove algae and dirt. Rinse thoroughly with a standard garden hose on a low-pressure setting.
Step 2: The 4-Point Inspection Checklist
- The Collar Grip: Squeeze the rubber collar against the PVC or cast-iron pipe. It should feel firm and elastic. If it feels spongy, brittle, or cracks when pinched, UV degradation has compromised the structural integrity.
- The Horizontal Split: Inspect the top edge of the collar where it meets the pipe. This is the most common failure point for neoprene boots. Look for micro-fissures or complete horizontal separation.
- The Base Flange Seal: Check the perimeter of the metal or plastic base flange. Ensure the roofing cement or sealant has not dried out, cracked, or pulled away from the shingles.
- Fastener Integrity: Verify that the exposed roofing nails on the base flange are flush and capped with a bead of high-grade polyurethane sealant. Exposed nail heads are a direct conduit for water intrusion.
Diagnosing Failure: Repair vs. Complete Replacement
When a defect is identified, the correct intervention depends on the severity and location of the damage. A common amateur mistake is smearing cheap asphalt roof tar over a cracked rubber collar. This traps moisture, accelerates the decay of the underlying pipe seal, and fails within a single season.
Decision Matrix for Boot Intervention
| Observed Condition | Recommended Action | Estimated Cost (Professional) |
|---|---|---|
| Exposed nail heads on base flange | Clean and cap with polyurethane sealant. | $75 - $125 |
| Minor gap between collar and pipe | Apply stainless steel hose clamp and sealant. | $100 - $150 |
| Horizontal split in rubber collar | Install a rain collar (boot cover) over the existing pipe. | $150 - $225 |
| Brittled rubber, torn base flange, or rusted metal | Complete tear-off and replacement of the roof boot. | $250 - $450 |
Step-by-Step Neoprene Boot Replacement Guide
If the boot is beyond repair, a full replacement is mandatory. For standard asphalt shingle roofs, this requires careful integration with the existing shingle courses. Building science principles emphasize that water must be directed over the lower layers and under the upper layers; proper flashing integration is critical, as noted in resources from Building Science Corporation.
- Extract the Old Boot: Use a flat pry bar to gently lift the shingles surrounding the base flange. Break the seal of the roofing cement. Remove the old nails using a cat's paw or roofing hatchet. Slide the old boot off the pipe.
- Prepare the Penetration: Scrape away old sealant and debris from the roof deck and surrounding shingles. Ensure the underlayment around the pipe is intact; if it is torn, patch it with a 6x6 inch piece of self-adhering ice and water shield.
- Install the New Boot: Slide the new neoprene boot (e.g., Oatey All-Flash) down over the pipe until the base flange rests flat on the roof deck.
- Integrate with Shingles: Lift the course of shingles directly above the boot. Slide the top edge of the boot's base flange under the upper shingles. Ensure the lower edge of the flange rests over the lower shingles.
- Secure the Flange: Fasten the base flange using 1.5-inch galvanized roofing nails. Place nails at the top corners and along the sides, but do not nail the bottom edge of the flange (this allows water to flow over it). Keep all nails at least 1 inch from the edge of the flange.
- Seal the Fasteners and Edges: Apply a generous bead of Geocel 2300 or equivalent tripolymer sealant over every exposed nail head. Run a thin, continuous bead of sealant along the sides and bottom edge of the base flange where it meets the shingles, smoothing it with a putty knife for a watertight bond.
Proactive Lifespan Extension Tactics
To push a standard neoprene boot past its typical 15-year failure point, implement these proactive measures during your maintenance cycles:
- Apply UV Inhibitors: Treat the rubber collar with a water-based, UV-blocking roof coating or a dedicated rubber protectant (similar to high-end automotive tire dressings) every three years. This significantly slows photo-oxidation.
- Install Rain Collars Early: If you live in a high-UV climate (e.g., the American Southwest), proactively install a secondary silicone rain collar over the top of the neoprene boot during year 10. This secondary barrier shields the primary collar from direct sunlight.
- Deploy Critter Guards: For lead boots, install a stainless steel mesh vent guard over the pipe opening. This prevents squirrels and birds from chewing the lead collar or nesting inside the plumbing vent, which can cause blockages and physical tearing of the flashing.
By adhering to this strict maintenance and cleaning playbook, property owners and facility managers can eliminate the most common source of residential roof leaks. Regular, methodical inspection of the roof boot ensures that minor material fatigue is addressed long before water breaches the interior envelope. For further technical specifications on residential flashing integration, refer to the manufacturer guidelines provided by Oatey and local building codes.