Master Application Techniques for Any Roof Waterproofing Material
Master application techniques for liquid and membrane roof waterproofing materials. Learn surface prep, mil thickness, and curing best practices.

Industry data consistently shows that up to 80% of premature roof failures stem from application errors rather than material defects. When installing any roof waterproofing material, the chemical and physical bond to the substrate dictates the system's lifespan. This technical guide bypasses generic advice to detail the exact application protocols, environmental parameters, and quality control metrics required for liquid-applied polyurethanes, modified bitumen, and single-ply membranes in 2026.
Substrate Preparation: The Non-Negotiable Baseline
Moisture and surface contamination are the primary enemies of adhesion. Before unrolling a membrane or opening a pail of liquid resin, the deck must be rigorously qualified.
Moisture Testing Protocols
- Concrete Decks: Must be cured for a minimum of 28 days. Use a Tramex Concrete Moisture Encounter meter. Readings above 4% CM (carbide method) or 75% RH (relative humidity via in-situ probes per ASTM F2170) mandate a moisture-mitigating epoxy primer, such as Tremco Viseo, before applying the primary roof waterproofing material.
- Existing Assemblies: Perform an infrared thermography scan (increasingly done via drone-mounted FLIR cameras in 2026) to locate wet insulation. Remove all compromised polyiso or EPS down to the dry layer. Never encapsulate trapped moisture.
Mechanical Profiling
Smooth concrete or metal decks require mechanical abrasion. Shot-blasting or scarifying the surface to achieve a Concrete Surface Profile (CSP) of 3 to 5 per ICRI guidelines increases the surface area for mechanical interlock. After profiling, vacuum the deck with HEPA-filtered industrial vacuums; blowing dust off with compressed air merely redistributes fine particulates into the pores.
Never apply any roof waterproofing material if the substrate temperature is within 5°F (3°C) of the dew point. Condensation will form microscopically on the surface during the curing process, leading to immediate delamination and blistering. Use a digital psychrometer to calculate the dew point on-site before every shift.
Liquid-Applied Polyurethane: Mil Thickness and Reinforcement
Liquid-applied systems, such as Sikalastic RoofPro or Tremco AlphaGuard, form a seamless, fully adhered monolithic membrane. The most common application failure is uneven mil thickness, leading to weak points that split under thermal movement.
- Primer Application: Apply a two-component polyurethane primer at a rate of 200-300 square feet per gallon. Allow it to become tack-free (typically 2-4 hours at 70°F). If left past its maximum recoat window (usually 24 hours), the surface must be re-primed.
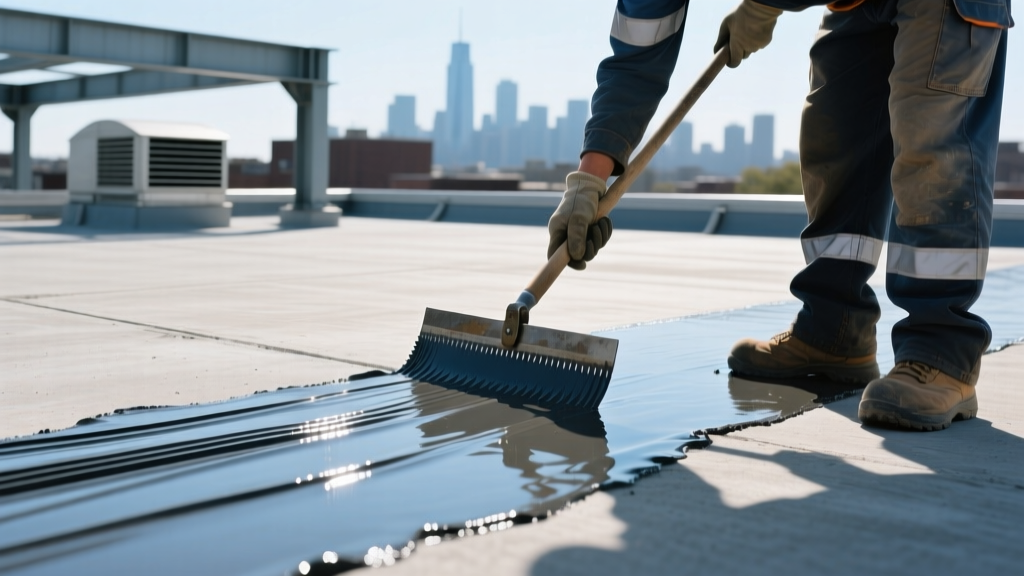
- Base Coat and Fleece Embedment: Apply the base polyurethane coat using a 1/4-inch nap roller or notched squeegee at 20-25 wet mils. Immediately roll a 40-mil spun-bonded polyester fleece into the wet resin. Use a dry roller to press the fleece down, ensuring no air pockets remain and the fabric is fully encapsulated.
- Top Coat: Once the base coat cures (4-8 hours), apply the top coat at 20-25 wet mils. The combined system must achieve a minimum of 60 dry mils.
Do not guess your coverage rate. Use an aluminum wet mil gauge (such as a Pfund gauge) immediately after application. Drag the gauge through the wet liquid; the highest pin that leaves a mark indicates your exact wet mil thickness. Adjust your squeegee pressure or roller speed in real-time based on these readings.
Modified Bitumen Torch-Down: Heat Welding Techniques
Modified bitumen relies on heat-fusing asphalt layers. The application technique varies significantly depending on whether you are using APP (Atactic Polypropylene) or SBS (Styrene-Butadiene-Styrene) modifiers.
APP membranes require higher torch temperatures to achieve the necessary melt state (typically around 300°F / 150°C at the bonding surface). SBS melts at a lower temperature and is more forgiving but highly susceptible to scorching if the torch is held stationary for even a second. According to the National Roofing Contractors Association (NRCA), the torch operator must maintain a consistent pace to achieve a uniform 1/4-inch to 1/2-inch 'bleed-out' of modified asphalt at all side and end laps.
Seam Verification: After the membrane cools, every seam must be tested with a blunt-nosed seam probe. If the probe catches or penetrates the lap edge, the seam is defective and must be re-heated and sealed with a compatible bitumen mastic.
Single-Ply TPO and EPDM: Seam Welding and Adhesives
Single-ply membranes are highly dependent on seam integrity. A 2026 field study referenced by GAF Technical Resources indicates that over 90% of single-ply leaks occur at improperly welded or adhered seams, not in the field of the membrane.
TPO Hot Air Welding Parameters
Thermoplastic Polyolefin (TPO) requires precise hot air welding. Automatic welders (like the Leister Varimat) should be calibrated daily. Standard parameters for 45-mil to 60-mil TPO are:
- Temperature: 1100°F to 1200°F (590°C to 650°C) at the welding wedge.
- Speed: 10 to 15 feet per minute.
- Pressure: 40 to 60 PSI via the pressure roller.
Always perform test welds on a scrap piece of the exact same material batch every morning and after any significant change in ambient temperature or wind speed. Peel the test weld; the failure must occur within the membrane itself (substrate tear), not at the seam interface.
EPDM Adhesive Application
For fully adhered EPDM, use a water-based or solvent-based bonding adhesive applied to both the substrate and the membrane back. The critical metric is the 'tack time'. The adhesive must dry until it is tacky but does not transfer to a dry knuckle. Applying the membrane while the adhesive is still wet traps solvents, causing massive blistering later.
Comparative Application Matrix
The table below summarizes the core application variables for the three dominant roof waterproofing material categories.
| Material Type | Primary Application Tool | Min. Temp Limit | Cure / Set Time | 2026 Avg. Installed Cost |
|---|---|---|---|---|
| Liquid Polyurethane | Notched Squeegee / Roller | 40°F (4°C) | 4-8 hours per coat | $5.50 - $8.00 / sq.ft. |
| Modified Bitumen (Torch) | Propane Torch / Mop | 25°F (-4°C) | Immediate (cool down) | $6.00 - $9.50 / sq.ft. |
| TPO (Single-Ply) | Hot Air Welder | 25°F (-4°C) | Immediate (weld set) | $4.50 - $7.50 / sq.ft. |
Troubleshooting Common Application Failures
Blisters and Voids
Symptom: Raised, air-filled bubbles in liquid or adhered membranes.
Cause: Trapped moisture vaporizing under solar heat, or applying liquid material too thickly in a single pass, trapping solvents.
Fix: Cut an 'X' into the blister, allow the substrate to dry completely, inject a compatible polyurethane sealant, and patch with reinforcing fleece and topcoat.
Fishmouths in Membrane Seams
Symptom: Open, crescent-shaped wrinkles at membrane overlaps.
Cause: Uneven tension during the unrolling process or improper alignment during hot air welding.
Fix: Never force a misaligned seam. Cut out the fishmouth entirely, clean the area with the manufacturer's designated splice wash, and apply a 6-inch wide cover strip of the same material, welded or adhered per manufacturer specs.
Pinholing in Liquid Coatings
Symptom: Microscopic holes visible when backlit or water-tested.
Cause: Applying over a porous substrate without a proper primer, or applying in high winds that cause the material to 'skin over' before releasing trapped air.
Fix: Apply a localized re-coat. For high-porosity decks like lightweight concrete, a secondary base-coat layer is mandatory before the main reinforcement fleece is embedded.
According to the U.S. Department of Energy (DOE), proper application of highly reflective, waterproof roof coatings not only prevents structural water damage but can reduce peak cooling demand by 10% to 15%, making application precision critical for both building envelope integrity and energy compliance.
Frequently Asked Questions
Can I apply liquid roof waterproofing material over an existing asphalt roof?
Yes, but only if you use a specific bleed-through blocker. Asphalt contains oils that will migrate through standard polyurethanes, causing yellowing and degradation. You must first apply an asphalt-blocking primer, such as a water-based acrylic bleed-tracker or a specialized epoxy sealer, before applying the liquid membrane.
How does wind affect single-ply membrane application?
Wind is a critical safety and quality factor. For TPO welding, winds above 15 mph will strip heat from the welding nozzle, resulting in cold welds and seam failure. Erect temporary windbreaks or halt welding operations until conditions stabilize. Furthermore, unrolled single-ply membranes act as massive sails; always secure the leading edge with temporary ballast or fasteners during deployment.
Written by
James ThorntonJames Thornton is a construction industry veteran with 25 years of hands-on experience in wood framing, lumber grading, and residential building codes. He started as a framing carpenter in rural Oregon, earned his ICC Residential Building Inspector certification, and eventually became a senior plan reviewer for the City of Portland Bureau of Development Services. James holds a B.S. in Wood Science & Technology from Oregon State University and is a certified lumber grader through the West Coast Lumber Inspection Bureau (WCLIB). He has inspected over 3,000 residential construction sites and authored the city's internal guide on advanced framing techniques (2x6 at 24" O.C.). James lives in Bend, OR, where he builds custom timber-frame cabins and competes in lumberjack sports.
More from James Thornton
View all
Insulation
Best Home Insulation Materials: Complete 2026 Guide
Compare top home insulation materials for 2026. Find R-values, installed costs per square foot, and best uses for fiberglass, spray foam, and mineral wool.
Aug 4, 2026

Sustainable Building
Certify Your Green Building Material for LEED and WELL
Step-by-step guide to certifying a green building material for LEED v5 and WELL v2. Master EPDs, HPDs, and VOC limits for 2026 project specifications.
Aug 4, 2026

Stone & Masonry
Veneer Stacked Stone Panels: Interior Design & Style Showcase
Discover how veneer stacked stone panels transform interiors. Explore modern design profiles, material pairings, and technical installation specs.
Aug 4, 2026